 Fly RC Magazine WE LIVE RC
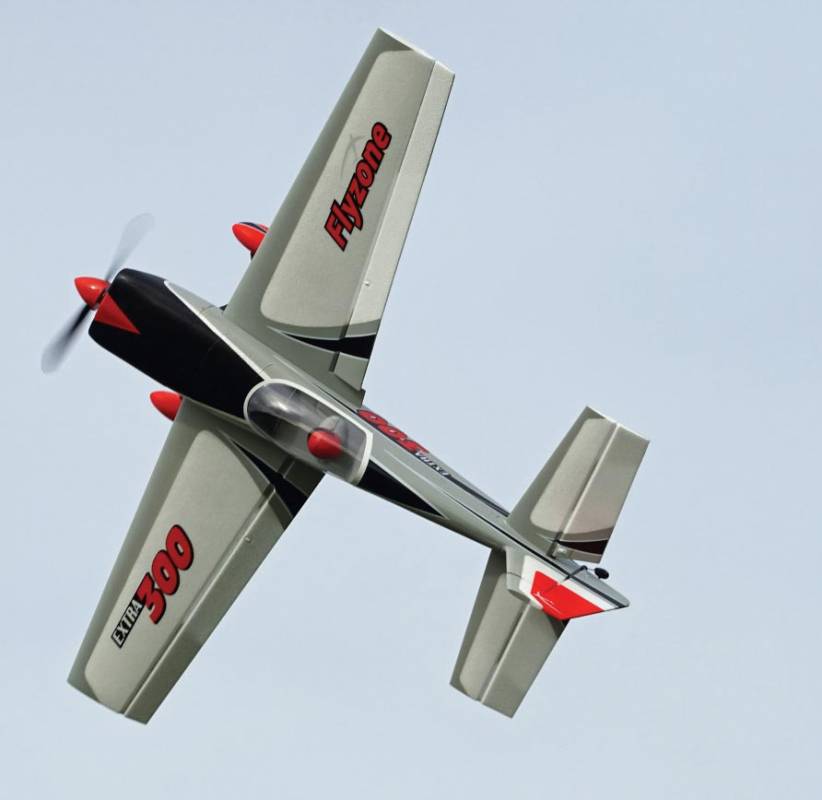
Words Josh Bernstein Photos By Jon R. Barnes
 Skies are blue, winds are low so let’s jump right in and look at some important characteristics of an appropriate, first 3D aerobatic plane:
DURABILITY
A pilot committed to learning 3D aerobatics must accept that crashing (often repeatedly) is unavoidable. When you push your boundaries, eventually your boundaries will push back. Treat any plane poorly and it will be short-lived. That said, your first 3D plane should be strong enough to handle some rough treatment and the occasional “ground-facial.”
REPAIRABILITY
Even the most durable of planes will eventually require repairs. You should be able to perform repairs quickly and without too much effort. If it takes more than a few drops of CA and some Kicker, you’ll likely lose enthusiasm.
ACCESSIBILITY
An often overlooked feature of a potential plane is how quickly and easily you can access components like the motor, ESC and servos. Checking connections and linkages is often necessary when diagnosing problems. Some planes are an open book and others are like Fort Knox. Opt for the open book.
COST
Unless you’ve recently won the lottery, regularly replacing parts and air- frames can take its toll on your bank account. Starting your 3D journey with an expensive plane can result in hesitation and anxiety, which will limit your progress. Accepting and factoring into your selection some degree of disposability will save money in the long run.
POST-STALL STABILITY
Many 3D-capable aerobatic planes on the market will tumble and perform sport/precision- minded maneuvers well, only to flounder in the area of post-stall (PS). Due to design characteristics and/or higher wing-loading (WL), these planes often display increased wing-rock and inferior PS mannerisms. If a pilot is constantly fighting to stabilize a plane during PS maneuvers (like the Harrier), enjoyment and progress can suffer. After you have developed competency in 3D aerobatics, you can tailor your airplane choice to your flying style. Some pilots prefer the way more heavily wing-loaded air- frames maintain their inertia during aggressive tumbling, while some prefer a lighter plane’s low-n-slow stability (and floatiness). While a wide range of planes – built with a wide range of materials – could be utilized as your first 3D trainer, with the above priorities and characteristics in mind, you can see that initially ruling out wood planes is a prudent idea. This leaves various foam materials.
DEPRON
Depron foam is feather-light and very stiff, making it a popular material for indoor 3D planes. Its characteristics would be beneficial if it weren’t for the fact that after just slightly flexing, it snaps in half. This fragility makes purely Depron planes a risky choice for a first 3D plane.
EPO FOAM
EPO (Expanded PolyOlefin) is most often found in thick-walled, full-fused foam planes. Durable and easy to repair, EPO foam works very well for trainers, sport planes, jets and warbirds. While many excellent aerobatic and 3D-capable EPO planes are available on the market, their heavier nature results in higher WL. As discussed previously, this higher WL can rob a plane of the kind of stable post- stall mannerisms important for a 3D trainer.
EPP
EPP (Expanded Polypropylene) is a light- weight foam that is extremely durable, flexible and repairable. Because of these charac- teristics, EPP is the mate- rial of choice for profile 3D planes. Within the dedicated 3D community there is near-universal acknowledgment of the supremacy – particularly for a first 3D plane – of this type of airframe. The profile distinction refers to the airframe lacking a traditional fuselage body, instead opting for wide lateral and horizontal pieces intersecting in a way that provides ample lift in all orientations. Sold as kits – requiring some building skills – the lightweight and durable nature of these planes make them ideal real-world simulators for starting your 3D journey. With very low stall speeds (capable of being flown slowly), these planes provide a flight experience more conducive to a pilot otherwise over- whelmed by the frenetic nature of 3D.
The process of building a 3D plane and installing components may be intimidating for pilots accustomed to purchasing prebuilt planes with pre-installed electronics. However, this provides an excellent oppor- tunity to develop the necessary skills to tackle future builds. As the saying goes, “Better to have the skills and not need them, then need the skills and not have them.” Most of the companies selling profile kits also offer “power packages” including recommended components that have been exhaustively tested to maximize that model’s performance.
 SETTING UP YOUR 3D PLANE
Once you’ve purchased and built your first 3D plane, proper setup becomes the next priority. Assuming you’ve followed the manufacturer’s instructions, you’ll have a plane whose servos, control rods and con- trol surfaces interact smoothly, with no binding and with correct geometries. Here’s an additional point to keep in mind regard- ing 3D planes and their large control surface deflections: while one could get lost in the complex physics of servo operation, it is preferable to first increase your radio’s servo travel closer to maximum (125-150% depending on radio) and then select the servo arm/control horn holes to achieve your required deflections. Too often I’ve seen pilots set up their planes with extreme- ly long servo arm extensions, only to find their servo travel percentages left at their radios’ default 100%. Doing so results in inefficient servo operation – increasing servo load and decreasing servo torque.
TRANSMITTER PROGRAMMING
Any RC pilot ready to take on 3D aerobatics will undoubtedly have some experience and comfort with programming a new model into his or her radio. Many of the steps are going to be similar to the process used for trainers, sport planes or warbirds. A few key differences deserve your attention.
• Rates and Expo: 3D planes have massive control surfaces capable of extreme deflections. This elevates the importance of setting up a distinct low rate (with lower expo) and high rate (with higher expo) targeted to specific flying styles and maneuvers. Plane manufacturers usually include deflection recommendations for low/precision/sport and high/3D rates. These are good numbers to start at, with some subtle personalization to follow later on.
• Which Rate?: To put it simply, every maneuver requires a certain level of control-surface deflection. A low-altitude, high-speed inverted pass up the runway is a low-rate maneuver (stability is prioritized over responsiveness). Hovering, on the other hand, is a high-rate maneuver (With no forward airspeed and only large bursts of prop-wash, maximum control-surface deflection is required). Instead of asking yourself what you are comfortable with, ask instead, “what does the plane require to perform this maneuver?” Doing so will provide the best opportunity for success. It may, however, result in the recognition that you simply are not ready for a particular maneuver. Far from being a bad thing, this represents a kind of wisdom that can con- tribute to a more realistic realignment of your expectations and skill-progression.
 CG SETTING IN-FLIGHT
We’ve all heard the slightly tongue-in- cheek axiom, “A nose-heavy plane flies poorly. A tail-heavy plane flies once.” As 3D flight often involves a mixture of post- stall, high-energy tumbling and some precision maneuvers, the vast majority of pilots will want a slightly nose-heavy plane. Commonly used in competition set- ups, this CG will provide a balance between 3D responsiveness and precise tracking. While a neutral CG maximizes many 3D maneuvers, a plane with neutral CG will often track poorly and balloon on landing (caused by the tail stalling prior to the main wing). For simplicity sake, perform the following test, which is quick, easy and accurate: With your battery in the recommended location, trim the plane to fly straight and level hands-free (at three- quarter to full throttle). Once achieved, roll the plane to inverted and let go. The plane will climb inverted (tail-heavy), maintain level flight (neutral), or descend (nose- heavy). Again, what we’re looking for is a slightly nose-heavy plane that will descend gently, requiring just a light push on the stick. Land the plane, adjust battery position as necessary (perhaps 1/4-inch at a time) and retest. Remember to always begin by trimming for level, upright flight prior to inverted testing.
MOVING FORWARD
Next month we’ll transition from preparation to practice and begin climbing the progressively more advanced ladder of 3D maneuvers (starting with perhaps the most foundational 3D maneuver … the mighty Harrier). Stay tuned!
