 Fly RC Magazine WE LIVE RC
DJI Flame Wheel F450
Author: Tony Yap
Photographer: Walter Sidas & Tony Yap
NEED TO KNOW
HELICOPTER: MANUFACTURER: DJI
DISTRIBUTOR: Atlanta Hobby
TYPE: Quadcopter
FOR: Intermediate to advanced Pilots
PRICE: $469.99
COMPONENTS NEEDED TO COMPLETE
Receiver and transmitter
3S 2200-4000mah LiPo battery
Suitable battery connectors
A 12 inch length of 12-14 gauge wire
SHORT DESCRIPTION
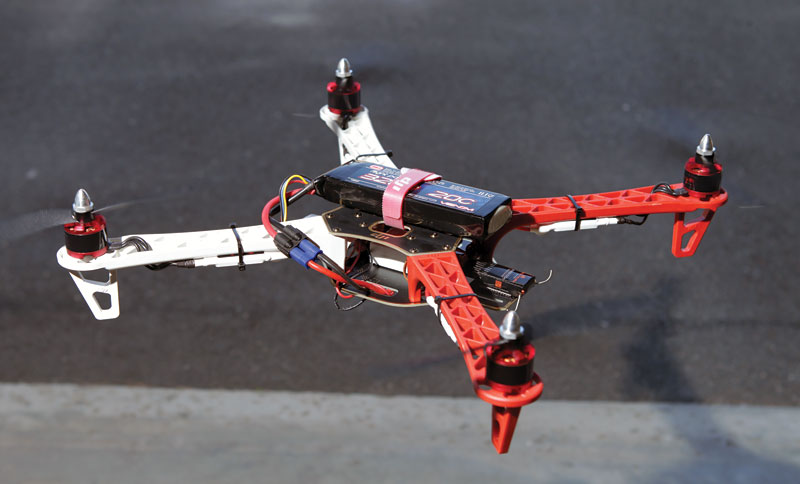
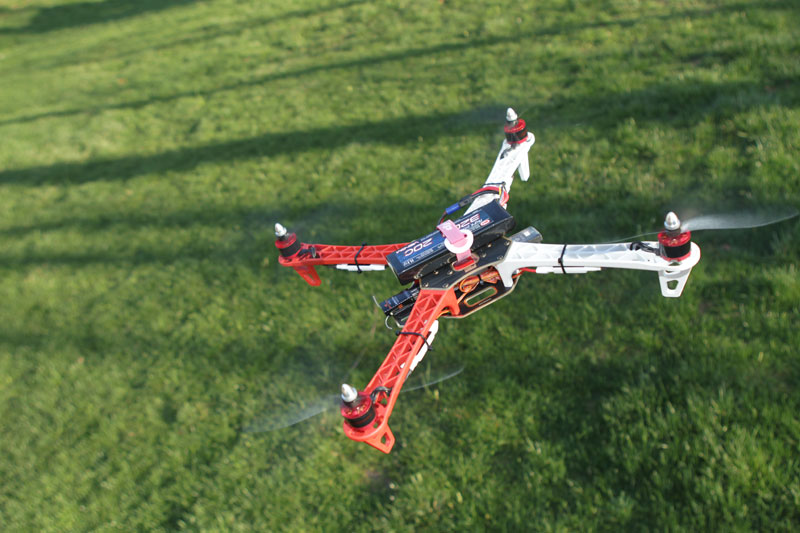
I found the Flame Wheel F450 to be quick building, with no issues during the assembly. The combination of the molded components and the central fiberglass plate structure produced a very strong and rigid structure. The included electronics seem to be of high quality, and I had no issues with any of them. The stability of the finished unit is uncanny, and the ability to have a gyro stabilized camera will be of interest to those wanting to try out aerial photography or first person view flying. The computer software installation could be simpler, but once installed, the unit is very easy to program and the default values worked very well.
ASSEMBLY
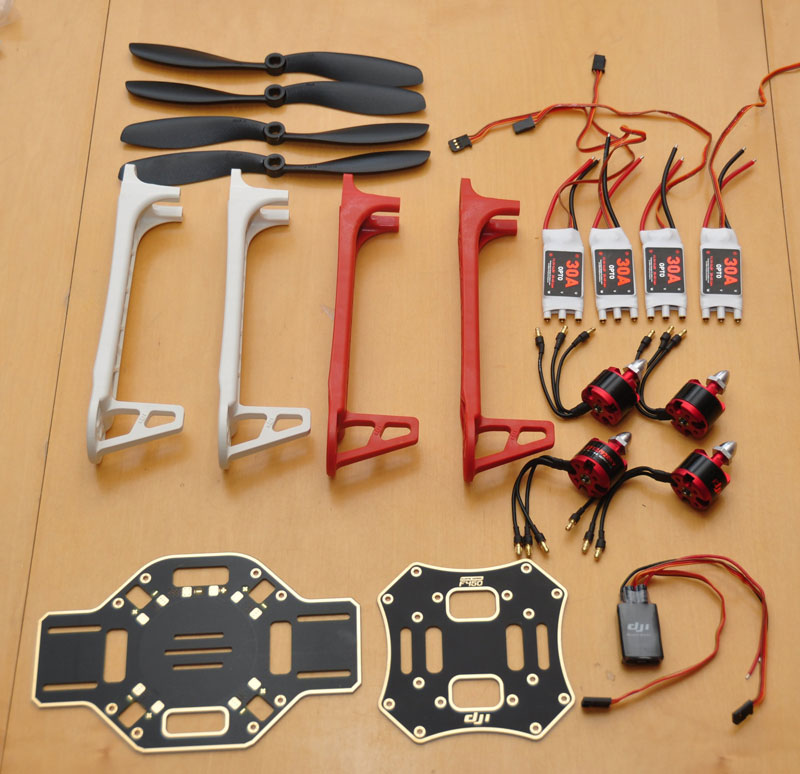
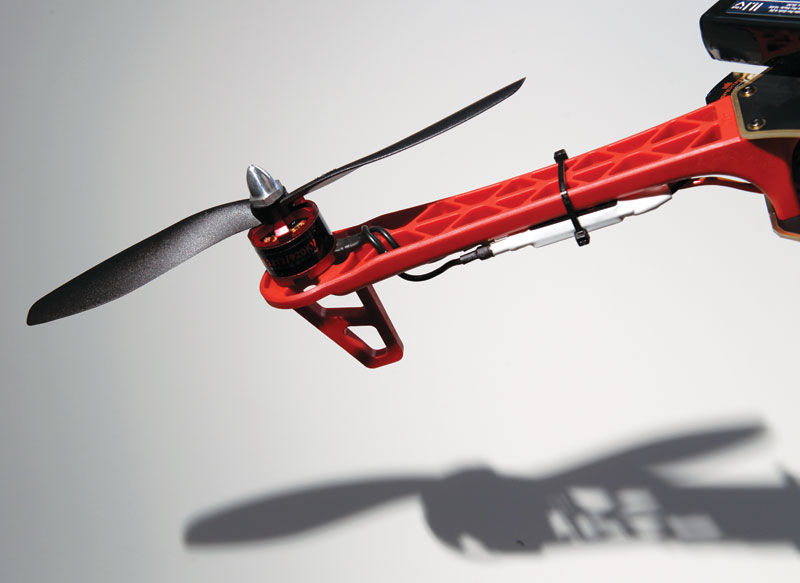
The Flame Wheel F450 is a four motor, multi-rotor aircraft. Spanning 450mm between the diagonal centers of each of the motors, the construction of the F450 is unique with the fact the each of the four legs is made out of injection molded plastic. By having the parts molded, the overall parts count goes way down. The F450’s legs each incorporate a motor mount, a landing skid, and an extremely strong braced structure to connect it to the center portion of the frame. In each kit, there are two red legs and two white legs. The reason for the different leg color is to allow the pilot to distinguish which side is the ‘front’ of the copter when the unit is in flight.
Each of the legs is jointed together in the center using two fiberglass plates. The lower plate had solder ‘pads’ and acts as a power distribution board to the four electronic speed controls for the brushless motors. Soldering skills are required to assemble the Flame Wheel as the power leads to each of the ESCs must be soldered to the corresponding pads on the lower plate. I found it easiest to pre-tin the wire, and separately, create a solder ‘blob’ on the solder pad on the board. I then placed the pre-tinned wire on top of the solder blob and heated it again with my soldering iron until the soldered melted and the two parts melded into one.
With the ESCs soldered to the board, a power lead that ultimately attaches to the flight battery must also be installed. Wire and a suitable battery connector must be provided. I used an EC3 connector along with 6 inch lengths of red and black 12 gauge wire. Soldering work is identical to the ESC installation. Along with the power lead, the included BEC leads must be soldered to the board. I soldered these in parallel with the input power lead.
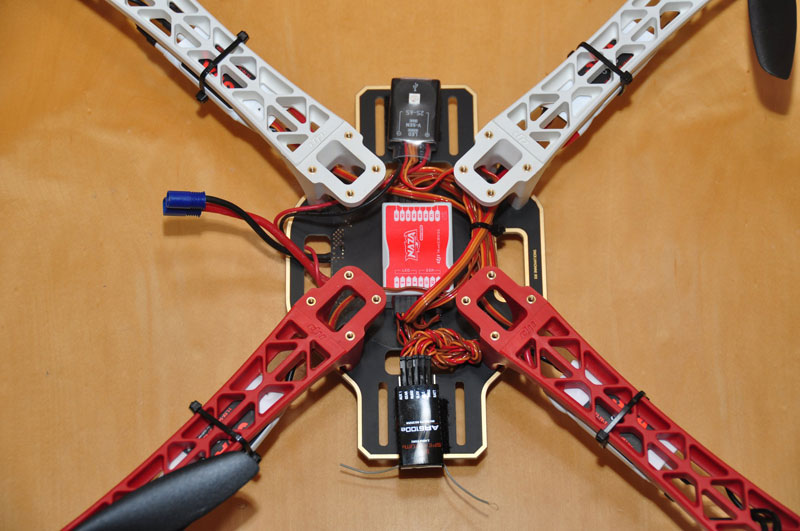
Once the soldering work is complete, the structure of the Flame Wheel can be brought together. I mounted the motors to the legs, and then mounted each of the legs to the bottom center plate. I left the top plate off until I installed all of the electronics.
Included with the almost ready to fly kit, is the DJI NAZA stabilization system. It consists of a white box, about the same size as a 10 channel receiver. On either end there are ports. On one side are connectors for the input signals, originating from the flight receiver. A total of five leads are used, one each for throttle, yaw, pitch, and roll. The final lead is used to tell the NAZA controller which flight mode you wish to be in. On the other side of the controller are output connectors that go to each of the ESCs.
The NAZA controller also has the ability to gyro stabilize a camera that is mounted on a roll/pitch mount. This will keep the camera level and pointed parallel to the ground as the airframe pitches and rolls during normal flying.
Power to the receiver and NAZA controller is provided by the included BEC. The BEC incorporates an extremely bright LED that indicates the charge level of the flight battery.
PRO TIPS
â— It’s imperative that each of the four motor/ESC combos are plugged into the proper ports on the NAZA control box. Be sure to follow the manual closely.
â— Prior to the first flight, spin up the props slowly while carefully holding the model. Tilt the frame in various directions. The controller should try to resist your motions.
â— Check the control directions by again spinning up the props slowly while feeding in various amounts of roll, yaw, and pitch. You should be able to feel the airframe rotate in the corresponding directions if everything is working properly.
â— The kit includes two sets of props (8×4.5 inch and 10×4.5 inch). They recommend the 8 inch props for sport flying, and the 10 inch props for carrying loads such as cameras.
â— If you plan on doing a lot of flying above eye level, mount the BEC so that the flashing light points downwards so you can see it when the unit is overhead.
â— Keep an eye on the flashing LED as it will warn you when the battery is low. With the fixed pitch props, there’s no ability to autorotate when the battery goes dead!
IMAGES
 |
 |
 |
| Here is the kit as it comes, right out of the box. All you need to supply is a battery and radio system. | ||
 |
 |
 |
| The main frame is assembled with the radio and electronics installed. | The motor and prop is installed on the end of the arm. Notice the design of the arms which provide a rigid, strong frame. | Venom 3S 3200 mAh LiPo battery powers the Flame Wheel. |
 |
 |
|
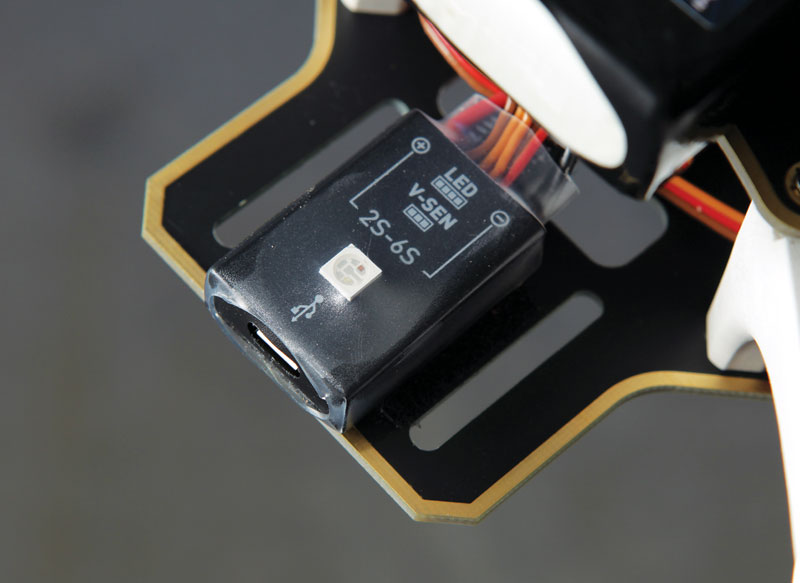
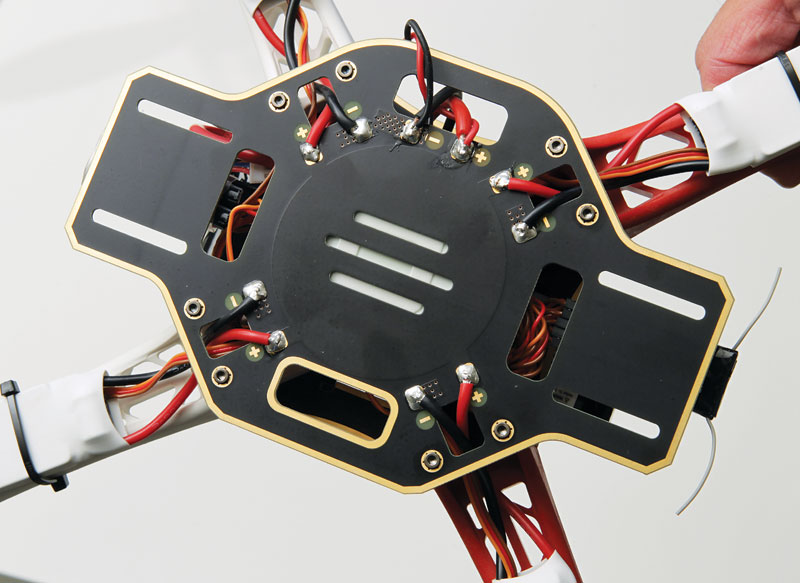
| This is the USB programming interface. | Here is the top of the main fram. |
LINKS
ATLANTA HOBBY
SPEKTRUM
VENOM GROUP
