 Fly RC Magazine WE LIVE RC
Setting up a new model involves many unique steps, each one with variations based on the individual project. One of the most common variations is when installing the servos. Some models are designed so no extension leads are necessary, while others may need several leads of different lengths. Your project may be delayed if your local hobby shop doesnt have the right lengths in stock, and using leads that are longer than necessary adds unwanted clutter and weight to your model. Fortunately, there is another option: you can make your own custom extensions.
I have recently been using modular servo-lead components from Maxx Products quite a bit, and I think that you might appreciate seeing the convenience of assembling your own custom extension leads.
| 1 | Maxx Products offers kits with male and female connectors that include gold-plated pins and sockets and plastic housings. They also carry wire in three sizes, 22, 26 and 32AWG, for micro-models to giant-scale birds. Since the connectors are crimped, you do not need to worry about soldering. The only tools you will need are the MPI Crimpers and some sort of way to strip off the insulation. I use a 2-in-1 wire cutter and stripper from Stevens AeroModel. | 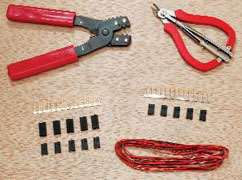 |
| 2 | Assembling a connector set is quite easy. Begin by stripping off about 1/8 inch of insulation, and then separate the individual leads for about 1/2 inch. Flex the connectors you will need back and forth a couple of times to break them free of the “tree.†| 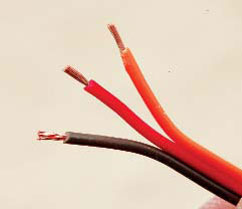 |
| 3 | There are two sets of open crimp tabs on each connector. Lay the wire in the connector so that the insulated wire sits between the first tab set and the bare wires are between the second set. Now lightly squeeze the first tabs together to help hold the connector to the wire. | 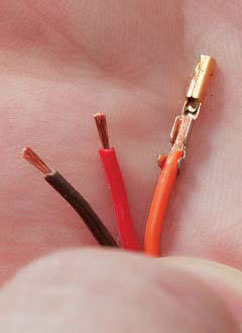 |
| 4 | Position the connector in the crimper with the tabs directed into the crimper pocket and the wire exiting on the side with the embossed wire-size markings. Squeeze the handles together firmly. With a little care, you can feel when the crimper does its job and locks the joint. Remove the connector, and give the wire a firm tug. | 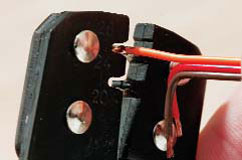 |
| 5 | Carefully insert the connectors into the plastic housing so that the molded retaining tabs catch the connector. Pay attention to your sequencing here. With the housing tabs facing upward, insert the wires from the right with the signal lead closest to you and the negative lead away. | 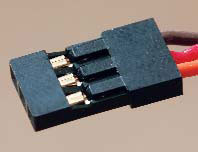 |
| 6 | The last step is to insert the connector with the pins into the outer shroud of the female connector. Molded into the shroud are two small wedges that engage the pockets. Because of the connector bevels, these components can only be assembled in one way. Push them firmly together until you hear or feel the wedges click into the pockets. | 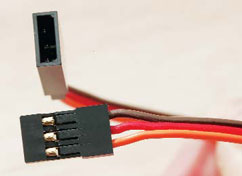 |
CONCLUSION
As you can see, making your own extension leads is not difficult, and it takes a lot less time than driving to the local hobby shop or waiting for a mail-order delivery. Now your leads will be exactly the length you need, and they will also be a bit less expensive than preassembled extensions.
Links
Himax Motors, distributed by Maxx Products Intl. Inc. www.maxxprod.com (847) 438-2233
Stevens Aeromodel www.stevensaero.com (719) 393-0830
