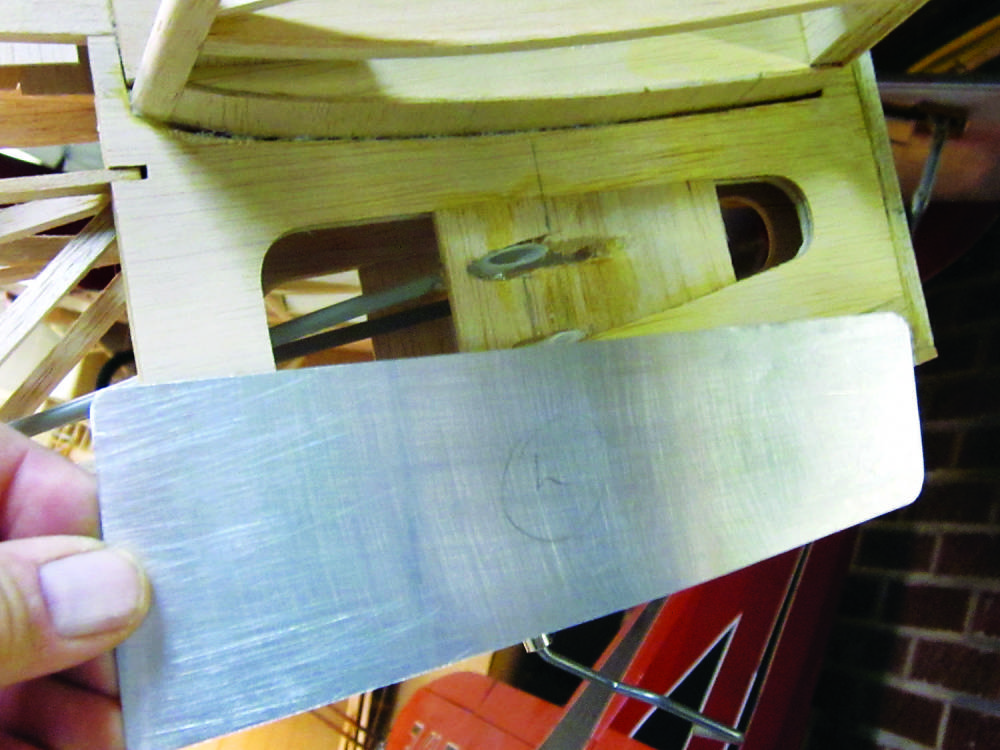
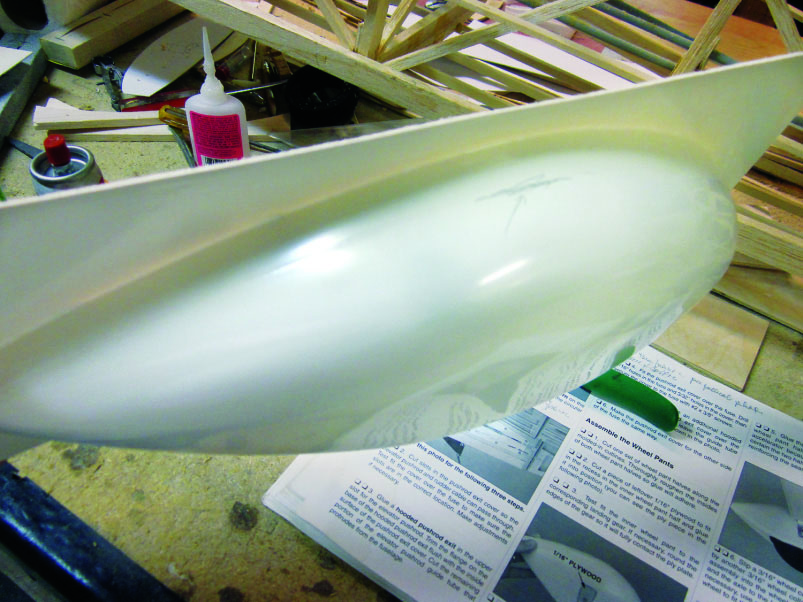
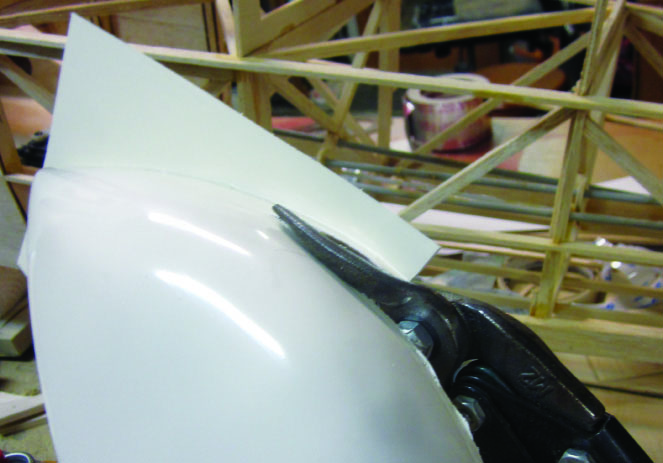
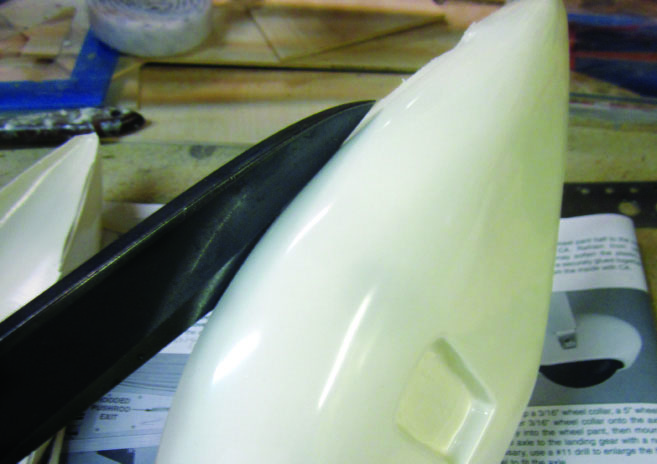
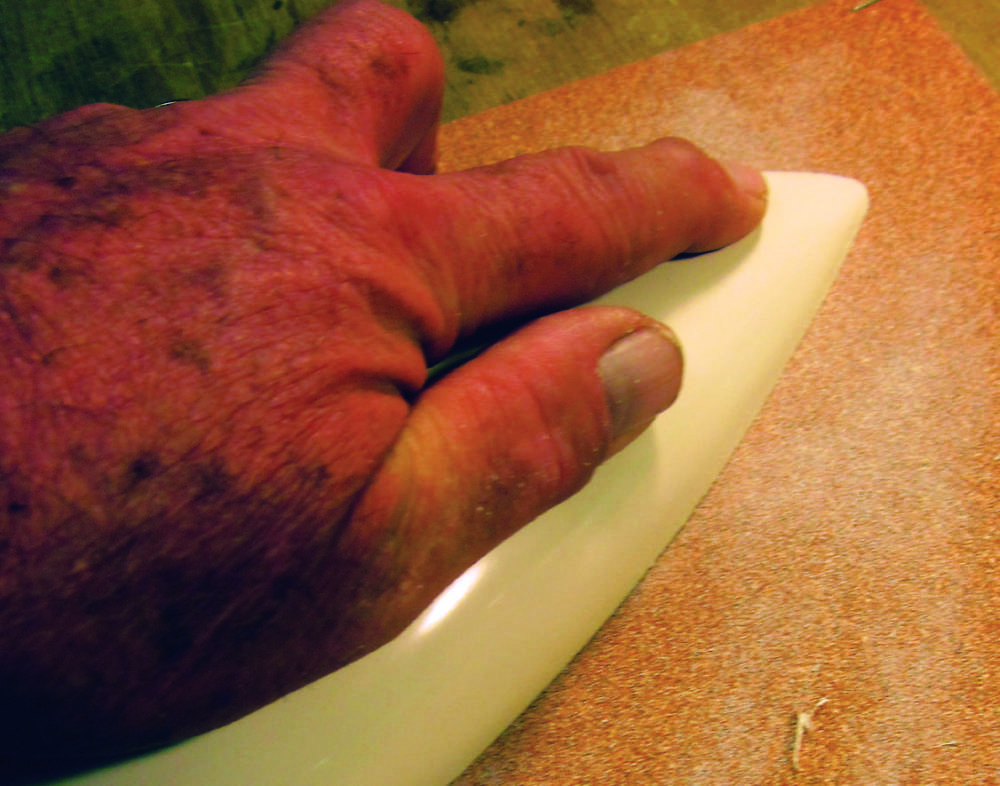
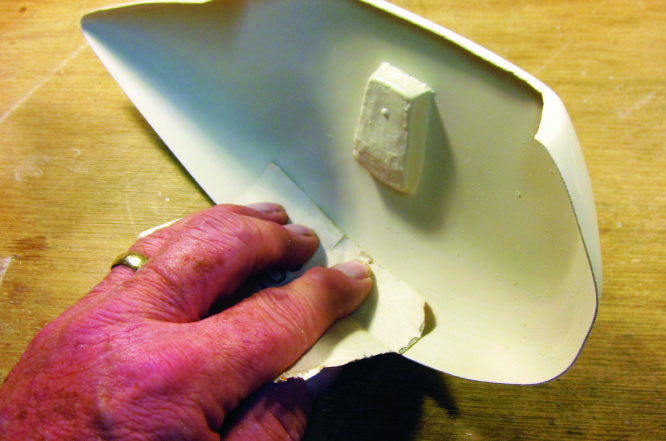
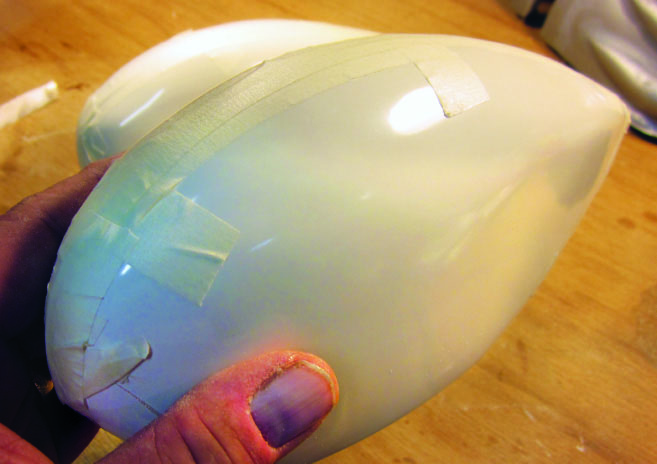
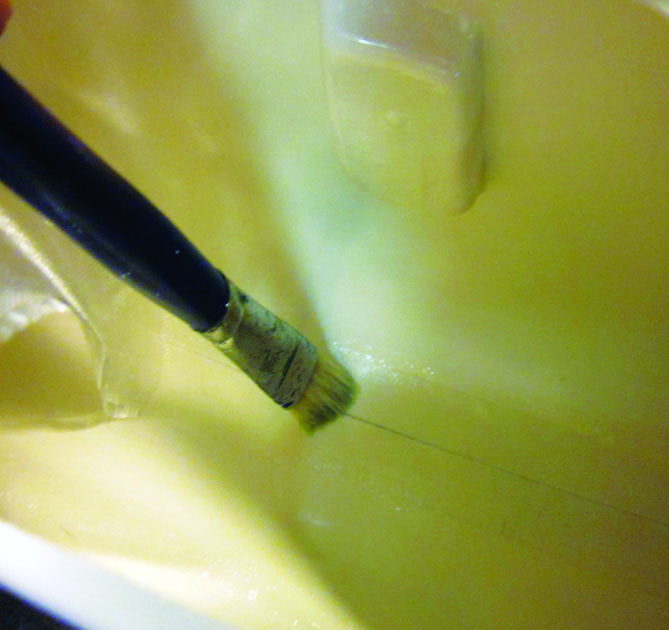
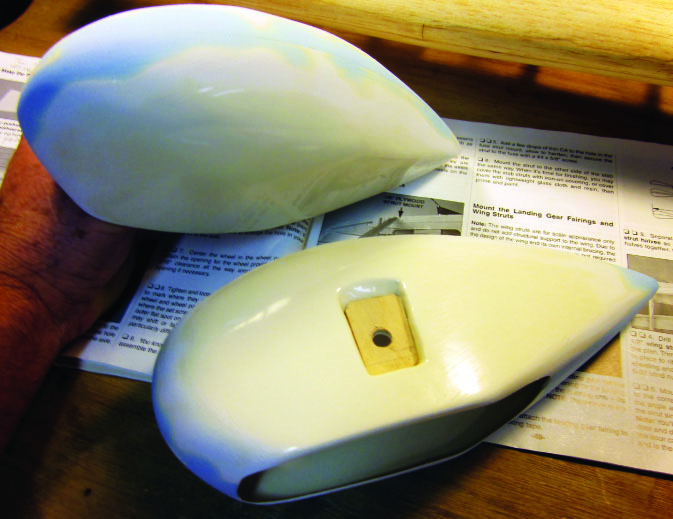
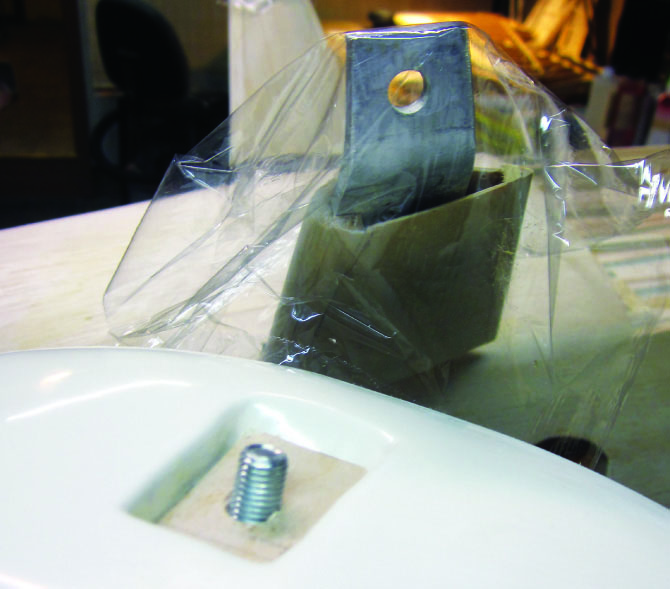
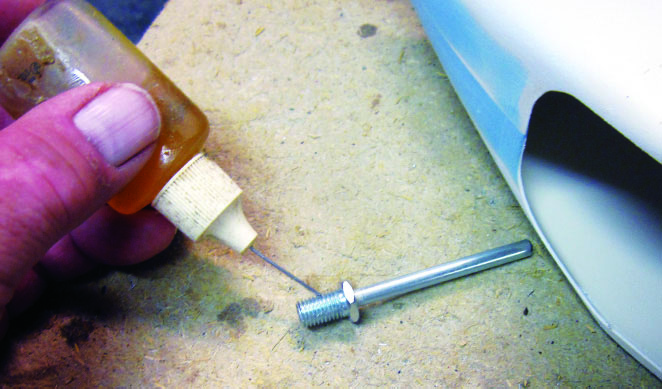
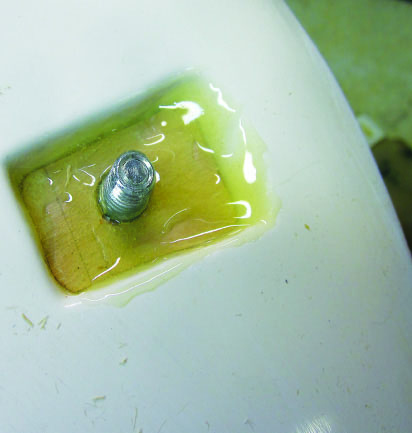
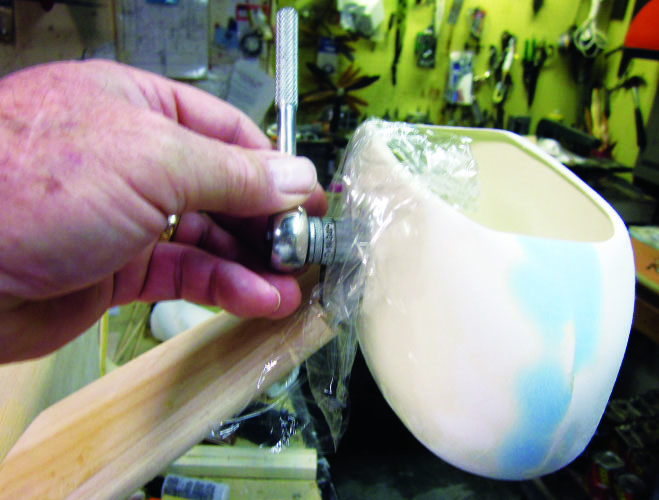
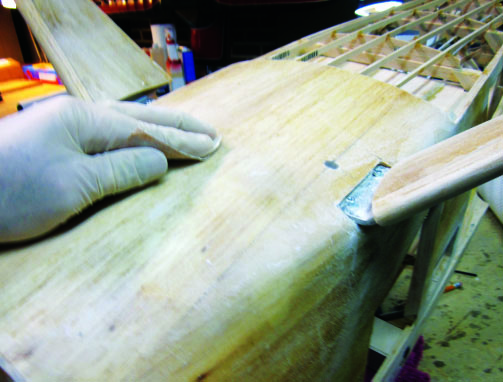
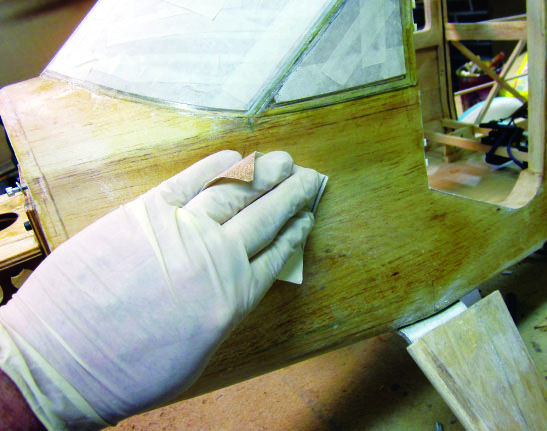
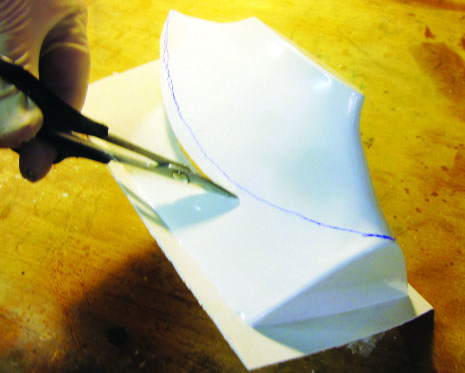
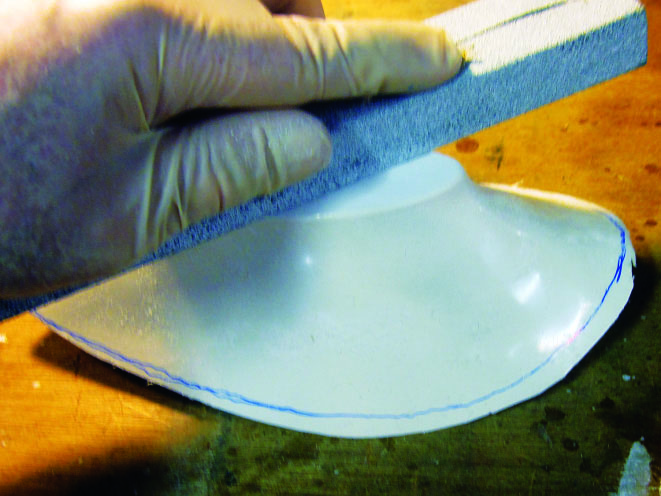
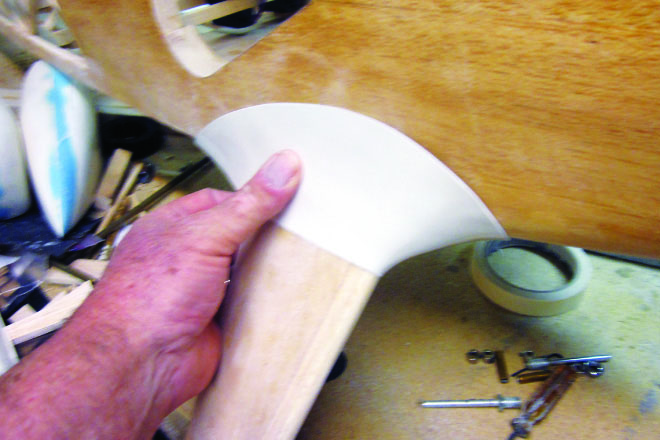
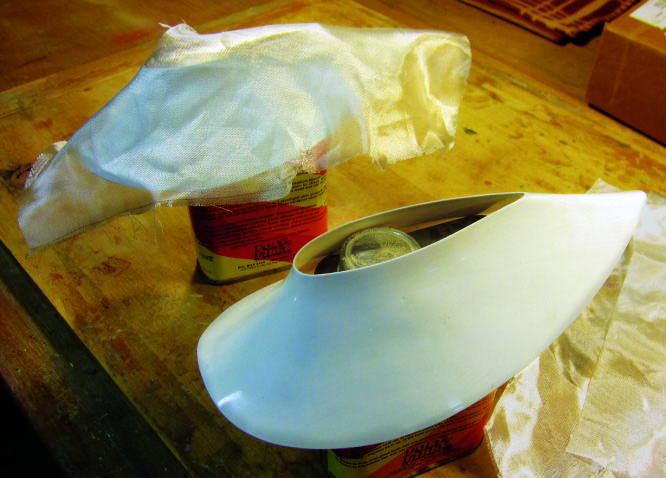
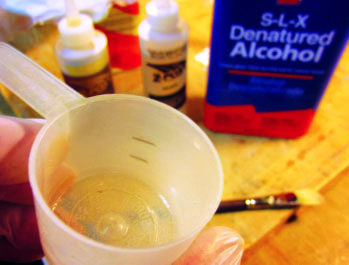
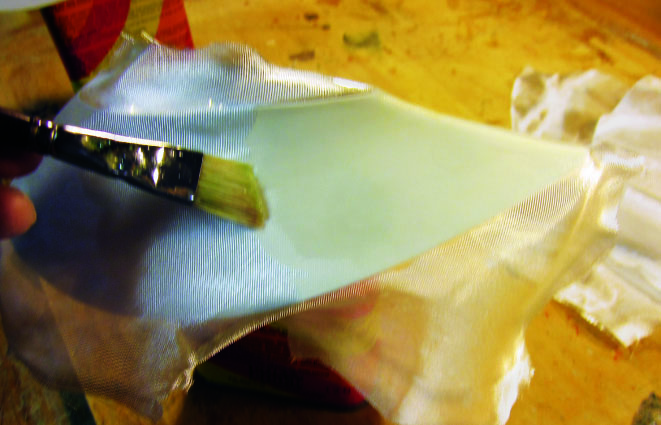
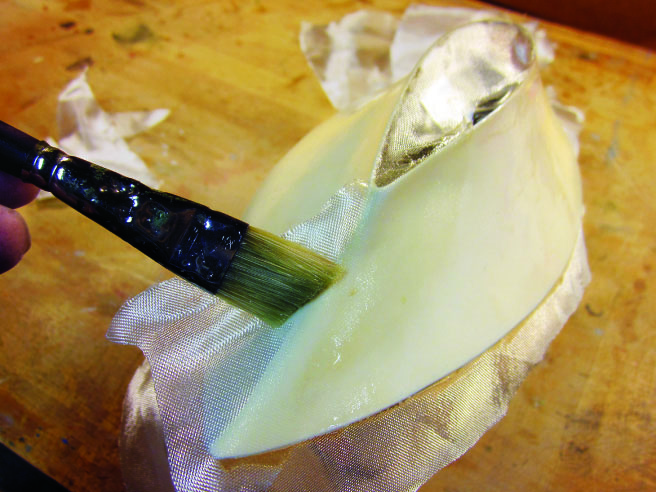
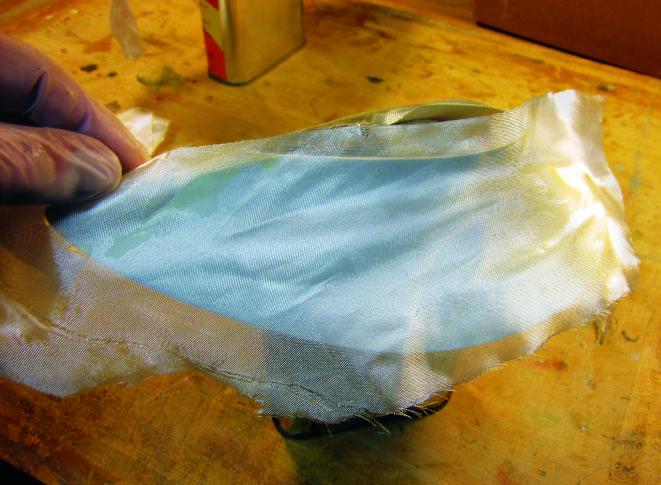
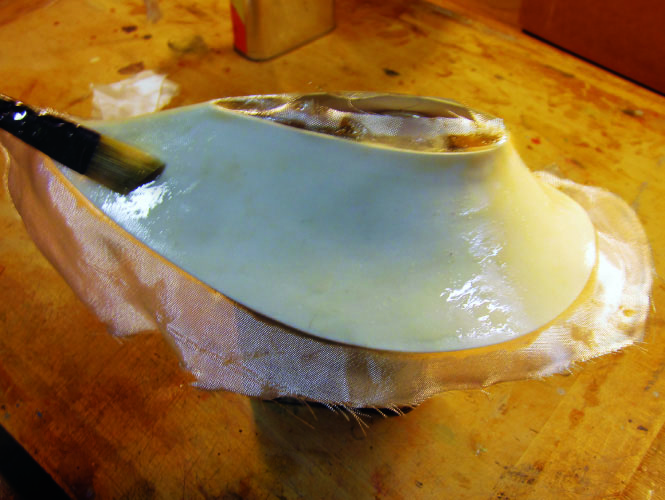
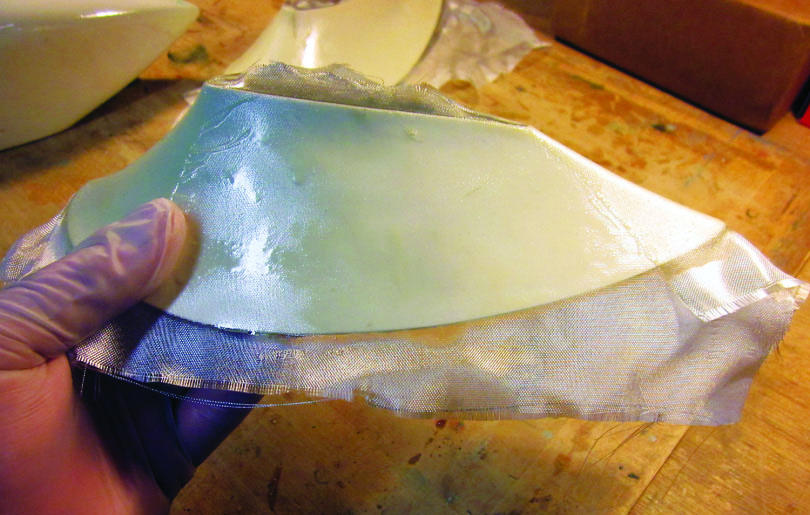
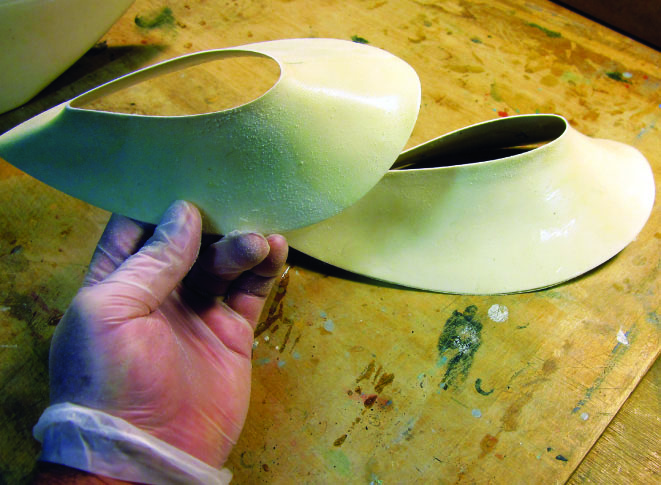
There was one task left over that I wanted to finish up before building the wheel pants. The control rod/cable exit covers on either side of the tail below the horizontal stabilizer have not yet been put on. The instructions suggest that you cut these from the ABS plastic sheet left over from the cowl molding matrix, but I chose to use more of that aluminum sheet, as it works out to be a bit thinner and less obtrusive. (Contrary to what the plan suggests, these panels lie beneath the fabric covering rather than on top of it.) The kit design requires that we put something there, but the full-scale photos show that it needs to be very subtle. Here, I have cut the left panel to shape.An old No. 11 blade is still tough enough to rough cut the openings in the aluminum panel. With that done I shaped and finished them with a narrow circular file, lined up the holes with the ends of the rudder and elevator control cable guide tube exits, and used ZAP-A-GAP to finish the job.Now we can get started doing wheel pants. They are provided as half-moldings of ABS plastic. The right and the left panels are symmetrical, but mirror- imaged…that is, the inner half of the left and right assembly, in turn, has a molded-in recess to fit the lower ends of the left and right LG struts respectively. The result of this is that all four “halves” are different and you need to keep track of which is which. Here’s the outer half of the right assembly still in the molding matrix.I used a pair of heavy offset metal snips for this job… overkill, maybe, but I wanted to be sure the curved plastic did not “grab” the tool and spoil the cut.This is the right/inner half shell getting the same treatment.Snips and shears can take you only so far toward a properly true, smooth joining edge. I fixed a full sheet of 100-grit production paper to the bench and worked each wheel pant half against it, flat, until I had an accurate mating edge.This part is easier. I’m cleaning up the inside edge with a loose piece of 100-grit.I taped each pair of halves together, joined the inside seam with a strip of two ounce fiberglass cloth and 30-minute Z-POXY, then removed the tape and cleaned up the outer face of each seam when the epoxy had cured hard. This is the assembled left pant, ready for fiberglass cloth reinforcement.The kit instructions suggest “glassing” the assembled wheel pants for added durability. If you plan on flying your SR-9 regularly you need to do this or risk beating the finished ABS plastic pants to an early death with rough fields and less-than-perfect landings. I’m adding a piece of 1.5 ounce glass cloth large enough to wrap entirely around one side of the assembled wheel pant with a generous overlap to the opposite side. Z-POXY finishing resin, thinned about 25-percent with denatured alcohol, is the best adhesive I have found for jobs like this. Here, I’m using a short, stiff brush to work a wet coat of epoxy into the fiberglass weave as I pull and press the cloth smoothly into place. NOTE: This shot is of the inside surface of the pant where I’m adding extra reinforcement.Here’s a look at the assembled wheel pants with both sides glassed and the overlapping edges trimmed and sanded smooth. You can see the kitsupplied 1/8-inch plywood insert in the right assembly…this forms a load-bearing base that mounts against the landing gear strut.This is the right pant “dry-fitted” over the axle assembly that inserts from the inside.I’m going to bed this threaded end of the axle (the part that assembles into the LG strut) firmly into epoxy resin, against the inset plywood face in order to define and lock in the angle at which it rests. I want to be able to remove the axle after the epoxy cures, so I’m coating the threaded surface with machine oil before fitting it into place.This is a liberal glob of 30-minute Z-POXY… still wet…that thoroughly fills the cavity where the LG strut is going to fit.This is the good part. I have covered the wet epoxy surface with a sheet of plastic wrap pushed over the threaded axle end and pressed the LG strut into place over that. Now I’m threading on the heavy fiberlock nut that will hold the whole thing together. I’ll pull this assembly together tight…the molded-in cavity and axle will align the wheel pant with the LG strut…and let it cure overnight. With a little careful tapping and prodding the cured epoxy assembly will pop apart at the plastic wrap and I’ll clean up any remaining rough edges.I elected to give the entire forward fuselage (the part that’s sheet balsa covered) a reinforcement of more of that 1.5- ounce glass cloth I used on the wheel pants, applied with the same Z-POXY and alcohol. I have trimmed all the edges and overlaps and here I’m doing a preliminary sanding of the fuselage belly with a sheet of 100-grit paper.Same deal on the fuselage side. You can see where the left LG strut fairing stops short of joining the fuselage. There’s a separate fairing coming along to cover and close that opening.As with the wheel pants, the upper LG strut fairings get cut out of ABS plastic matrix sheets.I’m using 80-grit production paper on a block to square off the lower end of the fairing where it’s going to slip-fit over the LG strut fairing.I have done the fit-and-trim-and-check procedure to get the upper face of the fairing to mate neatly with the curvature of the fuselage.I’m going to fiberglass these upper fairings for durability just like the wheel pants. Here, I have them placed them on temporary stand-off holders (odd cans and bottles) so I can work all the way around each piece with the epoxy-glass process.I’ve been talking about my coating-laminating medium of Z-POXY Finishing Resin thinned with one part denatured alcohol to four parts mixed epoxy. This is what it looks like. The alcohol makes it easy to brush onto and through the fiberglass without dragging or pulling the cloth and gives complete penetration of the cloth weave through to the underlying structure, which in this case is the ABS plastic molding.I have positioned a piece of glass cloth to cover approximately half of the fairing and wrap neatly around the curvature at either end.The thinned Z-POXY mixture has exactly the right “grab” to make the cloth lie neatly in place when I “pat” it into place with the brush. Note: Those marks in the ferrule happened when I had cleaned the brush and put it away after a previous job. My cats decided to check to see whether it was actually prey in disguise, then they gave it back to me.This is a similar piece of glass cloth cut to fit around the opposite side of the fairing and wrap into a generous overlap.I brushed the second piece into place just like the first. At this point you don’t worry about the overhangs…just let ‘em be.Here’s the finished, cured, glass-laminated fairing.Fine sandpaper (I’m using 320-grit production paper) is my preferred way to trim off those floppy overhangs.Both fairings are laminated, cured and trimmed, ready for the next work session.
 Fly RC Magazine WE LIVE RC