Words and photos by Bob Benjamin – bob@rcmodel.com
A genuine Golden Oldie that’s perfect for today’s small electric airplanes.
NOTE: This article is required reading for the next installment of Master’s Workshop, Guillow’s Hellcat #4
Silkspan … what’s that? Simply stated, it’s a unique kind of paper that since the really old (pre-WWII) days of aeromodelling has been recognized as an excellent covering material for model airplanes. More specifically, it’s a specialized tissue made from woody plant fibers. It’s my understanding that most if not all of it comes to us from Japan. The material generations of aeromodelers around the world have called “silkspan”, a trade name of which I don’t know the origin, is very specific kind of tissue paper, but not all tissue from Japan is silkspan. You’ll recognize its subtly mottled appearance when you see it…and you almost certainly have already. “Silkspan” is the model airplane world’s name for teabag paper. “Japanese Tissue”, the lighter, finer-grained paper made from the gampi plant, sold on the US model airplane market under names such as Esaki, is a different product which demands slightly different application techniques.
Back when I got started in this business, during the late 1940’s and early ‘50’s, silkspan had long since been accepted as the default covering for all but the very smallest…and largest…model airplanes. In those days nearly all the kit manufacturers included a couple sheets of the stuff in every box as the recommended covering material, which everybodyknew was supposed to be attached, sealed and finished with airplane dope. The silkspan that was available to us then (and still is) came in three different weights/thicknesses. “OO” is very light…very similar to the heavier tissue products and good for little models with wingspans on the order of twelve to maybe eighteen inches. “OO” silkspan has another special purpose application which works well on larger models as well. I’ll talk more about that later in this article. “GM” (gas model) silkspan is noticeably thicker and stronger…and the most commonly used. “SGM” (super gas model) silkspan was also there on the hobby shop shelf if you were building a six-footer and couldn’t afford very-much-stronger (and much more expensive) silk. If you opened a kit from Sterling, Goldberg, Berkeley, Top Flite, PDQ, Midwest, Kenhi, or Veco, among others in those days, you expected to find a couple of two-by-three foot sheets of silkspan included. This arrangement continued to be common into the 1960’s and beyond, long after most model builders had come to regard those various plastic film products as the new default choice of covering. You will still find silkspan in all the larger Guillow’s built-up balsa kits today, and that happy anachronism is what is going to lead us into this lesson on one of the good old skills of aeromodelling.
Regardless of the grade of silkspan you chose, if you were an experienced model builder you had long since learned to apply your covering NOT just over the “open” parts of the model structure. Instead you covered every square inch of the model’s surface, including the “closed” parts like sheet balsa or carved balsa blocks. If you left any balsa structure uncovered/unsealed by silkspan you would pay the penalty of having a rough, porous surface that was nearly impossible to finish to match the “covered” areas. A colored dope finish might help disguise the contrast between the silkspan and the bare, open grain, porous balsa around it, but even adding and sanding multiple coats of various “fillercoat” products could not give you a finish base to compare with “silkspan over everything” and a couple coats of clear dope. Some guys learned the hard way that if you started that color finish by putting on enough coats of sanding sealer/fillercoat over the bare wood to truly hide it, the extra weight pretty much guaranteed a non-flying airplane. Indeed, using colored dope containing heavy pigments was something we learned to avoid when building smaller airplanes that we wanted to fly well.
No matter how you planned to finish it, like most of the other “pre-plastic” coverings, silkspan could be applied dry by sealing down all the edges of the piece you were working on and then spraying it with water, which when it dried would shrink enough to pull out most wrinkles. The alternate method, which most of us preferred, was to cover wet by pre-moistening the silkspan with water and then taking advantage of the extra flexibility and stretchiness that resulted to pull the covering tight and flat even over compound curves like the top surface of a wing. As the water evaporated the covering would shrink itself really smooth. Once you got used to working with the more delicate, fragile wet silkspan you were almost guaranteed a tighter, neater covering job. Regardless of how you stuck it down, a silkspan covering job was always sealed and strengthened by adding several coats of clear dope. Usually you stopped adding coats when the silkspan began to look noticeably shiny after the dope dried. Using more dope added more weight but even worse, it always threatened to over-tighten the covering and warp (twist) your structure. There are different types of dope as well as various different techniques for using it, but no matter…they all come with a REALLY STRONG SMELL. Even if you didn’t mind it everybody around you DID…and that is one of the best reasons why lots of model airplane builders stopped using dope-and-silkspan as soon as they discovered those new plastic coverings. Very recently a new product for sealing/surfacing silkspan (as well as other types of tissue) has become available to model builders. It does all the things we want the dope to do, but it DOESN’T SMELL and it doesn’t over-shrink. I will tell you more about this stuff later, but right now I want to talk about one more characteristic of silkspan that really expands its usefulness.
Silkspan, which is naturally white, used to be available in multiple pre-dyed colors as well. You could find red, yellow, orange, blue, green , black…or even checkerboard-patterned silkspan in red or black stocked right on the hobby shop shelf next the white kind. Can you imagine a model covered with, say, deep golden-yellow translucent silkspan sealed and turned glossy with five or six coats of clear dope, glowing in the afternoon sun at some grassy flying field? This is the effect that those transparent colored film products have been trying for years to reproduce. If you have ever seen a well-executed clear doped colored silkspan (or silk) covering, you will agree with me that they have not yet managed to get it right.
OK, enough of the history lesson. I have chosen clear doped colored silkspan as the covering/finish of choice for my ongoing series of electric RC conversions of Guillow’s traditional stick-and-tissue balsa model. I am going to show you how to use it a bit differently than we did in the past and in the process explain why learning to do it the new way is such a good idea.
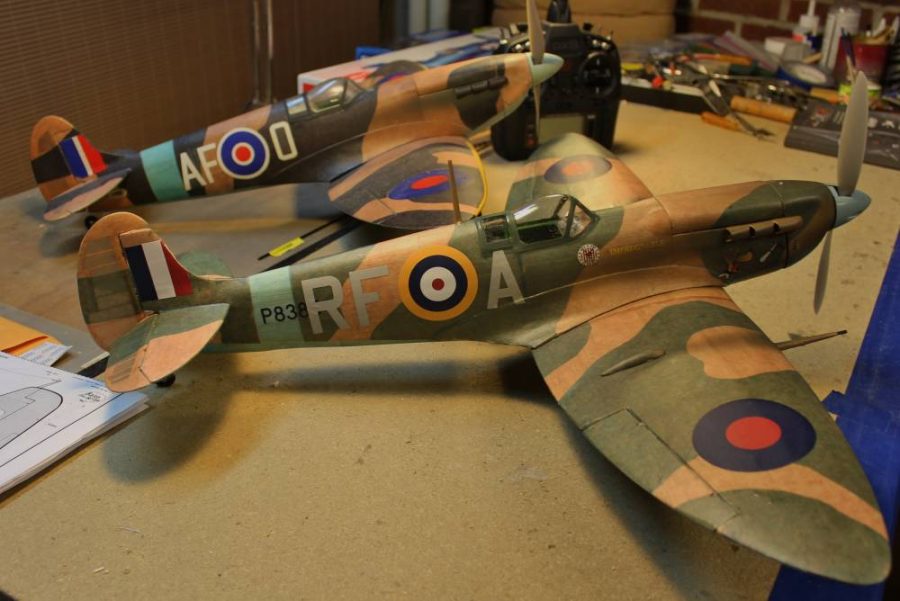
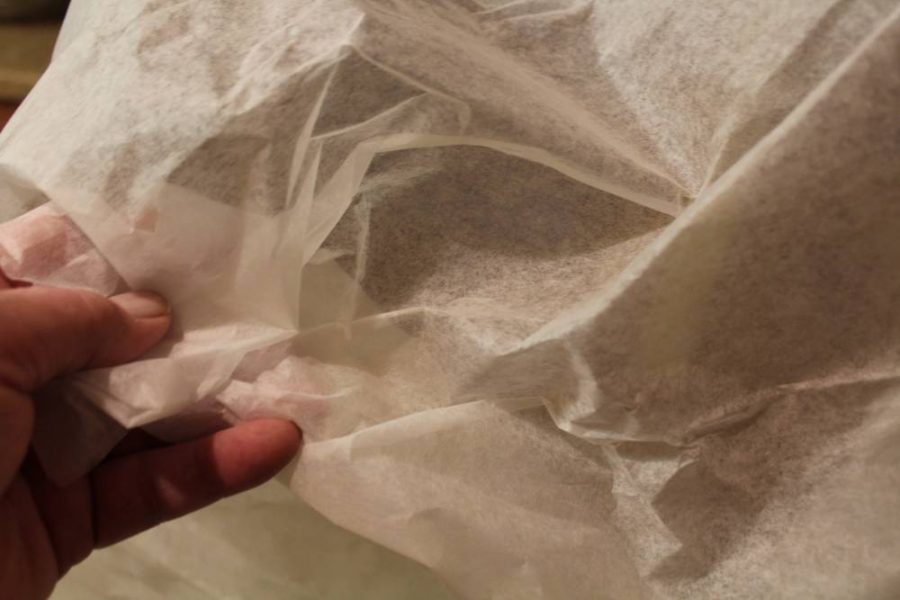
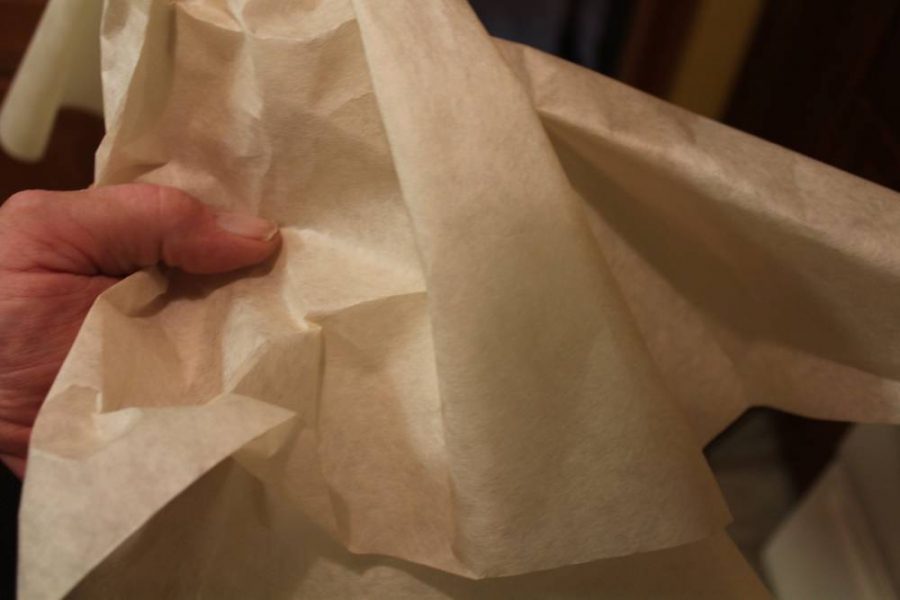
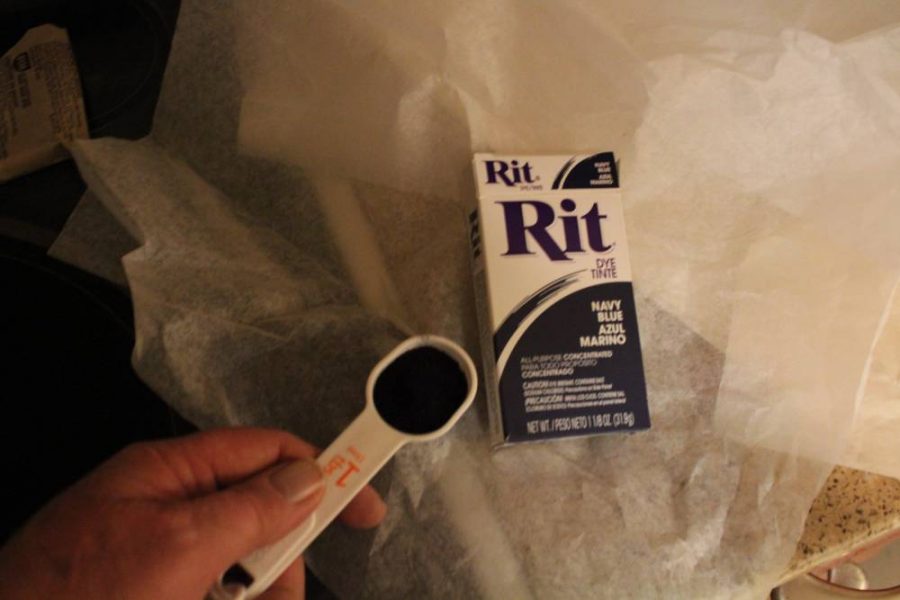
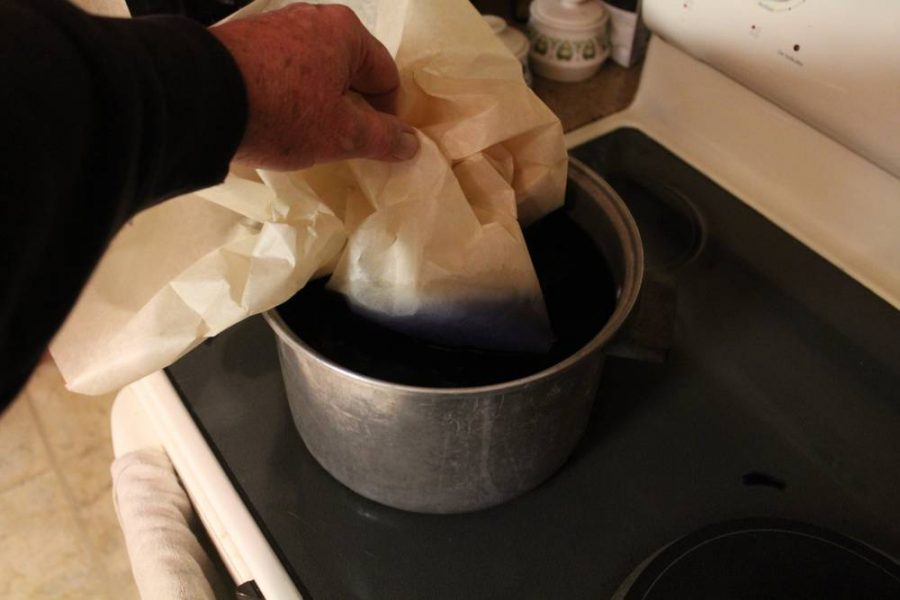
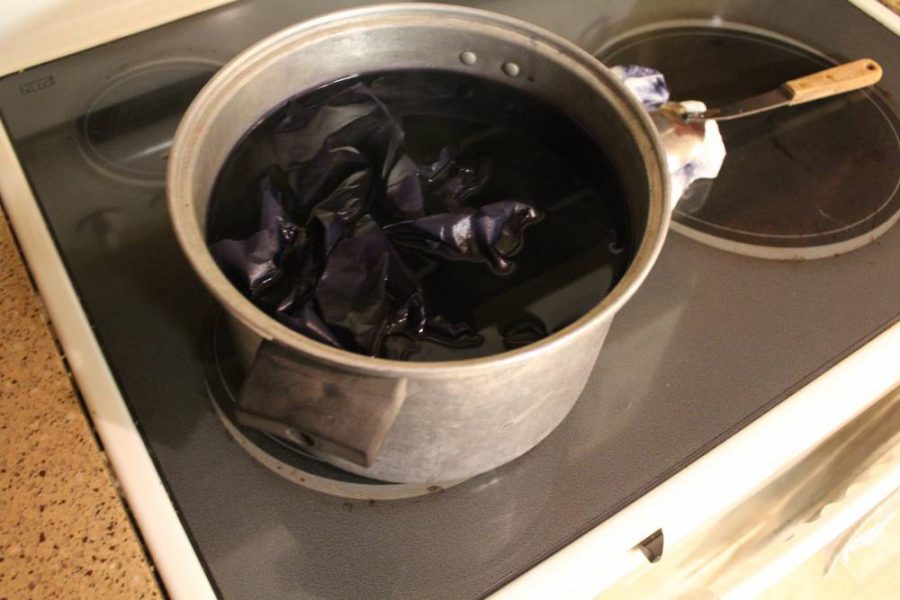
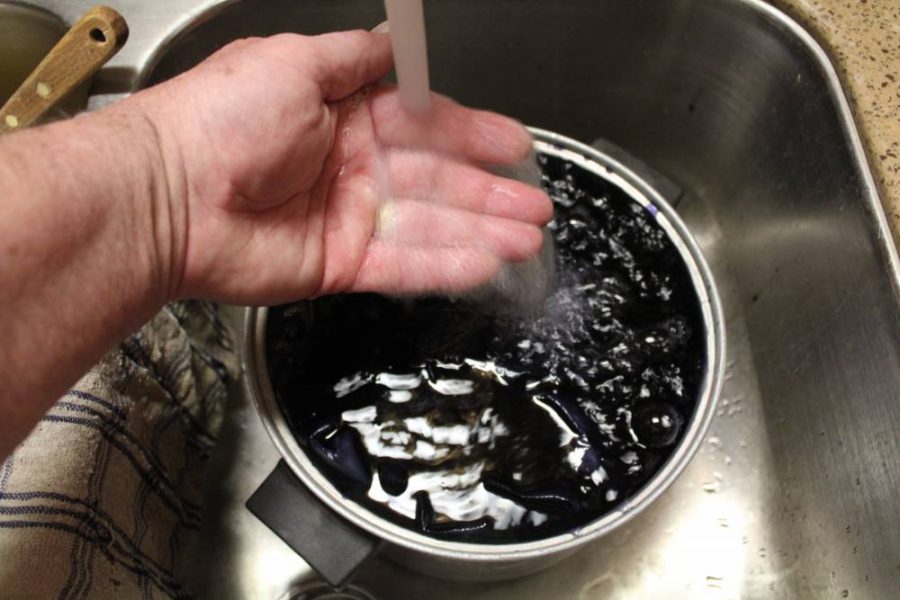
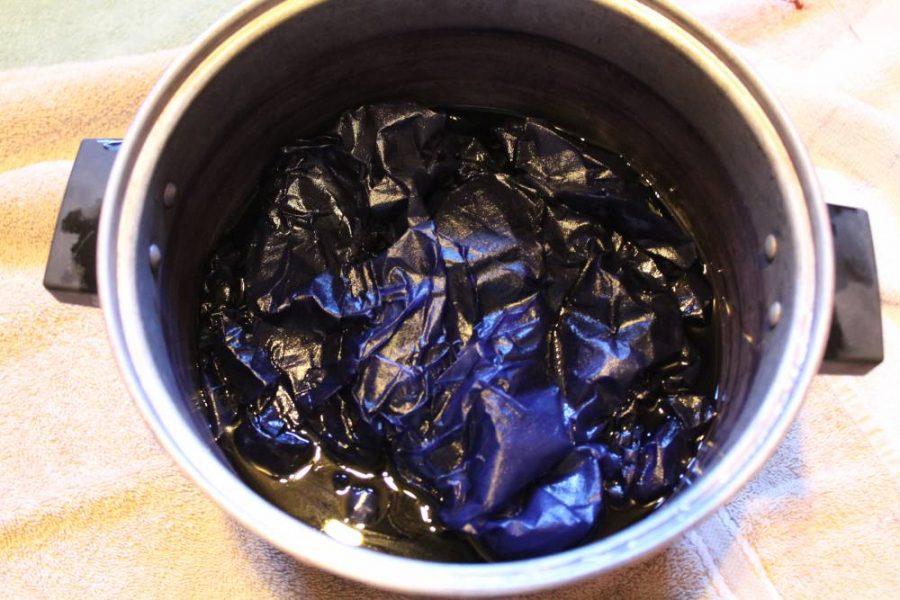
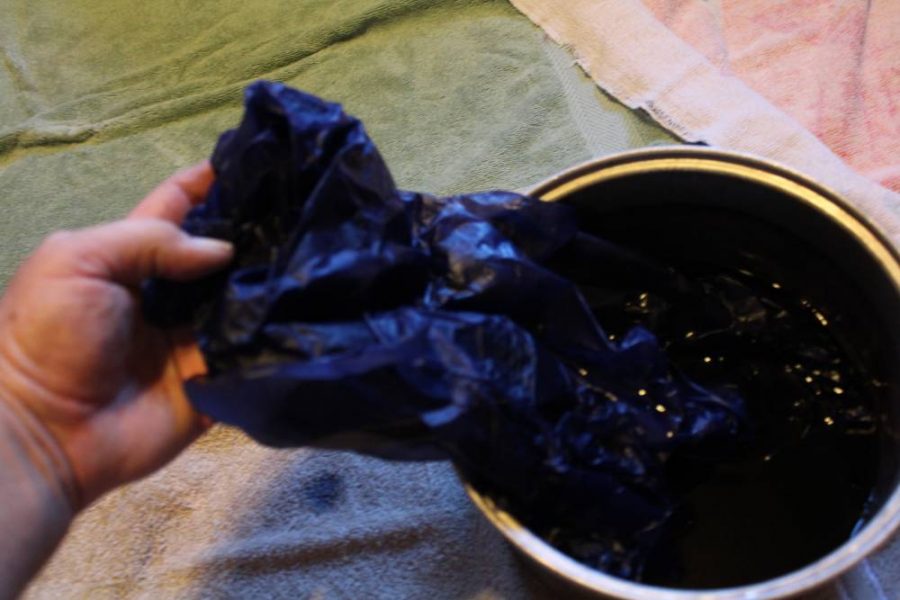
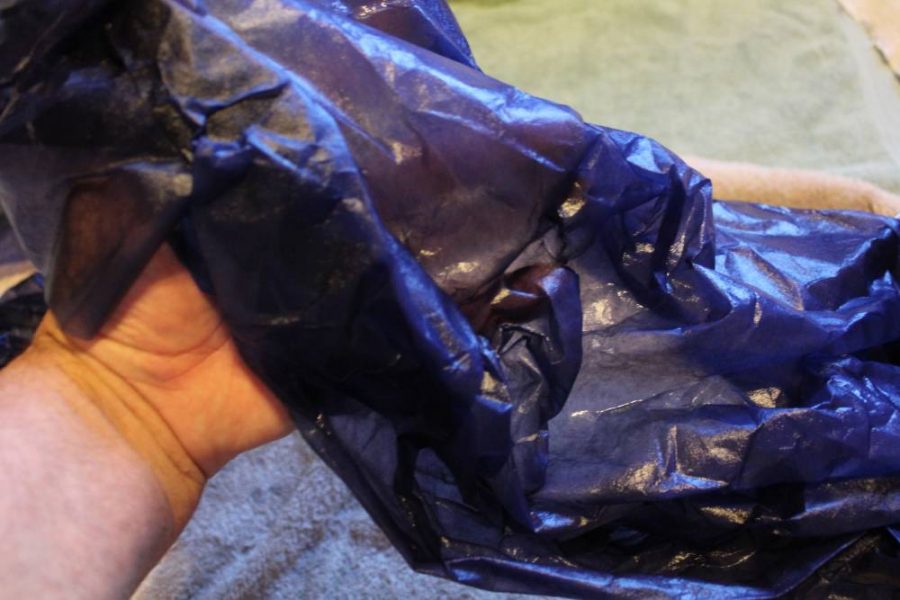
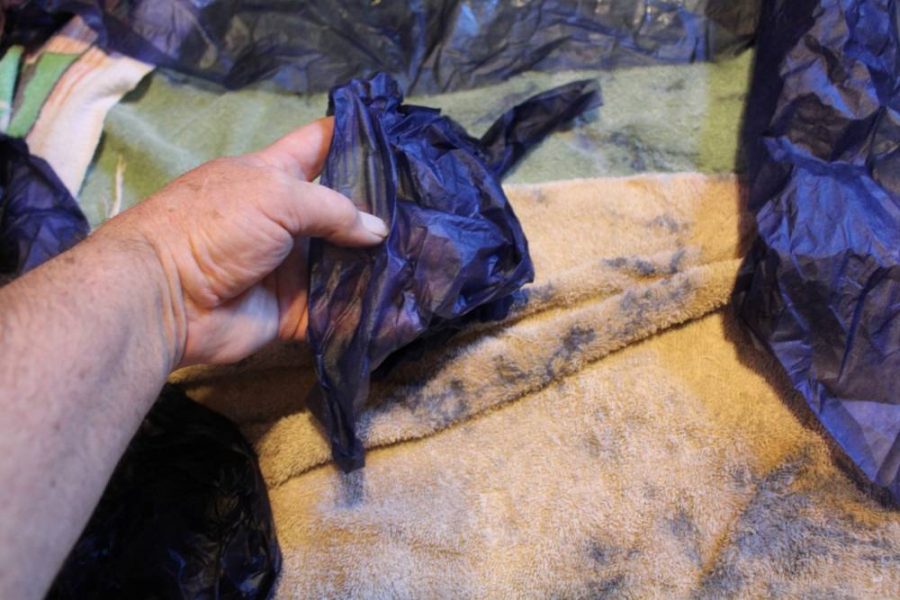
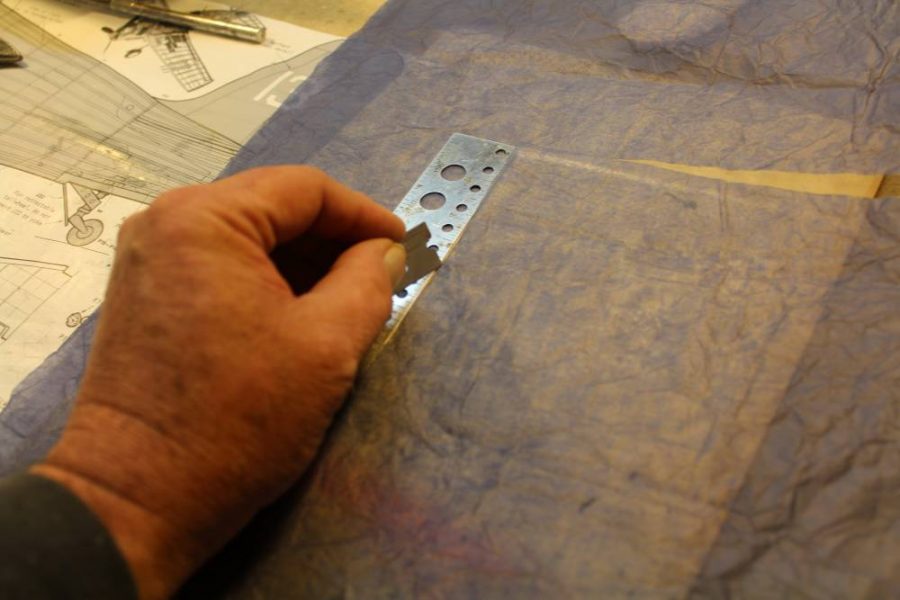
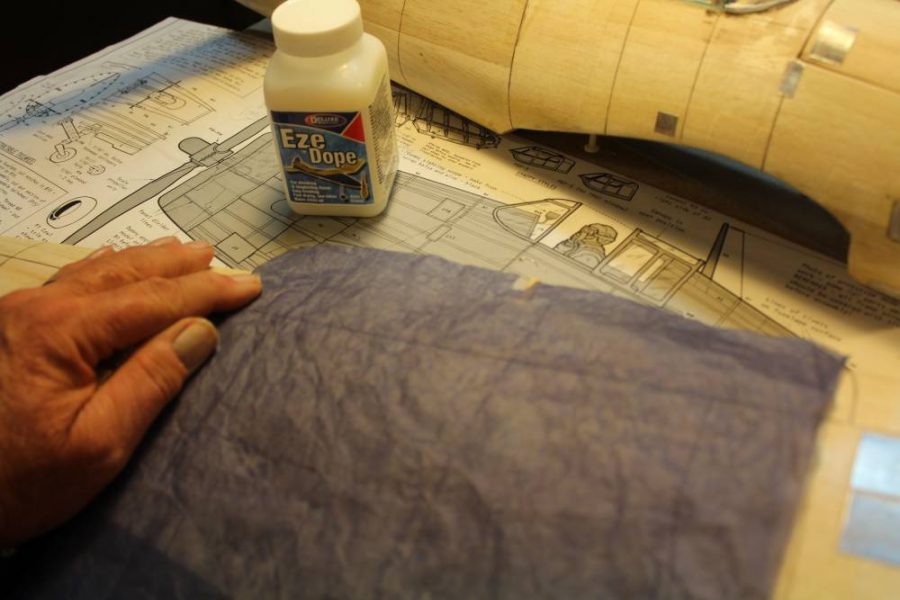
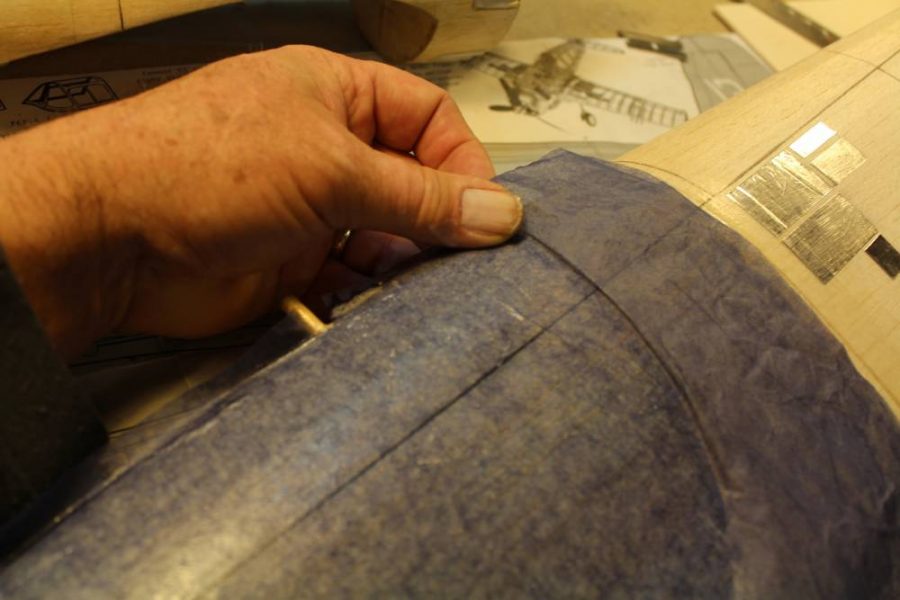
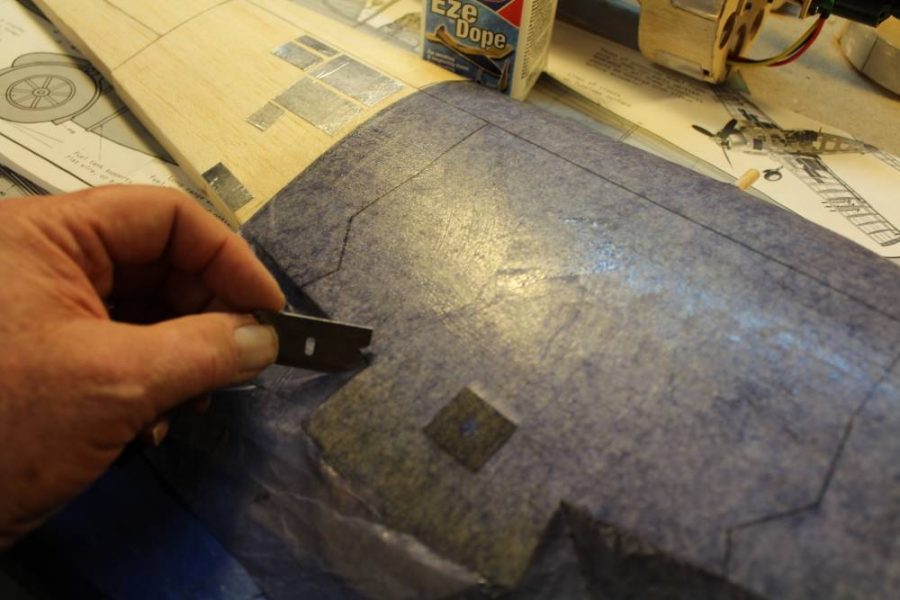
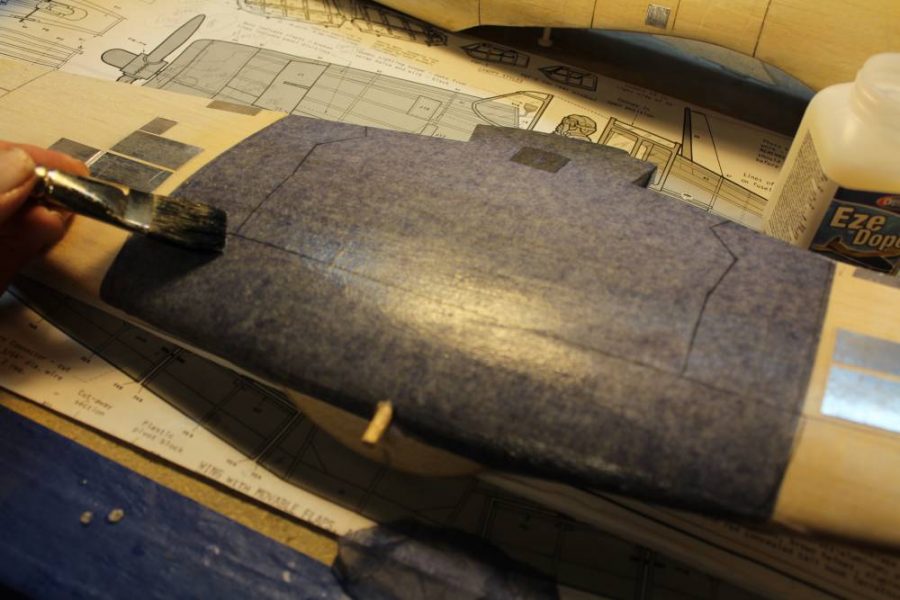
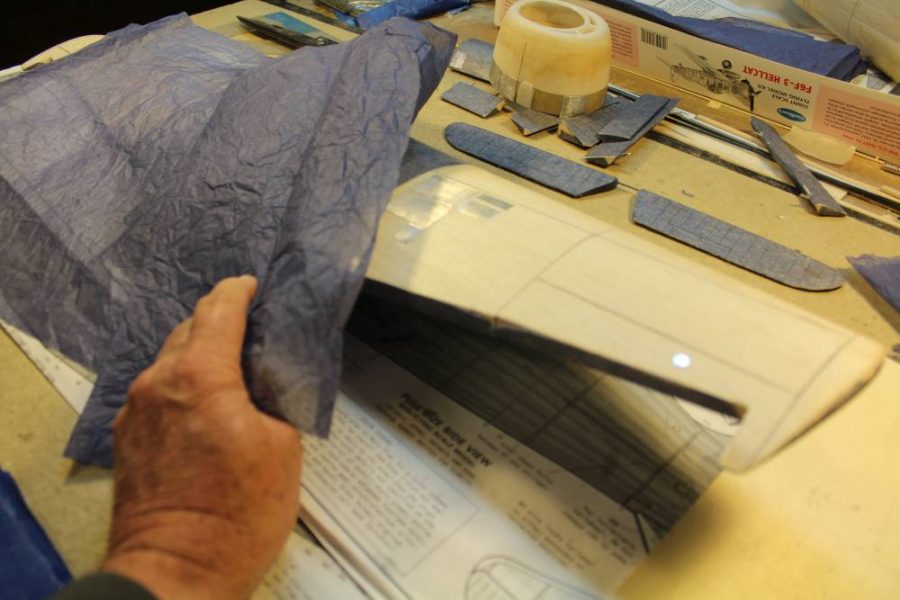
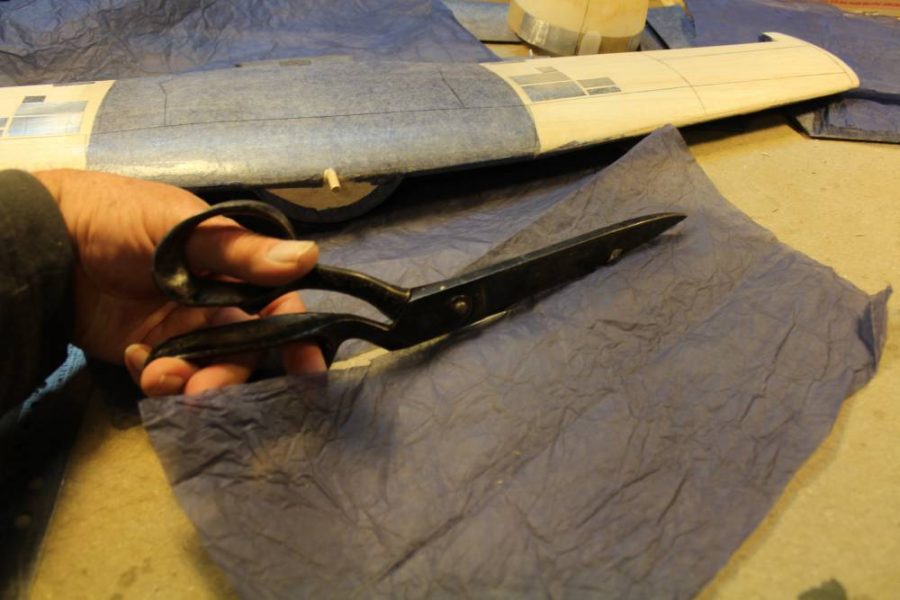
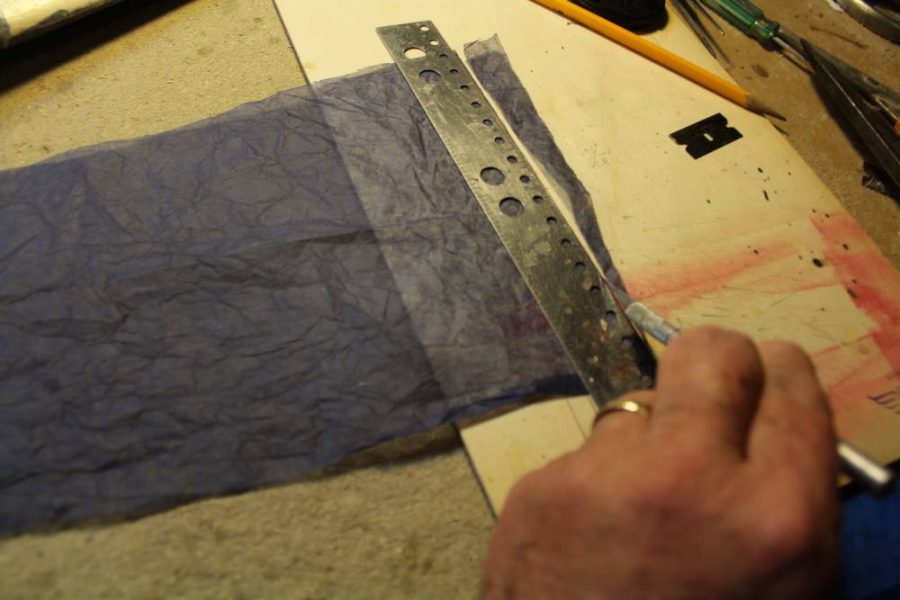
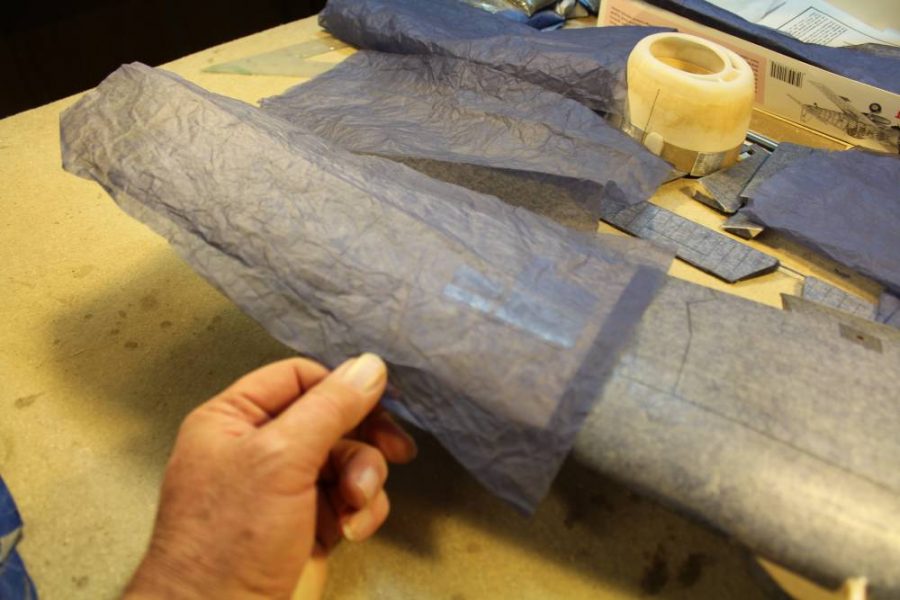
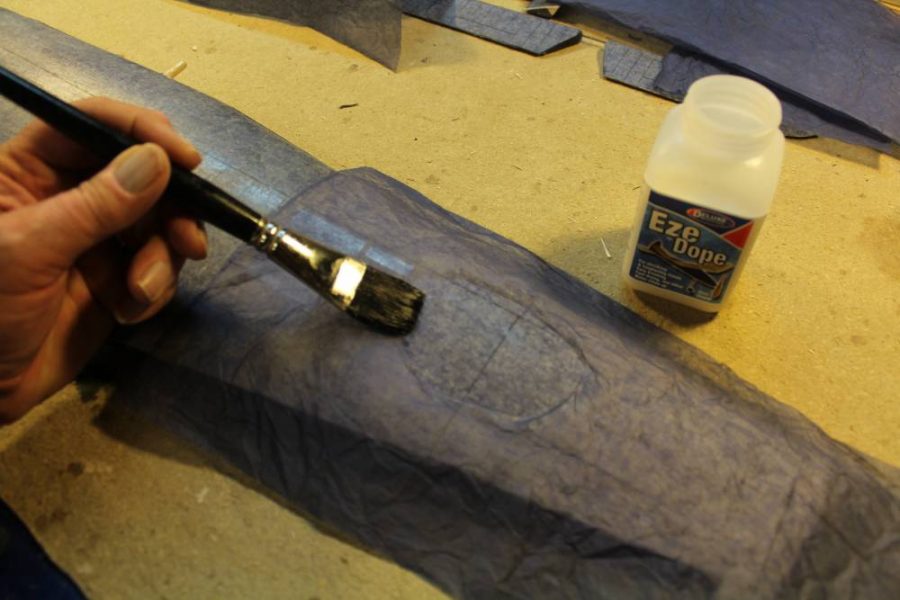
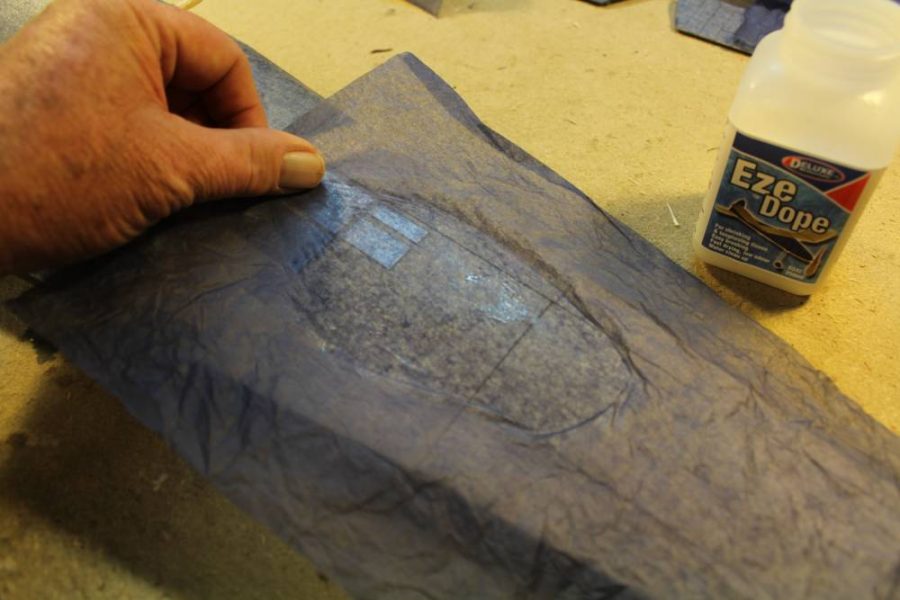
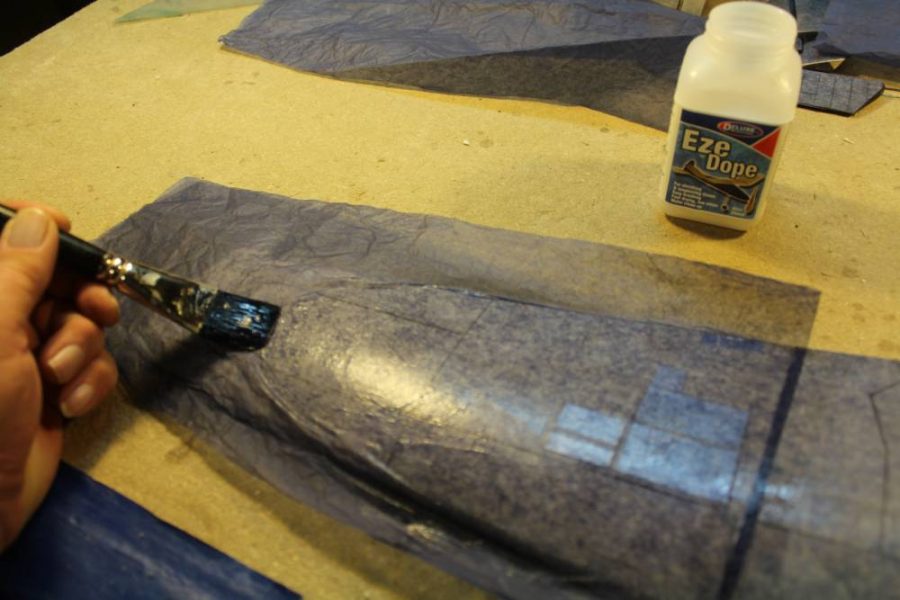
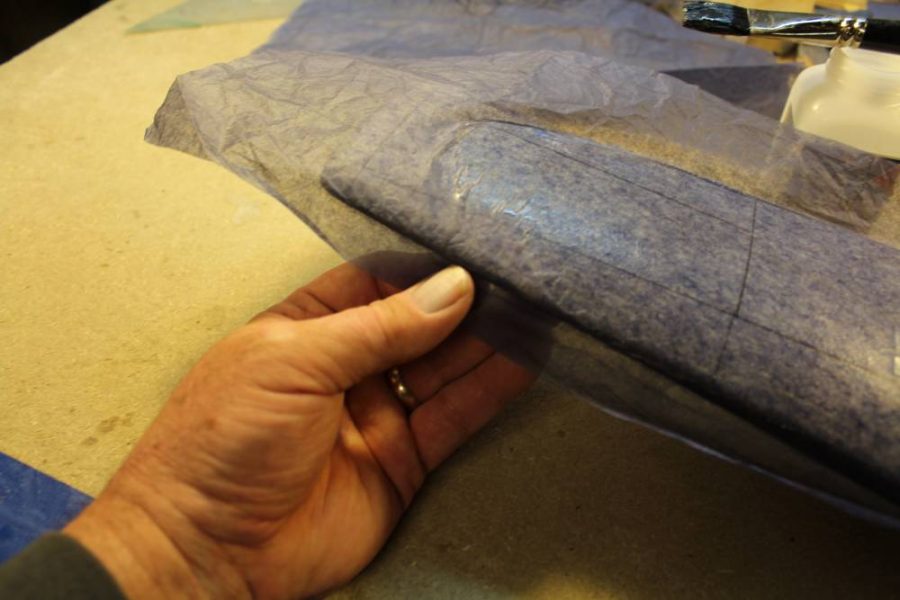
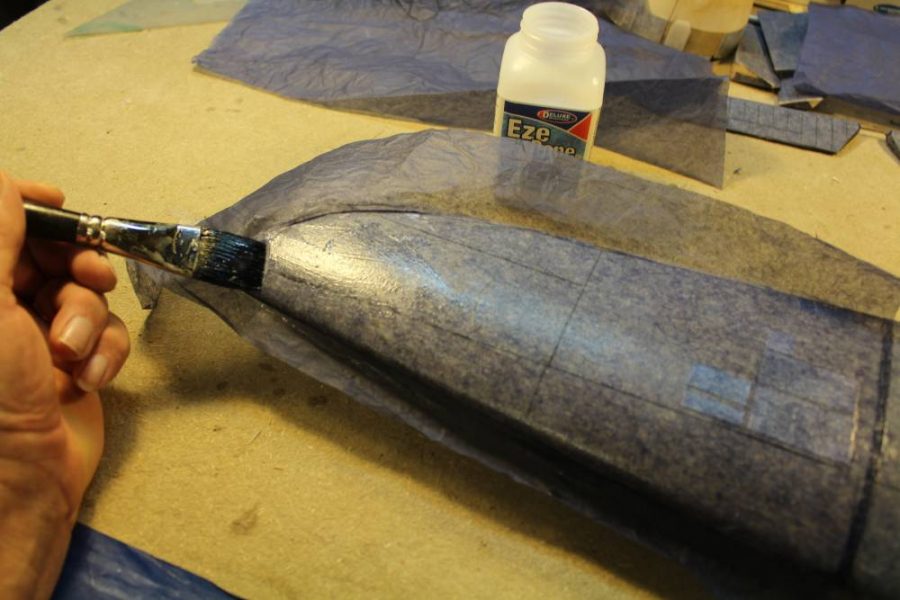
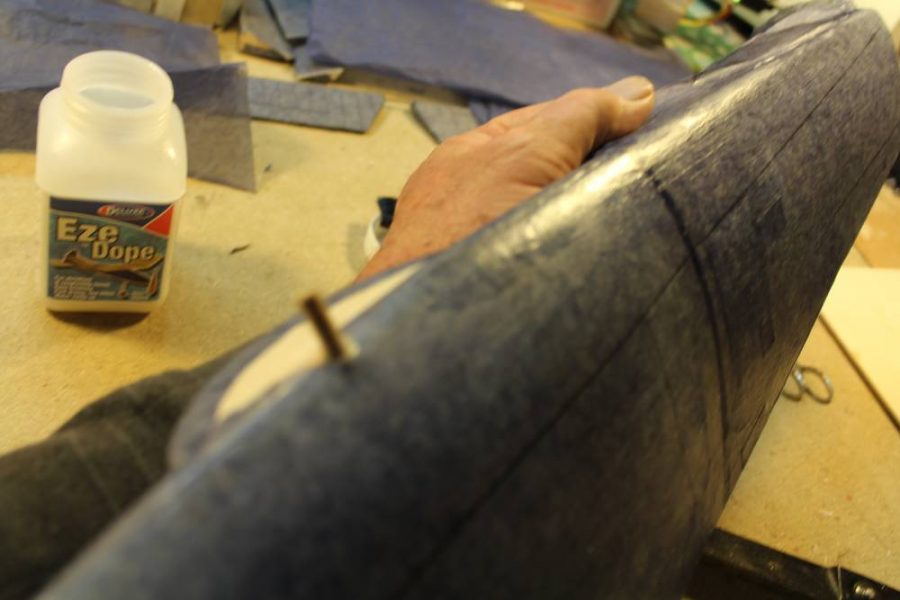
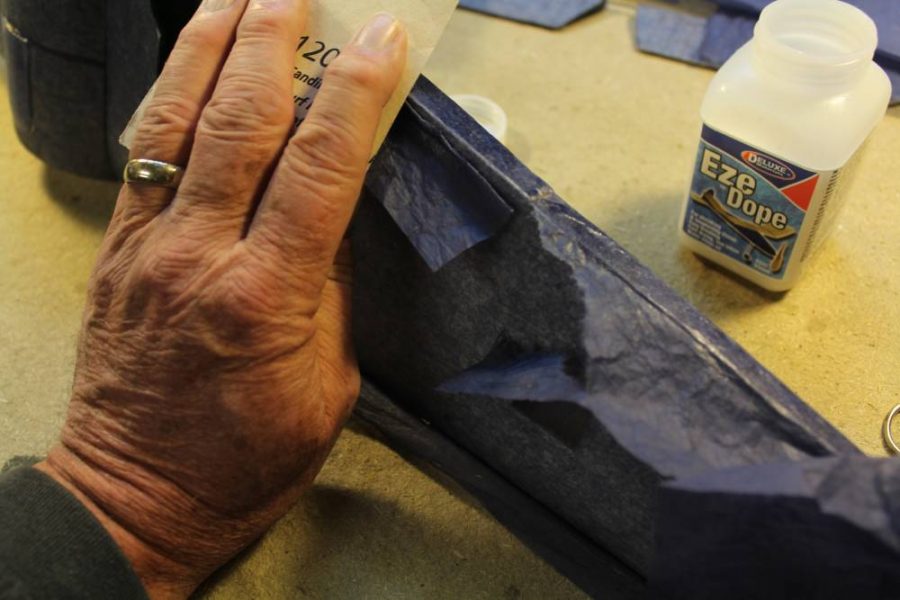
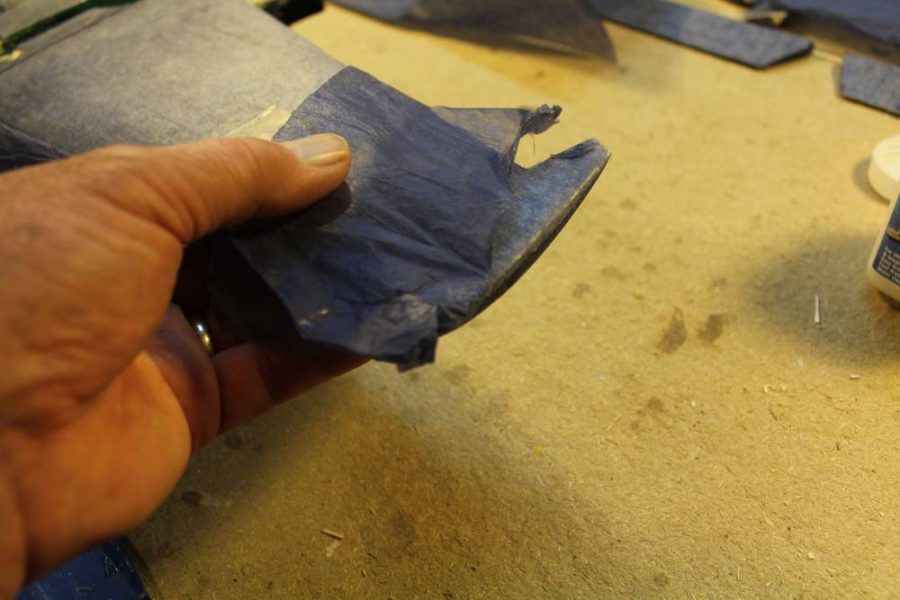
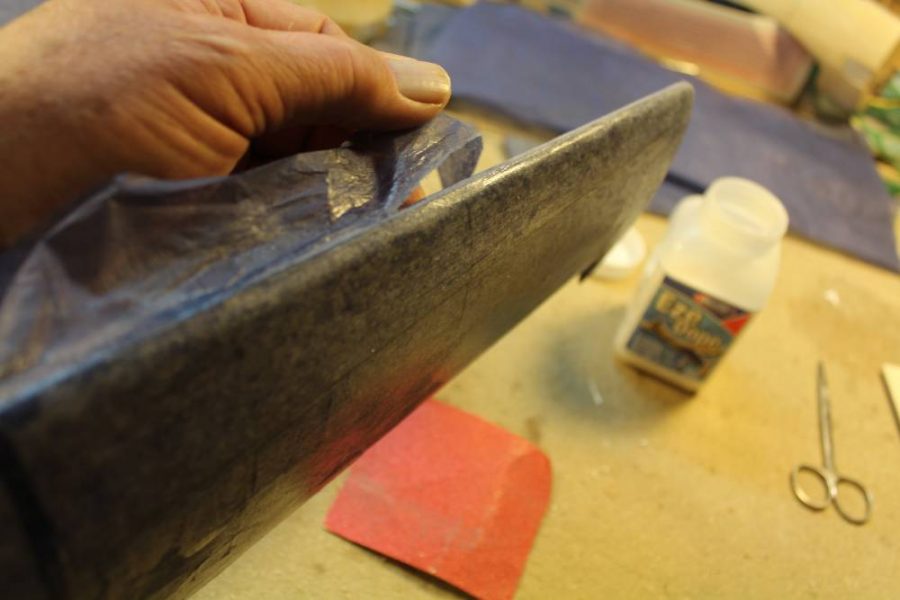
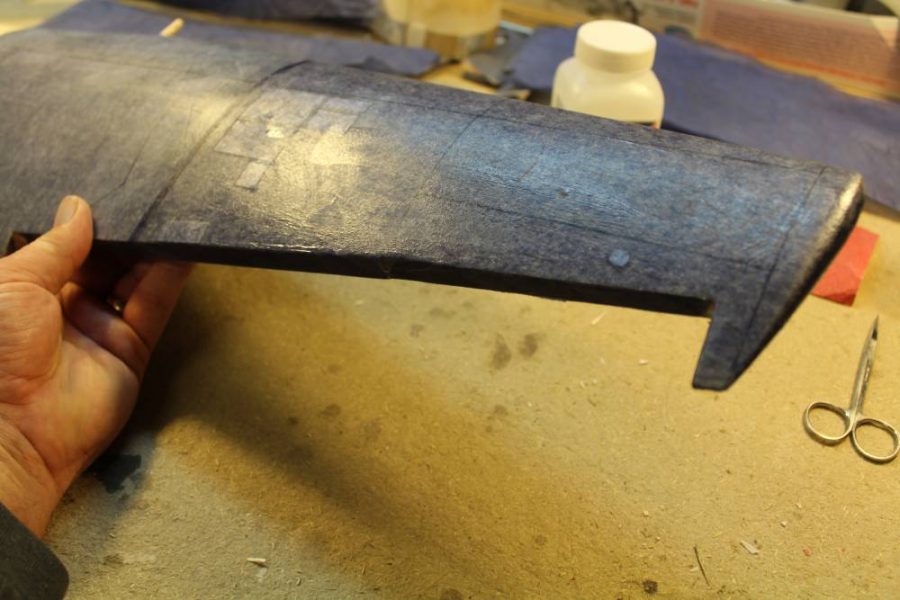
These are the two Guillow’s Kit. No. 403 Spitfires I talked about in the lead-off article of this series, and they provide an excellent example of what dyed, clear-doped silkspan covering looks like. I’m going to show you how to do stuff like this yourself.Unfortunately, most hobby shops today carry silkspan (or any other tissue-type covering for that matter), and the guy behind the counter probably won’t even know what it is. There are in fact quite a few specialized dealers who sell it…mostly online…but let’s start the easy way. Do you remember my mentioning that Guillow’s, whose models we are featuring in this current Master’s Workshop series, not only include it in their larger kits but are also happy to sell it to you separately? What you are looking at here is a sheet of “OO” silkspan directly out of a Guillow’s kit box.Just for comparison, this is a sheet of significantly thicker/stringer/heavier “SGM” silkspan. This piece happens to be at least sixty years old…it came from a dozen-roll tube sold by Berkeley to complement the materials included in their kits. Because it was kept in a closed container and out of sunlight, it’s in the same condition as when it was new stock on a hobby shop shelf somewhere. In fact, right after taking this picture I included a couple sheets of this old stuff in the same dye bath as the new silkspan from Guillow’s and set it aside for some future project.Here’s where the action is. Ordinary “Rit” fabric dye does an excellent job of coloring silkspan. For this job I used a two-gallon pot and about half of the dye in the packet.The Rit package instructions for dying various fabrics suggest that the dyebath be at a gentle boil. Because silkspan is after all paper, not a textile, I don’t push its “wet strength” so far. The pot you see here is just at the temperature where the water steams slightly before bubbling, at which point I turned down the heat and added all my silkspan to the pot. Open up/unfold every sheet of covering you are going to dye and add it to the dye bath one sheet at a time, gently crumpled, so the dye will get to every corner of each sheet.Everybody into the pool! There are eight separate sheets of silkspan in this pot, which I kept “just simmering” for about twenty minutes while stirring it very gently to keep it all distributed evenly.Following the dye package instructions, the next step is to give the entire dye lot a cool rinse. Can you see how I am adding cold water to the pot while breaking the flow from the faucet with my hand to avoid damaging the covering with a strong stream of water?This part is a waiting game…sort of. According to the Rit directions you should keep adding cold water while pouring off the overflow until the rinse water is nearly clear. That’s what I do and it works.Pulling those wet sheets of now-colored silkspan out of the pot and separating them is a delicate job. If you don’t use plenty of patience and a gentle touch you will tear the sheets taking them out.Wet silkspan all crumpled and folded back on itself is frighteningly easy to damage. I prepare a “drying yard” using as many old bath towels (clean) as it takes to create an area large enough to spread every sheet out, free of folds and significant overlaps, and then work each sheet as nearly flat as I can get it. Here my batch of new Navy Blue silkspan is still pretty bunched up.Proceed slowly! If you look carefully you can see several sheets of covering already spread out at the rear. Once they are all spread out…as you have heard me say before…go away and let it all dry.You can tell by looking when that has happened. A fully-dried sheet of freshly-dyed silkspan is going to appear much less intensely colored than when it was wet. What you see here is a full sheet of Guillow’s standard kit silkspan spread out flat so I can cut it with a fresh/sharp razor blade to get the correct working size piece I need and to create a reliably straight edge to measure from when laying it in place on the airplane.This is what our nice new sheet of Navy-Blue-dyed silkspan looks like once it’s ready to be applied to the balsa surface of an airplane. Next to the Hellcat fuselage you can see a plastic bottle of the new product that is going to allow us to do no-smell doping. Deluxe Materials sells a wide variety of model building products; EzeDope is the one that has been painstakingly developed for the specific job we are about to do. I’ll fill in the details as we go along with a representative portion of a covering job.Before we go any further I want to remind you that on this particular modification of a Guillow’s Kit. No. 1005 Hellcat the entire surface of the model has been converted to sheet balsa covering. To cover open structure we will use a different technique based on another Deluxe Materials product called Tissue Paste. I will feature this in a future article based on a different model. What you see here is the curved upper surface of the Hellcat wing center section, which is flat all the way across the fuselage centerline from one dihedral break to the other. Notice that I have used that freshly cut straight edge of the working piece of silkspan to align it accurately along the center section-outer panel joint (the dihedral break). As we go on you’ll see why this straight-cut edge is going to help us. The most important part of what you see in this shot is how well the now-dry dyed silkspan spreads and flattens and lies snugly against the sheet balsa we’re attaching it to when I work outwards from a central starting point using a brush generously wet with EzeDope.I alternate between “chasing” the dry edge of the covering out across the wing surface with the wet brush and careful thumb-and-finger stretching from the outer edge of the covering to get it down tight against the balsa with NO WRINKLES. We’ll get a better look at this technique during the next several steps.Never pass up the chance to get an overlap where the silkspan (or any other covering) wraps around an edge. In addition to the more finished appearance that I already talked about, doubled-over silkspan provides a significant increase in strength in the structural edge it’s attached to. What you see here is the top of the wing center section with a sheet of blue-dyed silkspan sealed with EzeDope that has dried enough for us to handle it. Where the excess covering runs off the edge at that right-angle corner, which is the inboard end of the left wing flap cutout, I cut it so the resulting free edges can create the overlaps we want.Here’s the same wing center section seen from the front. You can see how neatly that folded-edge overlap works at the trailing edge. With that overlap completed and the EzeDope I used to attach the silkspan dry enough to handle, I’m giving the entire section of new covering/finish a final blend-it-all-together coat of EzeDope.As you have already guessed, I did the let-it-dry thing again before coming back to cover the right wing panel. This time I’ll repeat the process we just saw in better detail. Here I’m beginning by checking that the sheet of blue silkspan is in my hand is big enough for me to cut off a piece just the right size to fit the surface I want to cover.What you see is one end of a single sheet of “OO” silkspan from the Guillow’s kit, dyed and dried, ready for use. I’m marking a cut-off line that will give me a wide enough grab-and-pull margin without wasting material.There are several ways to cut silkspan. These large fabric scissors make it easy to follow that pencil line I just drew.You’ve seen me do this before. Because what will become the inner end of this pierce of silkspan is going to have to fit neatly against the center section edge that’s already on the wing, I need to make another straight cut in order to get a good fit. What you see is what you get…I’ve placed this sheet of covering over a clean, smooth surface so that a single pass along the steel straightedge with a nice sharp new razor blade gives me the clean cut I need. Doing work like this is not a place to try to economize on blades. A standard hardware-store-variety single-edge blade is good for maybe a dozen precision cuts like this before it dulls enough to risk catching and tearing the silkspan.This is about as narrow a gripper margin overhang as you should consider using. It’s WAY better to “waste” a few inches of covering material here than to cut too close and spoil the whole piece so you have to strip it off, throw it away, and start over.Remember “working out from the middle” with the EzeDope? Here’s another close-up look. If you look carefully you can see (at the left behind the brush) where I have pre-aligned those neatly trimmed edges. By now you have figured out that a double layer of dyed silkspan, as created by an edge overlap, is going to appear darker and more deeply colored than the surface around it. On this project I’ve chosen to employ those narrow overlaps to represent the sheet metal skin joints on the full scale Hellcat.More of the same. You will develop a feel for just when it’s time to put down the EzeDope brush and switch over to pulling out all the wrinkles before they get locked in and impossible to fix.With the silkspan EzeDoped’d into place exactly where we want it at the inboard end of the panel it’s time to work the other end smoothly all the way to the wingtip. Again what you see is what you get here. The easy error to make is not using enough EzeDope … keep the brush and the silkspan really wet, or those wrinkles won’t “chase”.We’ve been here before, too. You can see where I’m working to pull enough of that gripper edge of the silkspan down and around the leading edge to provide a good overlap.If you’ve stayed with me so far, this shot needs no explanation.Once again this is more of the same. Where the silkspan is thoroughly wetted with EzeDope around the wingtip you can use the natural curve of you hand to form/squeeze/press it into place.Here I have come back to the leading edge of the right wing panel and I’m using the same technique I did a moment ago with the wingtip. Getting the silkspan securely bonded and “no excuses” smooth just past the center of the leading edge curve is what we want to achieve.I have done the same thing along the right wing tailing edge and now the EzeDope is almost dry. This is one of those places where you’ll have to develop your own sense of judgment…if you use that loose sheet of 220 sandpaper too soon you’ll tear the silkspan and pull it loose. If you wait until it’s completely dry this sanding technique won’t cut cleanly and you will have to work to pull away whatever part of the overlap has gotten stuck past where you wanted it to be. Practice, practice, practice.I have done the same thing along the right wing tailing edge and now the EzeDope is almost dry. This is one of those places where you’ll have to develop your own sense of judgment…if you use that loose sheet of 220 sandpaper too soon you’ll tear the silkspan and pull it loose. If you wait until it’s completely dry this sanding technique won’t cut cleanly and you will have to work to pull away whatever part of the overlap has gotten stuck past where you wanted it to be. Practice, practice, practice.This is how that trimming process looks when you get it right.And … this is the right wing panel all covered, trimmed, and sealed by the EzeDope I used to attach it. There are a couple of steps left to get this covering/finishing job done the way I want it, but we’ll talk about that in my Master’s Workshop Hellcat No. 5 installment (which is scheduled to appear right alongside this lesson).
There you have it boys and girls. An old classic that uses a few new tricks and products to get the job done better than ever. Be sure to check back in the next day or two for the latest Master’s Workshop installment, where all of this silkspan goodness will serve you well.
 Fly RC Magazine WE LIVE RC