 Fly RC Magazine WE LIVE RC
By Gary A. Ritchie
In this column we will build the turtledeck – the portion of the upper fuselage that lies behind the cockpit. That will set the stage for designing and building a removable battery hatch that contains the canopy.
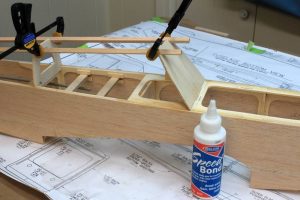
Ignore the section in the instruction manual called “Fit Fuel Tank and Fuelproof Tank Compartment” (Page 25, Steps 1 – 6) and be grateful that you will not have to “fuelproof” this electric powered airplane. Begin at Step 1 of “Install TurtleDeck”. The first sentence contains a typo that can be confusing. The word “pans” should be “parts”. Find the needed formers and then sand them smooth around the edges. Glue them all in place as described in Step 1 and 2. Then glue the ½” square balsa stringers in place on top of the formers and sand the stringers as described in Step 4. I used Deluxe Speed Bond glue here because it dries relatively quickly but offers time to make adjustments (Figure 1).
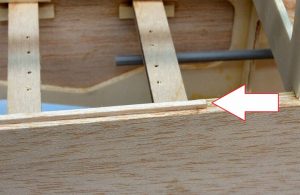
Following the illustration below Step 5 (Page 26) construct two turtle deck sides and sand them carefully along their bottom edges to assure that they are straight. I added a step here to make it easier to achieve a good joint between the turtle deck sides and the fuselage. This involved cutting several thin strips of 1/8” square scrap balsa and gluing them along the inside edges of the fuselage sides (Figure 2). They are offset in from the fuselage edges by 1/8”, providing a
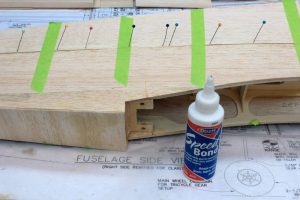
shelf against which the turtledeck sides will be glued and pinned. Glue and pin one side in place, against these strips, and tape it down securely with masking tape to dry (Figure 3). After it is fully dried, go ahead and glue the other side in place, and then pin it and tape it down also.
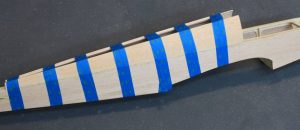
Once these joints are fully dry and both sides are glued in place, wet them with water, apply glue to the formers and stringers, pull the sides up tightly and tape them in place. The tape will not stick to the wet balsa, so the tape strips must run most of the way around the fuselage in order to hold tightly (Figure 4). The instructions suggest using thick CA for this step. I would highly recommend slow curing glue such as Deluxe Aliphatic Resin, which will give you more working time, is very strong and sands well.
I let this structure dry overnight then removed the tape and trimmed the sheeting flush with formers F-3A and F-6A (Step 9, Page 26). Then, using my 2” wide sanding block with 80 grit paper, I carefully sanded the top edges of the sheeting until they were flush with the stringers as shown in Step 10 and in my Figure 5. This will bring you to Step 11, Page 27. Before gluing the ½” x 2 3/8” by 26” turtledeck top in place, you may want to bevel its forward edge – it’s easier to do it now than after the top is glued on. Then draw a centerline as shown below Step 11.

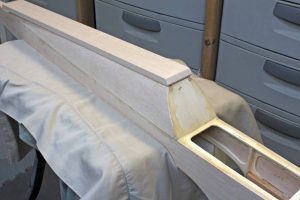
Finally, liberally apply Deluxe Aliphatic Resin, or another type of slow curing glue, to the tops of the stringers and formers and then glue the turtledeck top to them. Center up it up before the glue dries. Pinning it in place is not practical here because the wood is too thick. So I taped it in place with masking tape and further secured it with rubber bands. I placed them over the tape strips so they wouldn’t dig into the wood and leave marks (Figure 6).
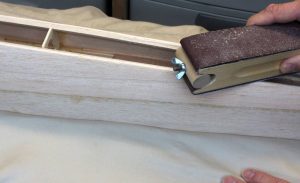
Mark the center lines on F-6A and along the top of the turtledeck then fasten it securely in either a vice or a Shop Mate (Figure 7). If you have a small hand razor plane this will speed the sanding process up. Also, if you trust yourself not to get too aggressive, you can also rough it out with a power hand sander (Figure 9). This is what I did and I found that it worked very well. Be sure to wear your respirator because this thing really generates a ton of balsa dust. Then finish it with your block sander and 50 or 80 grit paper.
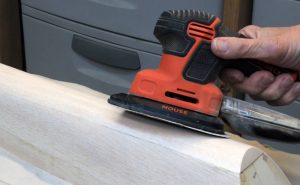
On the top of Page 27 the HINT suggests sanding the upper turtledeck with a strip of fine sandpaper. This is a good idea. To do this I held the fuselage in my Shop Mate and sanded the aft portion of the fuselage
(Figure 9), then turned it around and sanded the forward part. This does a very nice job of smoothing and evening out the turtledeck.
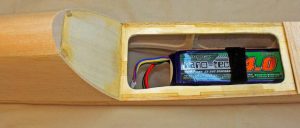
With the turtledeck finished and the battery tray in place, I test fitted the battery in the battery hatch (Figure 10). It fit like a glove.
That does it for this session. Next time we will build the removable hatch cover that will conceal the battery hatch and hold the canopy in place. We will go way off plan for this tricky build. For this you will need to pick up a sheet of 1/8” thick by 4” wide plywood.
Until then, remember to “take your time and enjoy doing a good job”.
LINKS
