The basic construction of typical wooden structures for airplanes is quite simple. The most important concept to consider is the accuracy of the structure. Be it a wing, tail, or fuselage, each piece must be built according to the original drawing or design. Parts should be assembled in a symmetrical manner and not be twisted, bent, or deformed. Basically, the left side has to be the same as the right side.
To ensure accuracy in model construction, proper tools must be used. Many of these tools will be discussed in future articles. For now, let’s consider how we are going to prepare the baseboard structure for gluing parts together. Parts must be attached to some type of jig to properly position the various parts, ribs, spars, bulkheads, etc.

The most basic jig that can be used for all of the structure is simply a building board. The building board is not generally just the top of a workbench. The building board must provide a means to hold the various parts of the structure in place, over the plans drawing, while the parts are glued to each other.
The building board must be very rigid so that it doesn’t warp, bend, or twist. This board should also be portable and easily stored when not in use. The most common method of holding the structure in position is with steel dress-maker pins or “T-pins.” Clamps of various kinds and masking tape are also used occasionally. I’ll discuss these items in future columns.
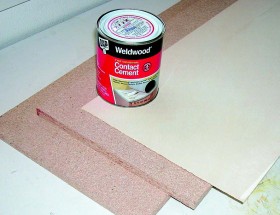
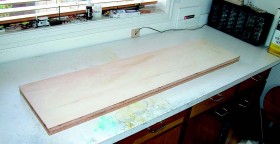
An excellent building board design that I have used for many years is a simple one made from two pieces of 5/8-inch particleboard and 1/8- inch SIG Lite-Ply. Two pieces of 5/8- inch particleboard are glued together with hardware store contact cement. A quart of contact cement costs about $5. Follow the instructions as supplied with the contact cement. The two pieces of particleboard make a very rigid structure and will not warp easily. Particleboard is readily available at home supply stores and quite low in cost, about $5 for two 5/8-inch thick pieces 12in. x 48in. size.

The problem with particle board is that it has a very hard surface that resists pins. Using a Lite-Ply building surface solves the pin attachment problem. Glue a sheet of Lite-Ply on top of the particleboard and you’ll have a very rigid and accurate building board with a soft wood building surface that pins can be stuck into. If necessary, depending on the type of pins and nails used, use a small tack hammer to gently force them into the Lite-Ply as you pin down parts over the plans.
The size board you need is determined by the size of the model you are building. A 12in. x 48in. long building board works fine for most projects. If a wider building board is required, have the home supply store cut the size you need from a 4ft. x 8ft. sheet. A 24in. x 48in. building board is about as large you will need for most models. If you have any questions or requests for future columns, email me at jerryn@radiocontrolflyer.com.
Good building!
Links
SIG Manufacturing
www.sigmfg.com, (800) 247-5008
 Fly RC Magazine WE LIVE RC
