 Fly RC Magazine WE LIVE RC
Getting Familiar With Plans
Words by Scott Copeland
For those new to the RC airplanes, all I can say is that “You’ve got it easy!” At no other time in the history of radio control aircraft has “the fruit” hung so low. The ARF and ready-to-fly market is enormous with offerings that range from micro-size indoor planes to giant-scale monsters. The cost of radio gear is extremely reasonable and the reliability of 2.4GHz has made radio interference a thing of the past. Not to sound like a grumpy old man, but back in my day, you had to earn your RC wings. When I got started 30 years ago, one not only had to deal with unreliable and heavy radio gear, but you also had to BUILD your creation from scratch! It was always a tremendous leap of faith to subject your new model to the RC fates and it was an accomplishment indeed if your project survived to fly again. If by chance your new creation suffered a mishap, you also had to know how to repair it rather than just order a new part online.
So why build? In my mind, there has never been a better time. If you learn to build, you don’t have to settle for the same old designs that are being churned out. Instead, you have at your disposal a limitless number of design and model options. Second, you have the satisfaction of having produced the airplane yourself and can give it your own personal character. Third, you have extremely reliable and inexpensive radio gear available so the odds of getting your model back in one piece (if it is built properly) are quite high. Lastly, you are perpetuating the tradition of aero-modeling. There is a feeling of satisfaction that comes from conquering the challenges of building your own airplane that one cannot experience any other way. Although the right of passage of building your own airplane is no longer necessary in present day, it is well worth the time and effort. As Dave Platt told me, “If I buy an ARF, I feel that someone else has already had all of the fun of building it!” If you are ready to venture into the world of building your own model, then let’s do it!
CHOOSING A SUBJECT
Don’t let the excitement of building overcome logic and practicality. A giant-scale P-38 with retracts, fowler flaps and simulated aluminum covering is not a good first building project. Don’t set yourself up for frustration and disappointment. Choose a subject with flat sides, flat bottom airfoil, and fixed landing gear. Consider the budget you have to work with and try to choose something that is easily affordable. It hurts a lot less to ruin a $2 piece of balsa versus a $20 piece of aircraft plywood. Size is another consideration. Although large models fly more like full-size airplanes, the cost of materials can be prohibitive, especially for your first build. An ideal first build is an airplane that is easily transportable so it can be flown often and enjoyed to the fullest. Choose a model which is built primarily of balsa and ply with no composite materials. Balsa and ply are easy to work with using common tools and are relatively inexpensive. Besides, since the birth of RC, these have been the raw materials of choice; and for good reason.
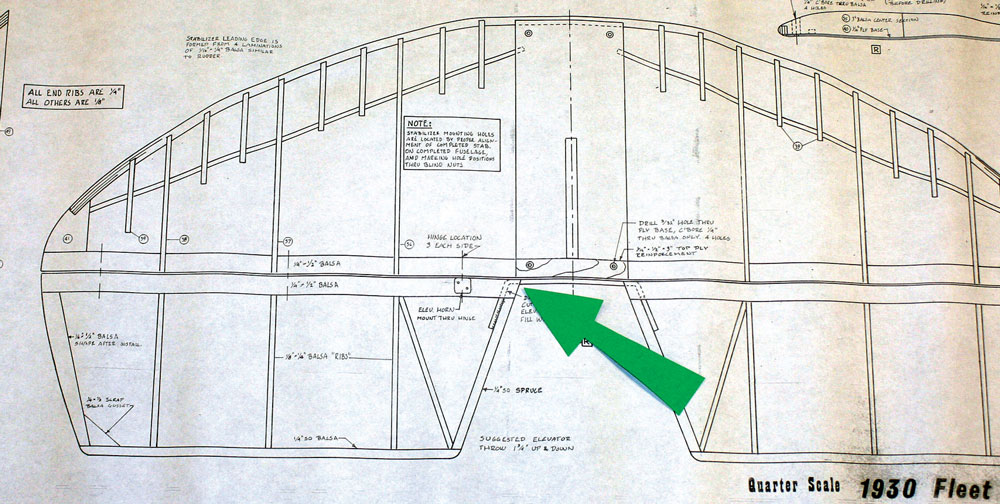
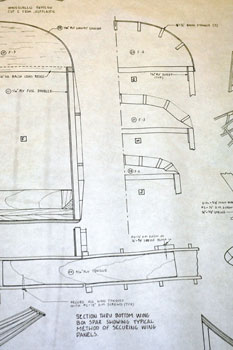
HOW TO READ PLANS
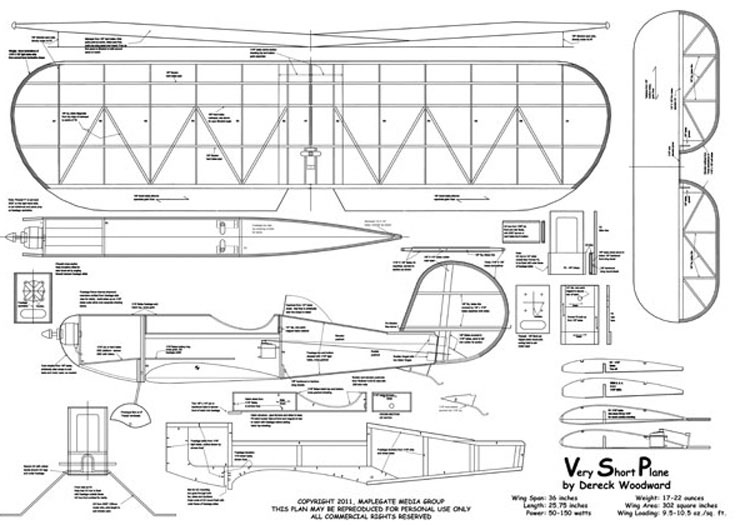
Once you have acquired an appropriate plan, sit down and study the details for a while. Try to visualize how all of the parts come together. This is a great mental exercise and will help decrease potential frustration once you put knife to wood. Remember that all of the parts are there for a reason. With time and experience, you may decide that you have a better idea of how to build the structure and you may very well be correct. At that point, congratulate yourself; you’ve become a designer as well! For our purposes, let’s talk about how to read a plan.
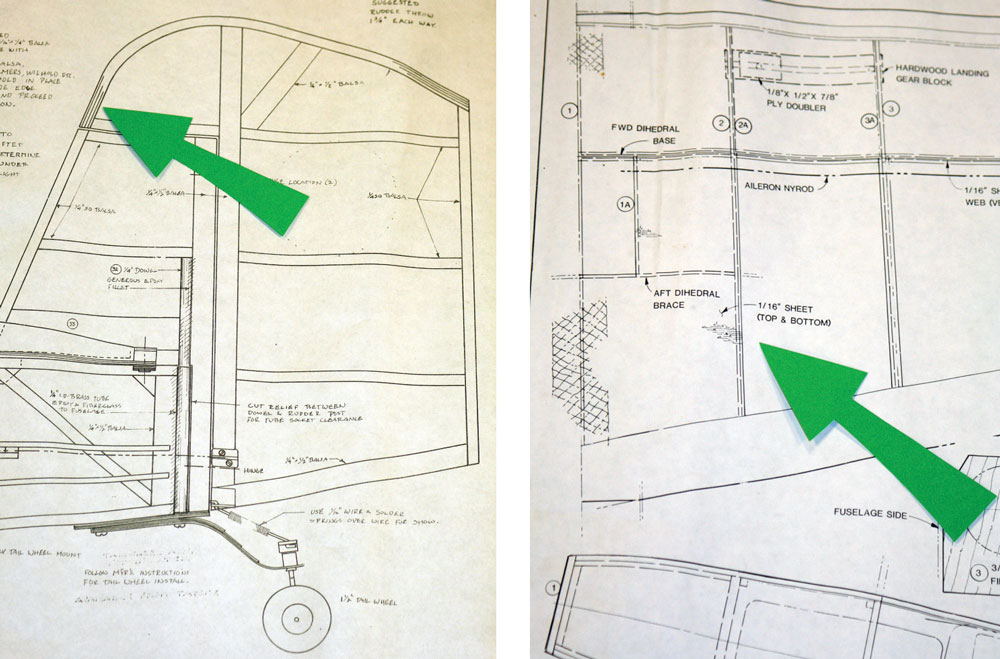
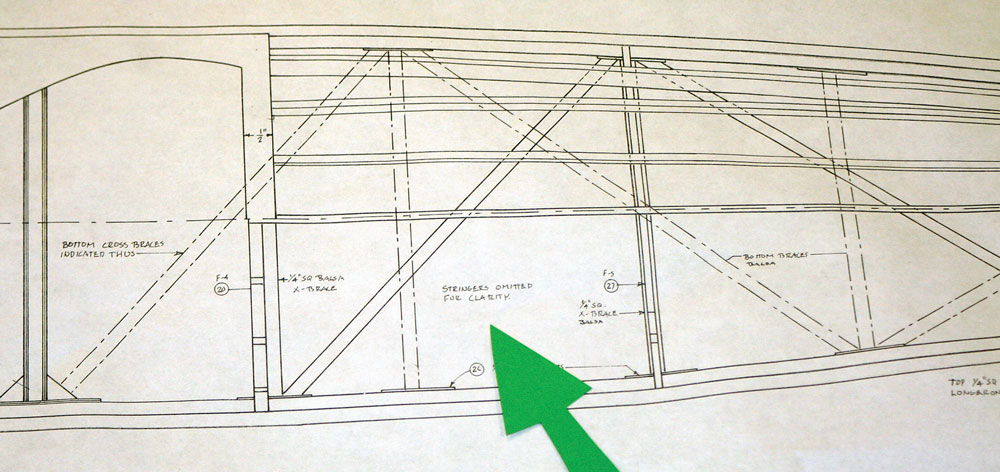
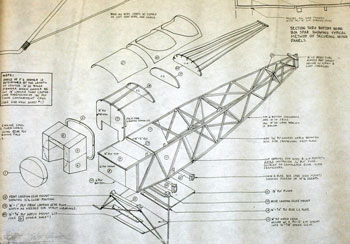
Most published plans are thorough and clearly show the dimensions and type of material used for each part. They also have clear explanation in areas which the designers assume may be confusing for the builder. As you absorb the plan information, try to visualize the order of parts assembly. If something is unclear in one plan view (for instance, the fuselage side-view) look elsewhere on the plan for clarification. Typically fuselages are shown in multiple views or in a 3-dimensional assembly drawing. If you have any questions, try to ask someone with experience or post your question on one of the many online forums. There is an unfathomable wealth of information and advice available online, but, like all things, you will have to decide if the information is correct for you. Everyone has an opinion and they are usually convinced that theirs is absolutely correct. One frustration with plans is the lack of standardization. Each designer has a unique way of representing their design and describing the building steps. CAD-drawn plans tend to be very clean (sterile), but sometimes lack clear details such as wood grain. Traditional hand-drawn plans typically show details like wood grain, but can have slight inaccuracies. Have fun with interpreting the plans and don’t let the inconsistencies turn you off. One of the joys of life is variety, so celebrate it. Next month we will discuss balsa and plywood properties, material selection, cutting your “kit”, and start sticking parts together as we begin building the VSP which is available as a free plan on the flyrc.com website. Cheers!
