We have made a few changes in the way I’ll be presenting A Master’s Workshop from now on. Perhaps the most important of these are intended to make it easier for you to relate the material we include in Fly RC’s print column with my original stuff as prepared for my on-going blog on www.rcmodel.com. (Bob Benjamin’s Old Time Model Airplane Workshop) One of the perpetual problems facing magazine editors and their contributing writers is that it’s almost impossible to present all the material relating to a particular topic in the page space available. Trust me, I’ve been writing for one model airplane magazine or another for thir- ty years and I know all about how one more photo the editor didn’t have space for would have answered a bazillion questions that we didn’t anticipate.
Not anymore! What you’ll see here in my column will be just the opening pages of a continuing story. When you’re done reading your nice new fresh-smelling copy of Fly RC , turn on the computer and go to www.rcmodel.com. Right in the mid- dle of my homepage you’ll see the latest blog entry with links to every earlier entry as well as all the other blogs I’ve posted on other models. It will never be possible to include all of it here in the print pages…there will always be more to see.
This month, I’m getting deeper into the Return of the TigerKitten story featured in the May 2012 issue of Fly RC. My old design is back in the form of a laser cut short kit from Premier Balsa Kits (www.premierbalsa kits.com) and I’m building a new one from one of their pre-release samples. Let’s head into the shop and pick up where I left off last time.
CONSTRUCTION
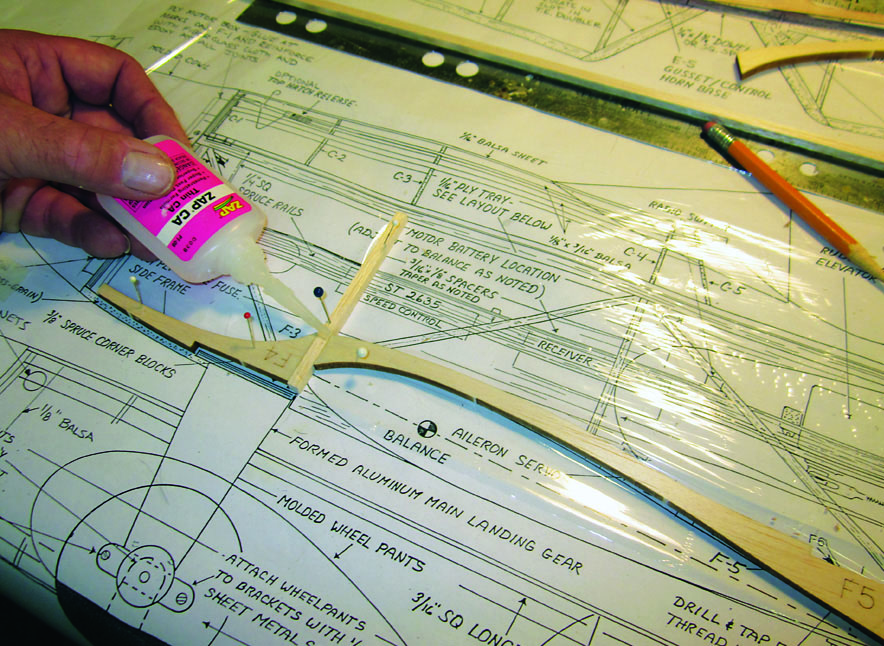
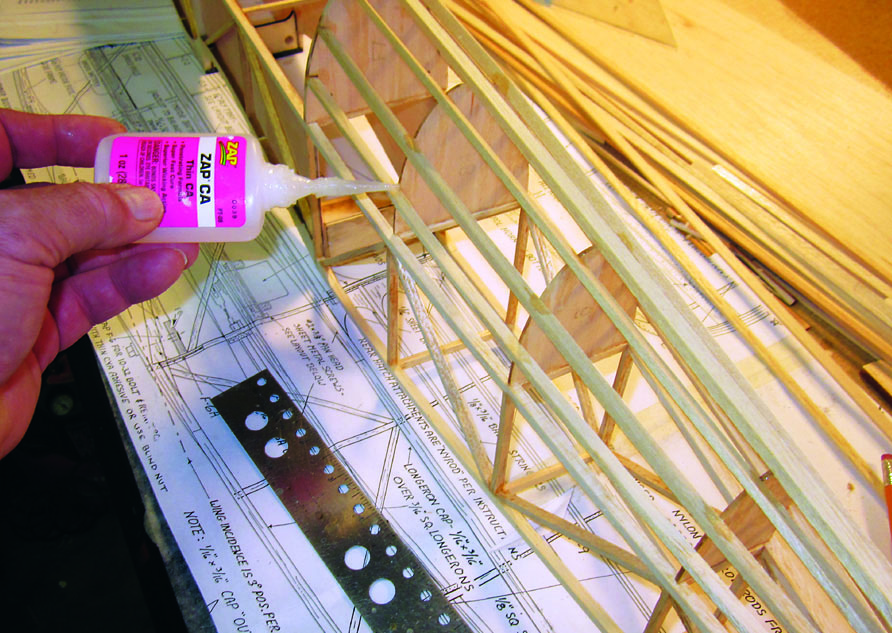
The TigerKitten fuselage construction is about as traditional as it gets—two identical side frames built up from balsa strips with a few shaped pieces in critical areas, but we get to combine state of the art stuff because those shaped pieces are laser-cut. We could also use a more traditional adhesive like aliphatic resin glue that is applied to each joining surface before the part is assembled in position, but again I’ve chosen to go with the newer approach and use ZAP cyanoacrylate products which permit “dry” assembly to ensure that everything is aligned perfectly before I stick any of it together.
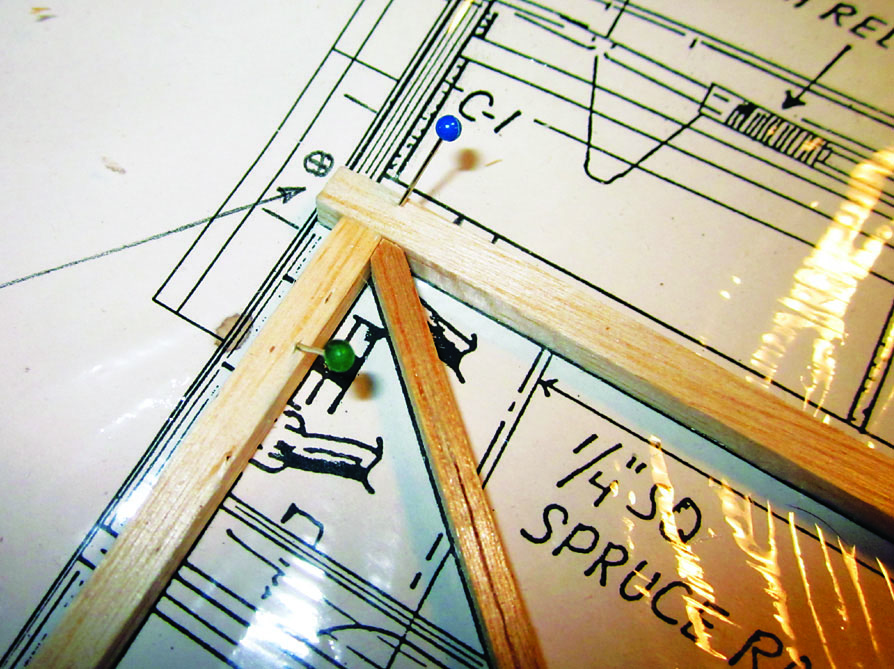
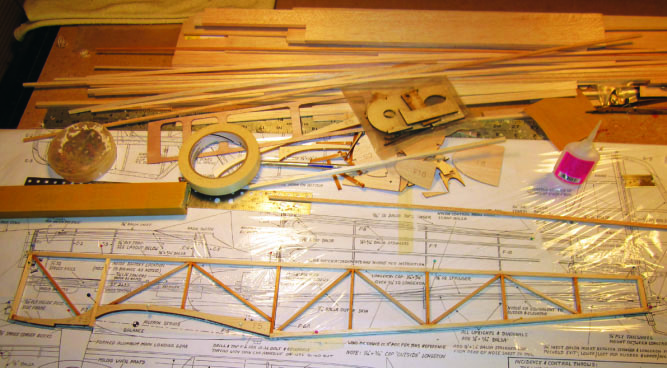
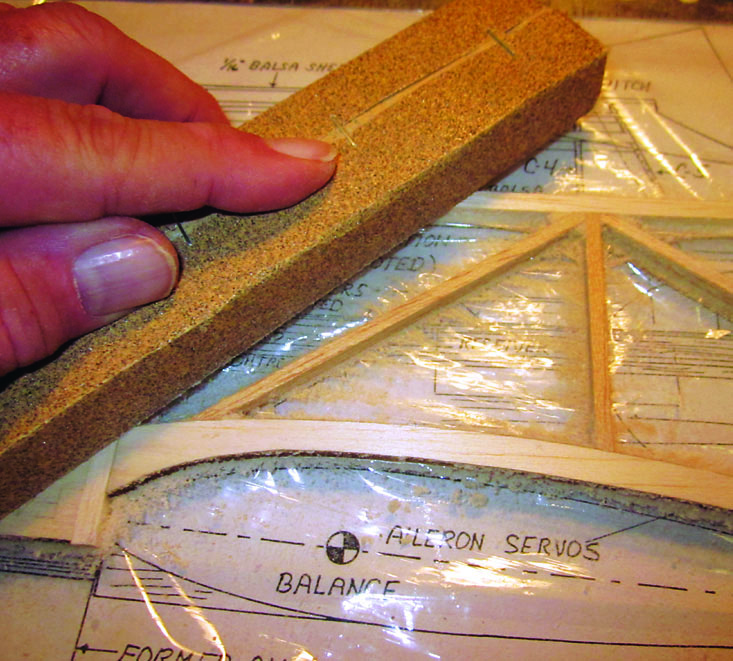
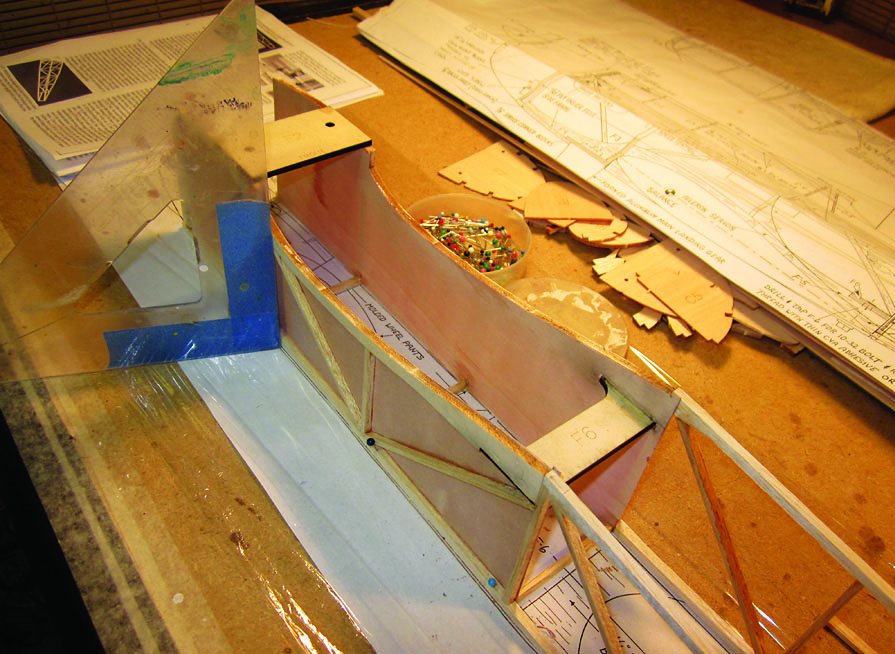
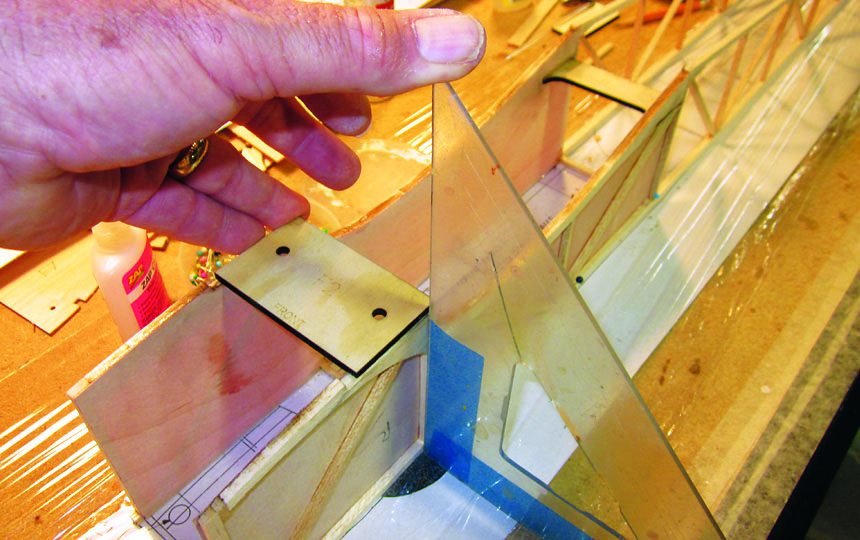
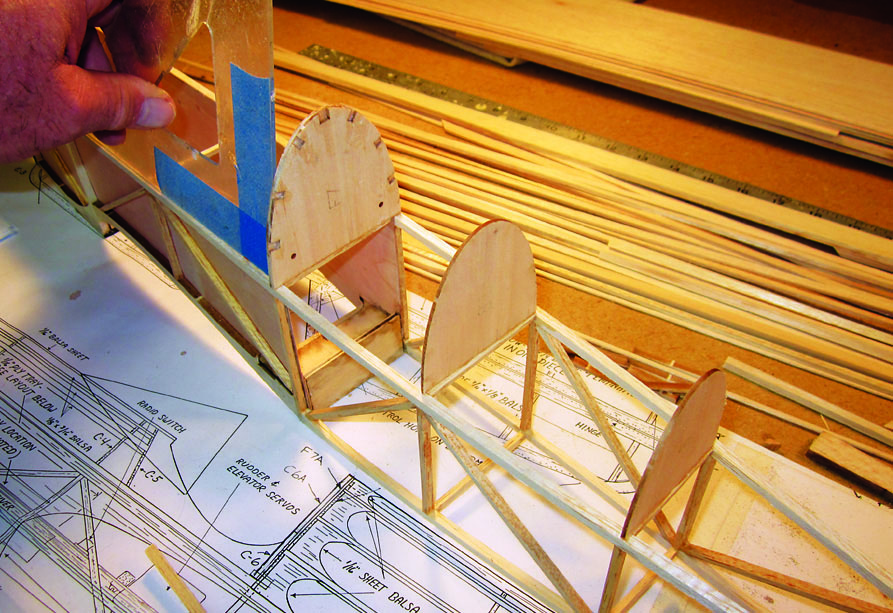
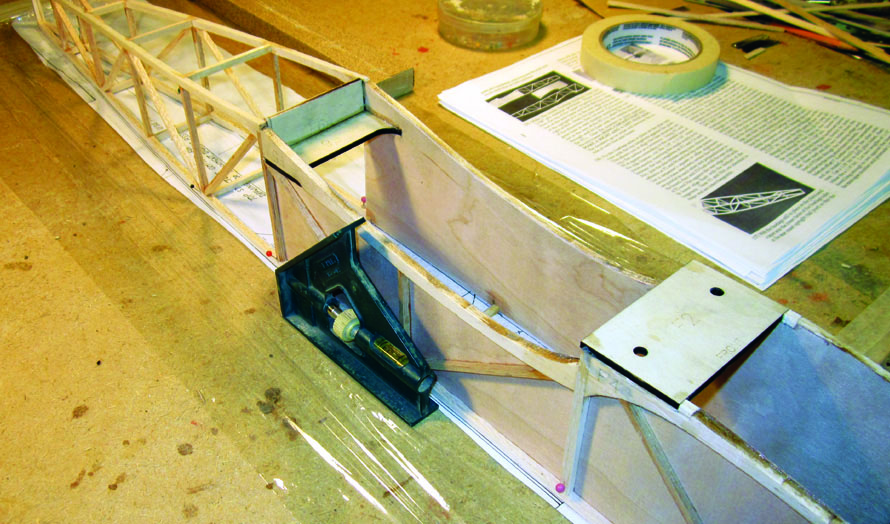
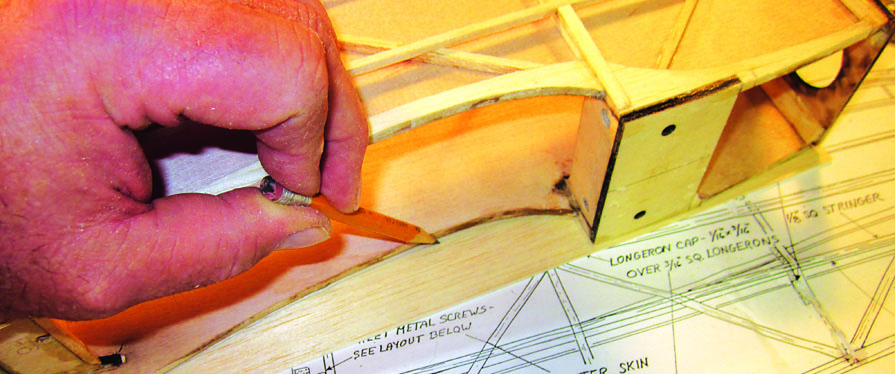
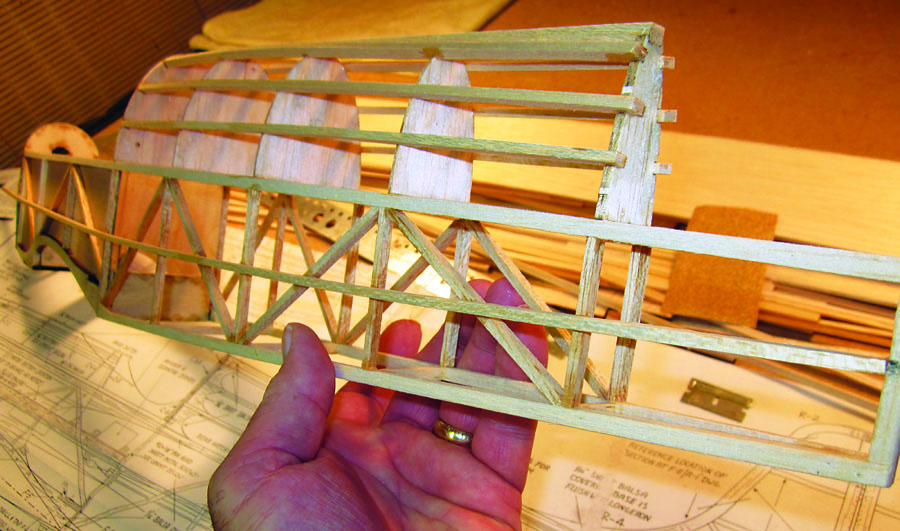
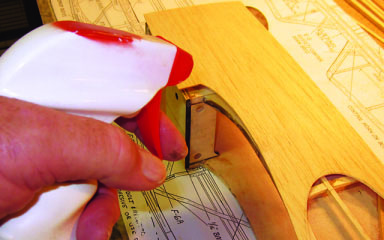
I chose to begin laying out the first fuselage side frame by positioning the laser-cut balsa wing saddle and landing gear mount reinforcement. These two parts are positioned in reference to a 3/16-in. sq. balsa upright which I have fitted in place here. Thin (instant) ZAP is the adhesive of choice here as it allows me to locate and pin each of the parts involved in exactly the position I want, then add adhesive.Here I have fitted the top longeron to the 3/16-in. sq. balsa upright that supports F-1, as well as the 1/8-in. x 3/16-in. balsa diagonal brace that lies directly behind it. This is an example of the way you should make all the joints in a model structure fit. It doesn’t make sense to have the advantage of precision laser cut shaped parts and not have the joints you fit yourself match that level of accuracy.I have all the longerons, uprights, and diagonal braces in place along with the laser cut components… this defines the structure of the side frame.The trick to building really accurate fuselage side frames is to block sand them aggressively while they are still pinned to the building board. Here I am using 80-grit production paper, which is coarse enough to neatly cut through all the hard spots of glue without compressing the balsa. The important thing here is to sand off enough material to get a flat, true surface. Don’t leave ridges or low spots. I’m sanding the second side, still in place. When it’s done I’ll remove it along with the top sheet of plastic wrap and repeat the operation with the first side.I added the laser cut plywood landing gear mounting plate and the rear wing mounting bolt plate (F-2 and F-6) as well as the 3/16-in. sq. balsa crossmembers that correspond to their positions between the top longerons. This is probably the most critical part of the fuselage construction where correct alignment is concerned.Got it right! I’m double checking that the fuselage side frames are assembled square to each other and the building board (which is my reference for all alignment) before I move to the tail.The formers that create the raised portion of the rear fuselage (the “turtleback”) are added now. I am using a square to make sure F-7 is perpendicular to the top longerons.I’m using a bubble level to be certain the fuselage frame is squared off before I go on to work on the wing attachment structure.I’m using an older model Robart incidence meter to check that the wing is set at an angle of three degrees positive. Remember that the entire airplane is assembled upside down, so the meter will read out at a negative value.With the clamped-up assembly turned over I can mark the cutting line along the wing saddle and the rest of the bottom edge of the fuselage onto the side sheet blank.The top center rear deck stringer is 3/16-in. sq. balsa. All those on the sides are 1/8-x 3/16-in. balsa, and it’s best to add them one at a time, alternating from one side to the other to minimize the chance of pulling a twist into the structure. I used fast ZAP here, holding the stringers in contact with each former in turn to get the alignment exactly right.All the rear deck stringers are in place now.This side sheet is going to have to assume a gentle compound curve to fit tightly against all the underlying structure. The easiest way to get a sheet of balsa to do this is to wet it with a light spray of water only on what you want to be the outside surface of the bend. The sheet will automatically curl away from the wetness and become more pliable at the same time.
SUMMARY
The fun doesn’t end here. Go to www.rcmodel. com to see what I did next. As for next time, I’m going to speed up the action on the TigerKitten story. Over a year ago I made a good start at building a big (100-inch span) Stinson Reliant from the Top Flite Gold Edition kit as an electric power conversion, then stopped working on it to finish other projects. With all the good stuff going on in my shop, my builds got ahead of my blogs. In fact, the TigerKitten you see here is already finished and flying. In my next column I’ll give you a look at the finished airplane, you can catch up on all the rest of my building blogs on-line and we’ll clear the bench for the big Stinson.
 Fly RC Magazine WE LIVE RC