 Fly RC Magazine WE LIVE RC
Words and Photos by Gary A. Ritchie
Last month we began building the hatch cover for our Ultra Sport 60. Now we will finish it up.
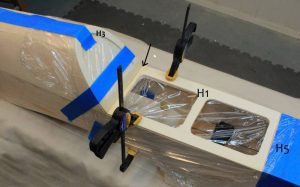
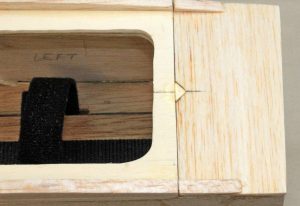
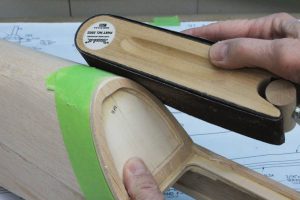
Let’s get started by gluing H5 in place then removing the rest of the hatch structure from the fuselage. Then lay a sheet of Saran wrap from the front of the turtledeck down to the top of the fuselage all the way forward to H5. Tape it in place. This will keep the hatch from getting glued to the fuselage. Glue the base of H3 to the rear end of H1 using epoxy. Make sure they fit together properly then tape them together until the epoxy dries (Figure 1). Then, using fast CA (I used Deluxe Roket Hot), glue the H2 strips to each side of H1 (Figure 2). Make sure that the tapered end is forward. It will extend about 1 inch over the sides of H5. Then cut the tapered ends of both H2 strips flush with the back edge of H5 (Figure 3).

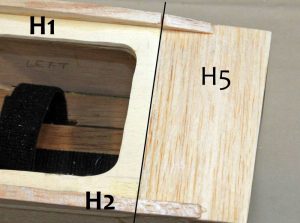
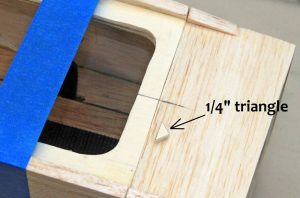
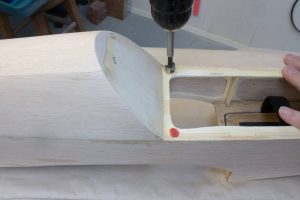
Now we are going to fabricate the mounting points for the hatch using a plywood joiner and two magnets. First, place the hatch cover frame on the fuselage, straighten it up, and then determine the center of H5 and the hatch cover frame (Figure 4). Mark it with a pencil line. Cut a ¼ x ¼ x ¼” triangle from scrap 1/8” plywood. Remove the hatch cover frame, hold it down with a metal weight and glue the triangle to the forward edge at its center (Figure 5). Notch a tiny triangle into the rear edge of H5 and fit the forward edge of the hatch frame into it (Figure 6). This will hold the forward edge of the hatch cover firmly to H5.
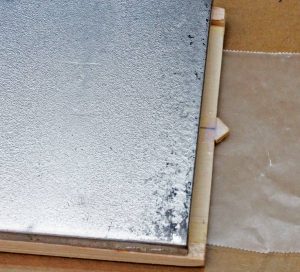
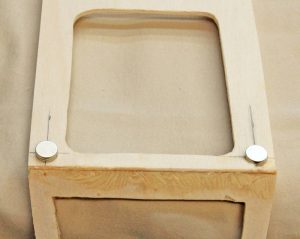
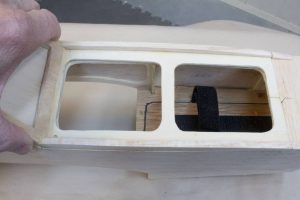
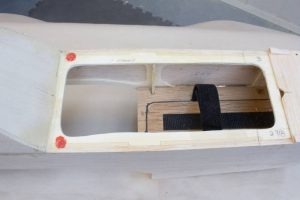
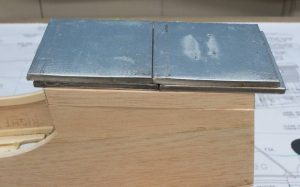
We will use two sets of neodymium 3/8” diameter powerful rare earth magnets (available at TOTALELEMENT) to fasten the rear of the hatch. Place them down at the lower rear edge of the hatch frame (Figure 7) and mark their positions. Then very carefully drill out a ½” diameter hole at each position. Try to get the hole the exact depth of the thickness of the magnet. If you have a Forstner Bit use it here. Test this with a wooden or plastic straight edge to make certain that the tops of the magnets are exactly flush with the surface of the plywood (Figure 8).
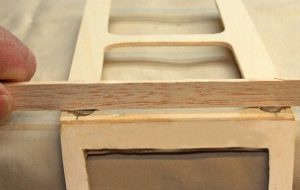
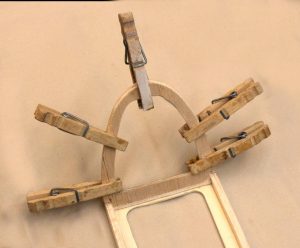
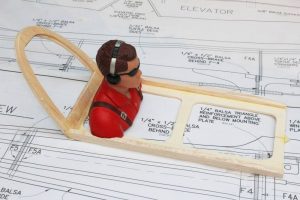
Using H3 as a template, cut a piece of 1/8” balsa to fit exactly on top of H1 and cut it out. Then glue it to H3 and hold it place with clamps to dry (Figure 9). Place the hatch cover on the hatch, tape it in place and sand the edge of H3 flush with the fuselage with 120 grit sandpaper (Figure 10). This will increase the thickness of H3 to establish a stronger glue joint when the time comes to glue the plastic canopy in place on the hatch. If you plan to use a pilot figure in your Ultra Sport (highly recommended) now is a good time to get it fitted in place. The pilot figure should be no wider than 3 3/8” or taller than 3 7/8”. Set it in place near the rear of the canopy. You may have to trim the sides (H2) a bit to fit the pilot in place (Figure 11). Do not glue it in place yet.
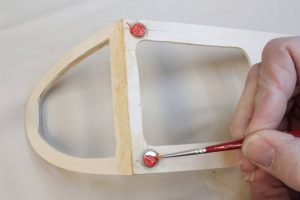
Now we will fasten the magnets in place on the fuselage. These will engage the magnets on the hatch cover, so they must be aligned perfectly with them. A good way to do this is to paint the magnets that are already in place on the hatch cover (Figure 12). Then place the hatch cover on the hatch and carefully slide it directly into place (Figure 13). When the hatch cover is removed, the locations will be marked with paint on the fuselage (Figure 14). Then carefully drill out the holes for the magnets with your Forstner bit (Figure 15) and set the magnets in place. Make certain that they attract the magnets on the hatch cover! These magnets, as those on the hatch cover, must be exactly flush with the surface of the top of the fuselage. Glue them in place with epoxy. Test fit the hatch cover in place – it should fit perfectly in place. To remove it, simply slide the rear of the hatch cover slightly to the side to break the hold of the magnets.
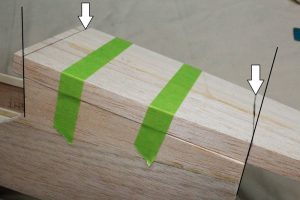
Our final step will be to finish off the nose and prepare it for building the fiberglass cowling. Here, again, we go off plan. Glue the two balsa Chin Blocks together lengthwise (instructions Page 28, Figure 8). When the chin block has dried, lay the fuselage on its back and tape the chin block on it as shown in Figure 16. Then draw a pencil line across the front and back edges. Maintain an angle on each edge that is in line with the front and rear edges of the fuselage. Cut the chin block off along these lines and glue them in place on the lower forward fuselage (Figure 17).
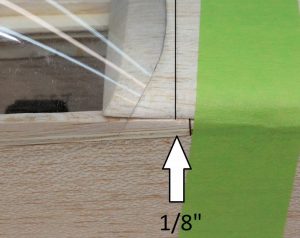
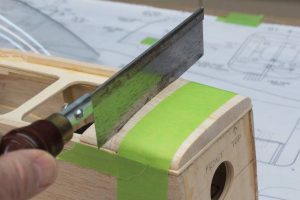
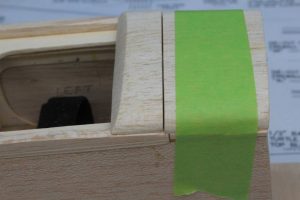
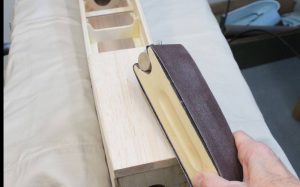
Now, find part H4, which we fabricated from the Top Front Bock in last month’s column (Figure 12). Turn the fuselage right-side up and lay H2 on the front. Tape it down with the forward edge flush with the front of the fuselage. Slide the hatch cover into place then measure back 1/8” from the forward edge of the hatch cover and draw a line across the top of H2 (Figure 18). Then carefully cut along this line with a razor saw (Figure 19). Finally, glue the forward part only of H2 to the forward edge of the fuselage. Do not get any glue on the hatch cover or the rear section of H2 (Figure 20). When the front of H2 is glued in place the hatch cover should slide into and out of the 1/8” gap easily and cleanly. Do not glue the rear section of H2 or the canopy in place on the battery hatch yet. We will do that during the covering process. Put the hatch cover, canopy and rear edge of H2 away in a place where you can find them later. Finally, sand the nose of the fuselage to its final rounded form with 120 grit sandpaper (Figure 21).
Next time we will build a fiberglass cowling. To prepare for this step you will need the following supplies: block of Blue foam (carried by hardware stores – I got a small block from a fellow model builder), a sheet of ~2 oz. fiberglass cloth, 3M Super 77, several 1/2” throw away brushes, #200 and #400 wet sandpaper, and a bottle of Deluxe Materials Eze-Kote (available at Horizon Hobbies). Until next month, remember to “take your time and enjoy doing a good job”.
LINKS
