 Fly RC Magazine WE LIVE RC
Tried-&-True Techniques
Ive been a sport modeler for 30 years. Along the way, I have discovered some simple techniques for making hatches. Here are a few that Ive relied on. Given the expansion of onboard widgets of all kinds, you just may find yourself wanting some hatches to better access electrical connections and components on any brand of ARF. First, lets look at how the designers at Goldberg and Great Planes paved the way, and then well look at a very simple magnetic hatch you can build in 20 minutes.
| 1 | 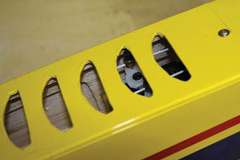 |
This underbelly hatch on a Carl Goldberg Electra has cooling vents and a simple design. A light-ply tab on the inner surface of one hatch end slips under the bottom inside fuse wall, and a small, self-tapping screw anchors the hatch on the forward end shown. Its a solid functional design, but it takes a few seconds to release the hatch. |
| 2 | 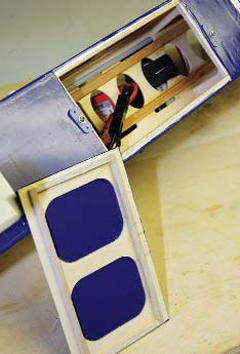 |
This underside hatch on the Great Planes Electristar Trainer (a great first model or all-around sport model) shows the use of a raised square frame on the inner hatch surface that mates with the hatch inside perimeter to keep it securely in position. Note that the outer surface is as wide as the fuse width and uses nylon swivels that act as keepers to lock down the hatch. They are easier to release than screws. |
| 3 | 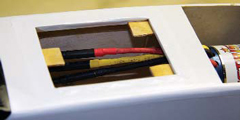 |
On a project that equips the Great Planes Electristar with onboard data-gathering gadgets, I needed access to a lead that fed power from the ESC to the motor. Here, the hatch is not as wide as the fuse, and it will be held down with inexpensive, 1/8-inch, rare-earth magnets from RadioShack (item no. 64-1895/pack of two). Note the three, light-ply tabs that the hatch will rest on. |
| 4 | 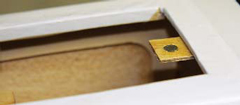 |
When you cut into the balsa wall and the hatch width does not reach the support of the fuse sides, you have to glue in a strip of balsa or light-ply that runs along the inside left and right edges of the hatch opening to form rims. Then you seal down a square strip of covering material that covers the upper area and wraps around these support sticks, folding into the hatch opening. |
| 5 | 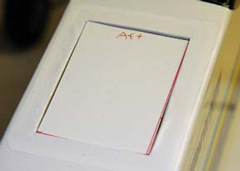 |
I find it handy to first measure the hatch dimensions and create a light cardboard dummy hatch to verify that I have the size accurately defined. Then I place this on the back of balsa stock and transfer the outline with a pen. |
| 6 | 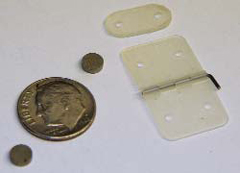 |
Note the size of these strong rare-earth magnets tiny. If you go the nylon keeper route, you can make them out of nylon hinge stock (as shown); Du-Bro sells these and also a spring-loaded hatch switch for those who want a deluxe installation. |
| 7 | 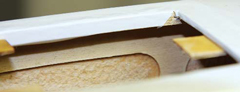 |
Drill holes that are slightly smaller than the magnets, press-fit the magnets into the holes, and then lock them in with CA. The strongest pull comes when opposing magnets are in contact with each other. You may find that, at times, when you try to separate these powerful magnets, they want to pull out; the answer is to slightly distance them from each other by painting them with epoxy or using other methods to reduce their holding power slightly. |
| 8 | 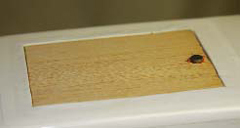 |
I position the hatch in the opening, place the magnet where it locks onto the other magnet and mark the position. I score the underside of the top magnet, Zap it and press it into the balsa so that it is separated by several thousandths inch from the bottom magnet. That, along with the covering on top, effectively locks the top magnet into position. |
| 9 | 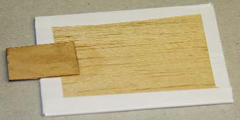 |
Underside view of the new hatch. |
| 10 | 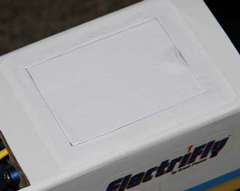 |
The finished hatch is functional and will not be blown off when you fly aerobatics. To increase the locking force, press the top magnet farther into the hatch balsa and wick thin CA into the wood (do this before covering). Some pilots also mount a small horn or another hatch handle to open the hatch. Now, you are all set to add hatches to any flat surface on your airplanes! |
Links
Carl Goldberg Products, dist. exclusively by Great Planes Model Distributors
www.carlgoldbergproducts.com (800) 682-8948
Du-Bro
www.dubro.com (800) 848-9411
Great Planes Model Mfg., dist. exclusively by Great Planes Model Distributors
www.greatplanes.com (800) 682-8948
