“You’re gonna put working cabin doors on that new scale job you’re building? And, you’re planning on taking it out and flying it, and flying regularly, not just once to prove you dared to? Yeah, right…”
Once upon a time, admitting to something like this would instantly assign you to the ranks of those gawky, nerdy guys whose model airplanes seldom even made it out of the basement into daylight, and if they did, those special features fell apart or otherwise failed during their single trip to a flying field. Ever since the beginning, way back to when the only practical way to make and fly a scale job was to build a control-line model, when only a few consummate masters had the skill and nerve to turn loose accurate free-flight scale models and reliable multiple control RC was the stuff of dreams, guys who got to fly their scale models a lot learned early on to keep it simple, build it tough and keep it light! Things like working doors could be counted on to break, fall off or otherwise embarrass you even worse by causing some sort of freak crash. But, what about those highend competition scale airplanes at places like Top Gun? They do that stuff, and it works.
That part is right. If you go to a competition like Scale Masters or Top Gun and your canopy doesn’t slide or your doors don’t open, your static (scale fidelity) score will suffer. Scale features like that are part of what adds huge amounts of time and effort to serious scale aeromodeling. You really have to want to do it. So, how do they get away with it?
I have done those things and I can tell you that there is a serious feeling of accomplishment that goes with something like taking your scale job out to the flight line in front of all the judges, having operating doors serve as your only access to radio switches and so on, and having it work every time under all that pressure. It’s not messing around at the field on Saturday stuff but things have been happening in the world of model airplanes that make such an investment a whole lot more practical than it used to be. I’ll address three.
First, reliable radio control is the obvious part. The stuff we have now is so good we take it for granted, especially since the appearance of 2.4GHz radios has pretty much eliminated RF interference as a cause of crashes, and it has come to make a lot of sense for an aeromodeler who buys and maintains top quality equipment and learns to fly well to worry a whole lot less about the inevitable crash that used to loom in every model airplane’s future.
Second is one you might not think of right away. It’s now very practical to build and fly larger model airplanes. Building things like working doors that you can depend on not to fall off makes a lot more sense when you can use off-the-shelf hinges and real world 2-56 or 4-40 nuts and bolts instead of making exotic micro hardware under a magnifier.
The third factor is the one you know I’m going to talk about. Electric power and scale model airplanes are the perfect match for each other. We already know that power, weight and duration have ceased to matter as problems; now we can take advantage of no exhaust, no vibration, no seeping oil, to encourage building those cool working details that make you feel good just looking at them. That’s what’s going on here with the Stinson SR-9. The engineers at Top Flite knew about this stuff when they realized that working doors were pretty much the only practical way to deal with wing panel attachment without making compromises that would mess up the external scale appearance of the model…and…they weren’t even taking electric power into account. With all that going for me I’ve decided to go all out and add inset door and window frames, sheet metal outer door skins and scale-looking working door latches. Let’s build some doors.
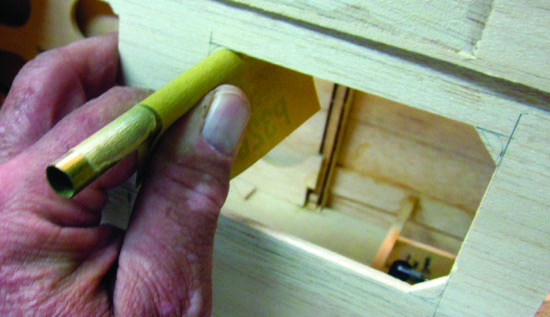
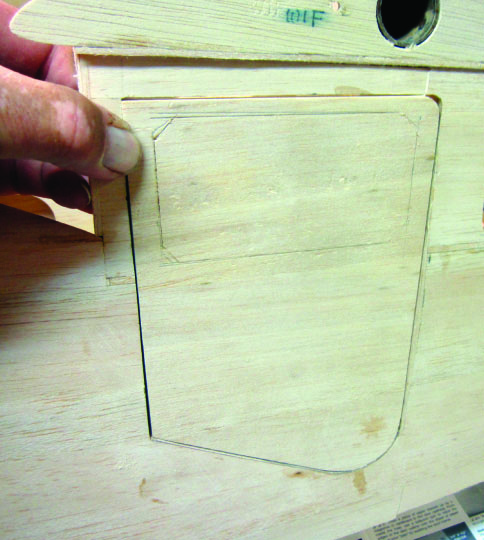
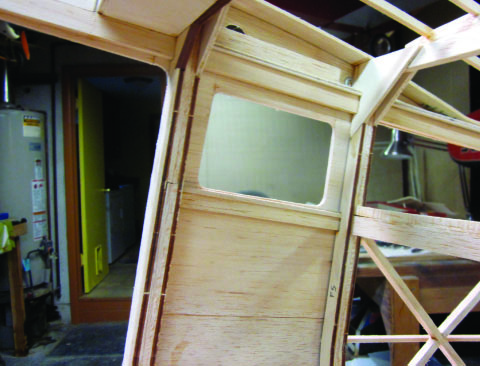
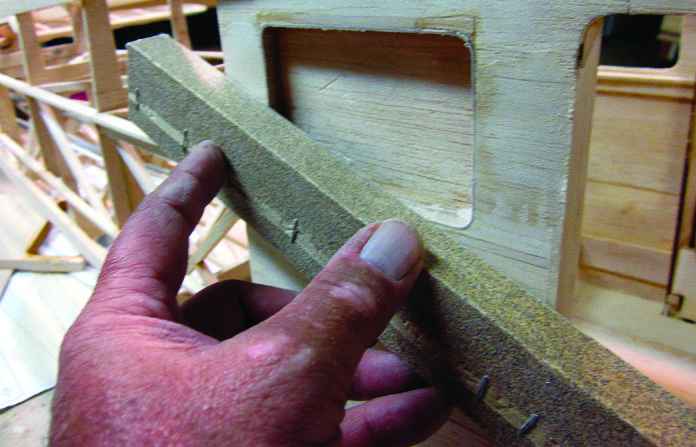
This shot is a carry-over from our last session. I’m using another custom sanding tool to finish an accurate quarter circle outline on the left rear window frame. At this point you can see the still-intact fuselage side sheeting in place behind and to the left of my hand. The instruction book provides detailed directions for marking the door location from the inside and cutting out the opening.
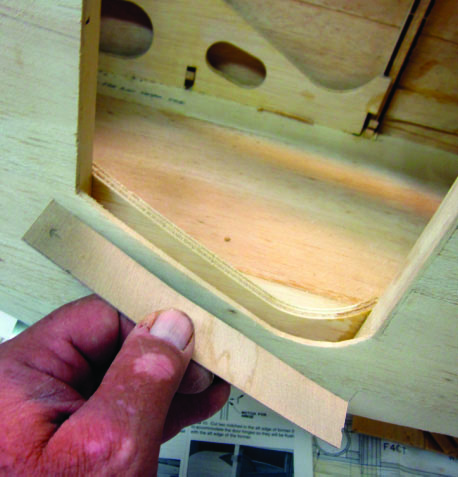
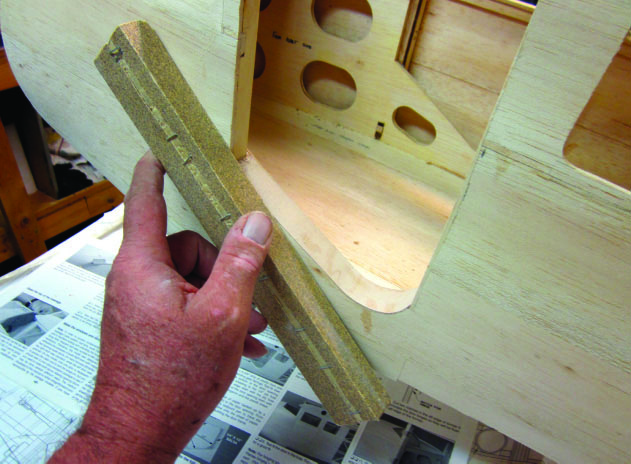
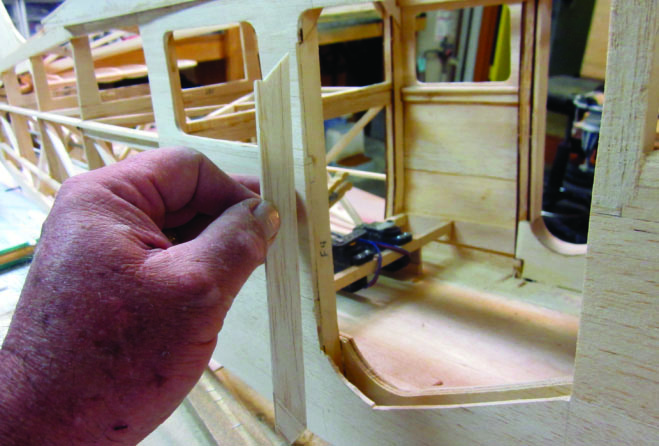
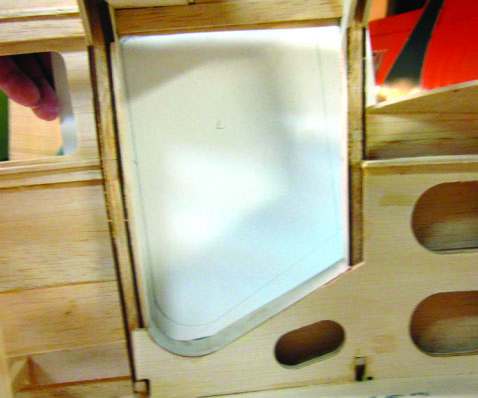
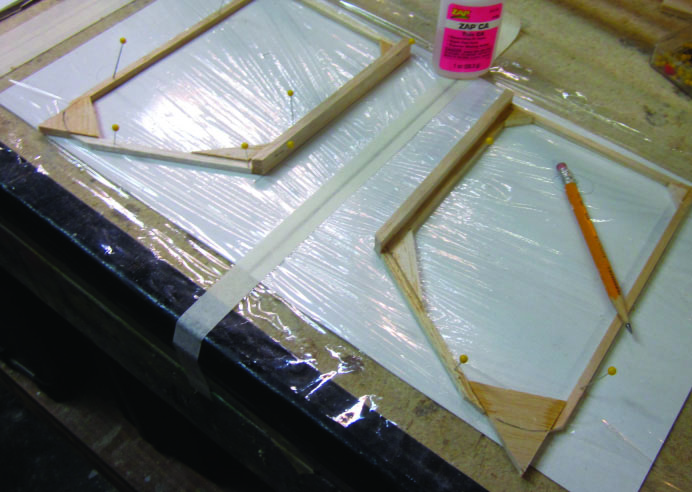
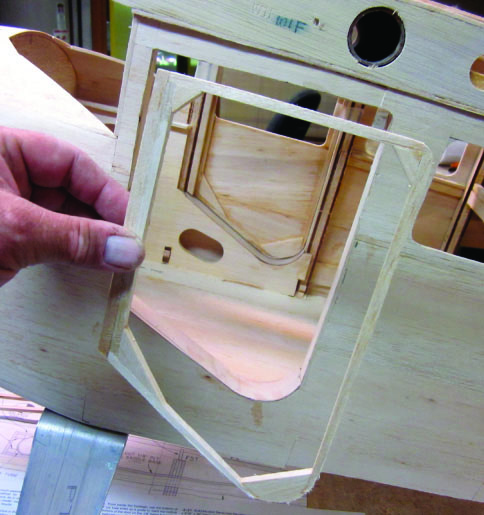
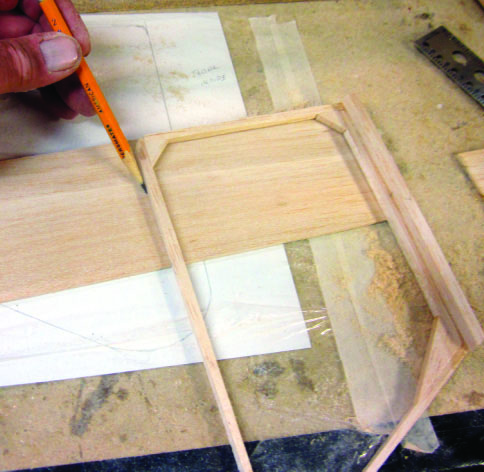
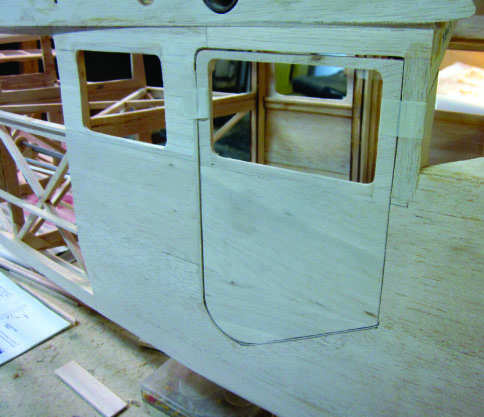
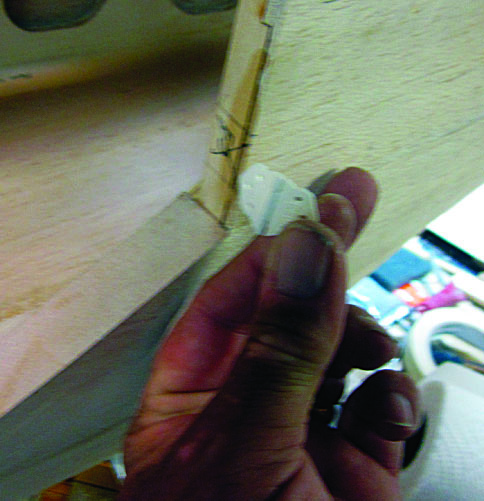
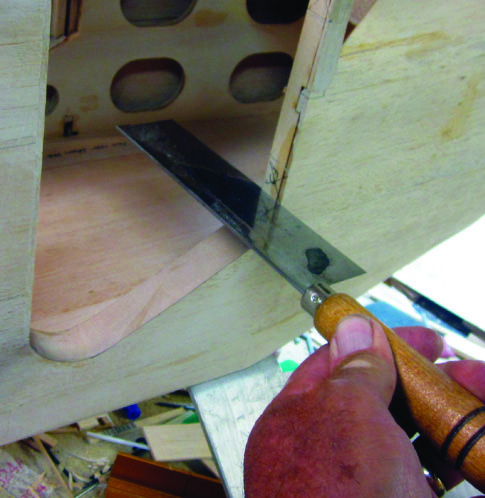
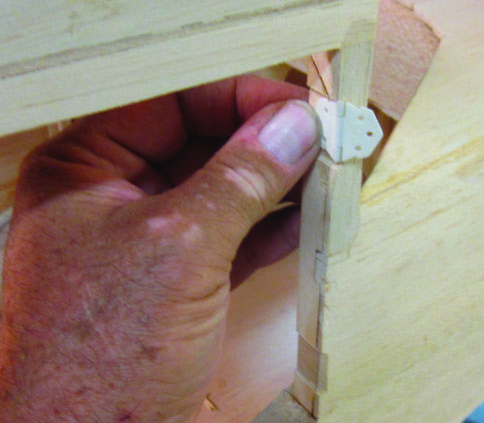
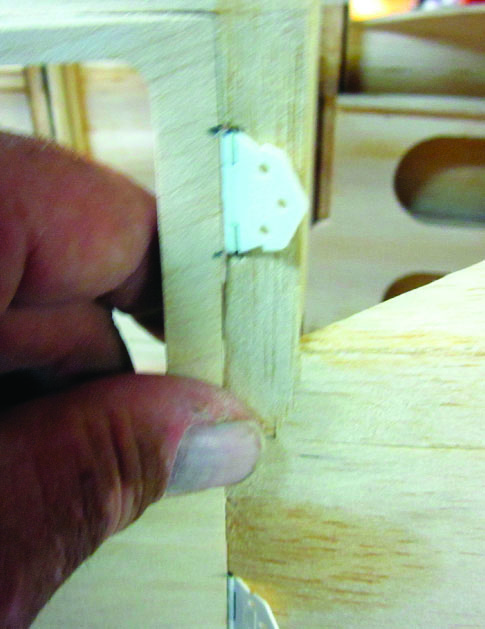
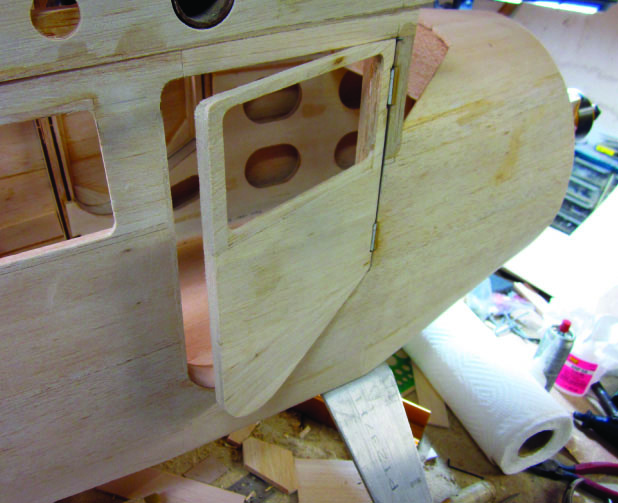
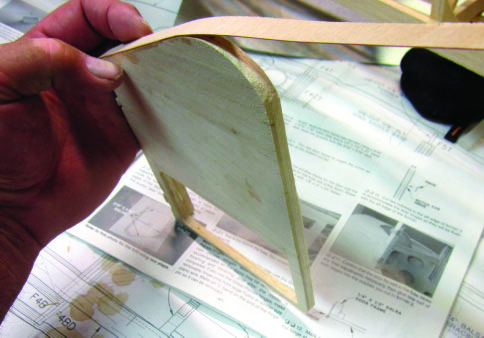
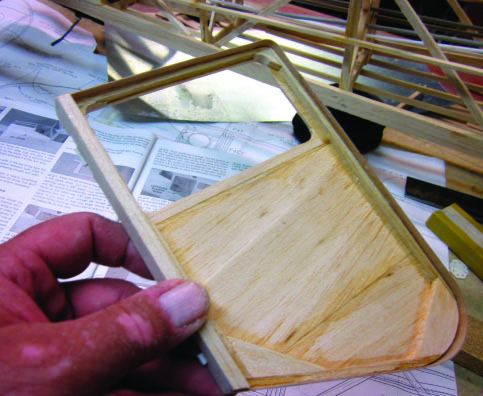
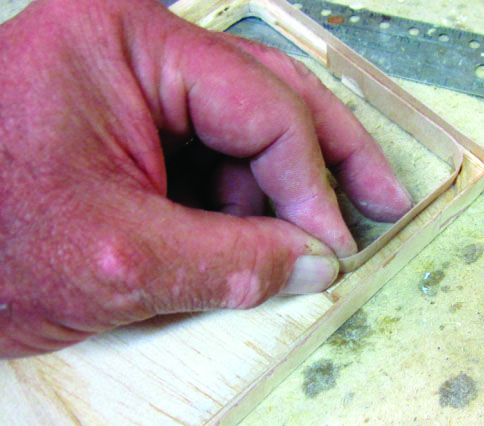
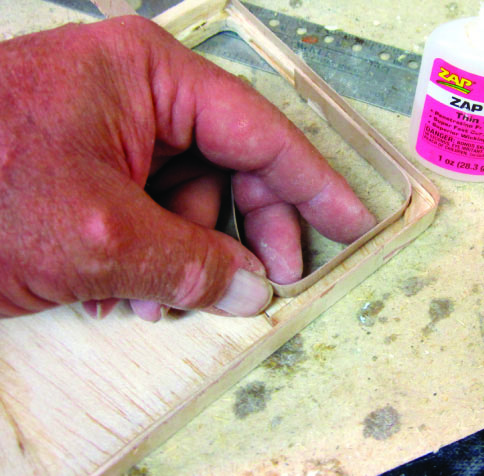
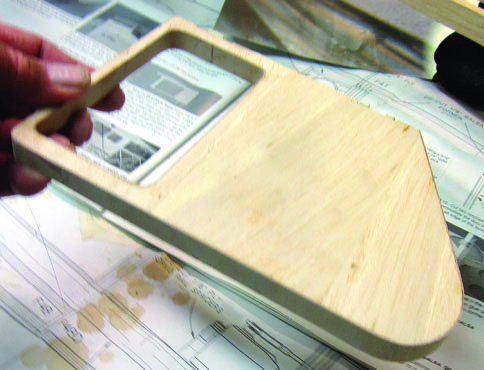
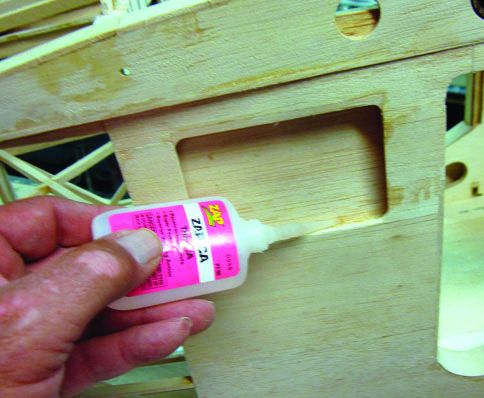
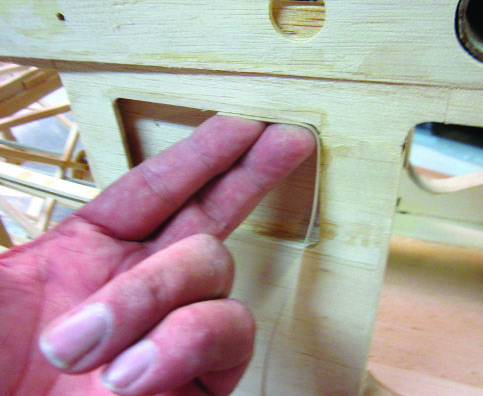
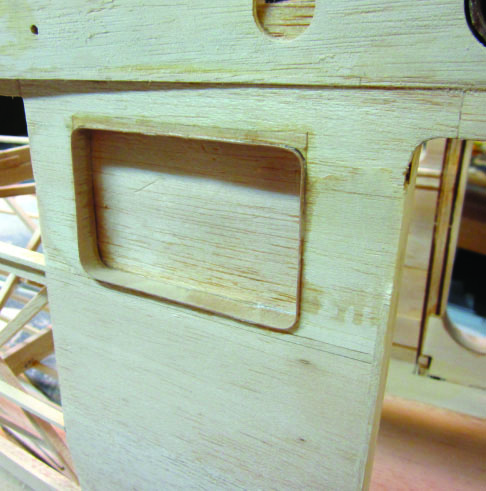
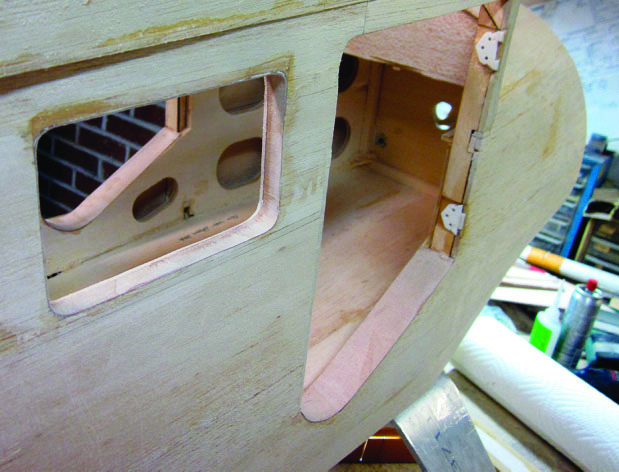
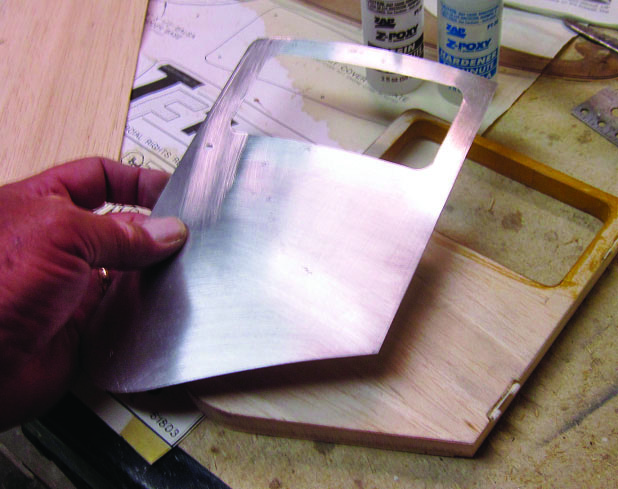
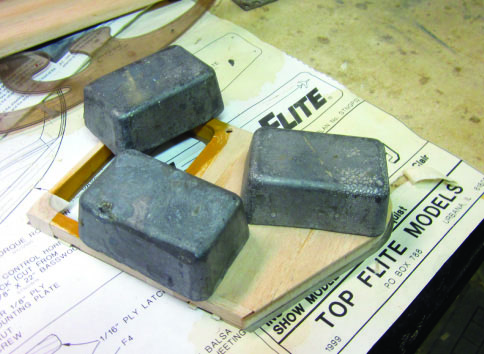
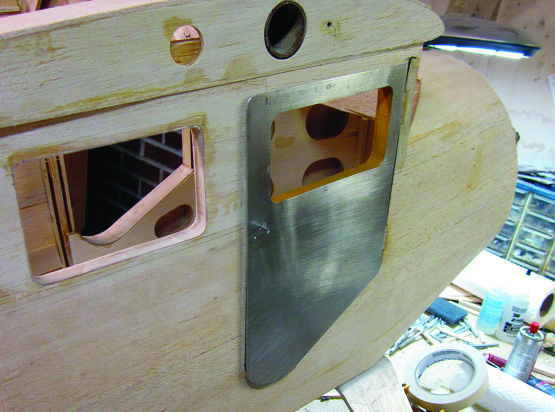
I finished the cutting-out part off camera. Here’s the left door opening trimmed and squared to an exact match with the outline shown on the plan. The instructions suggest using leftover ABS sheet from the landing gear fairing moldings to line the doorframe, but I’m using 1/64-inch aircraft plywood from the hobby shop because I can get a better glue joint and sand the doorframe inserts flush with the side skin more accurately than with the plastic. This strip of plywood is cut to orient the primary grain across the opening, so it will bend easily, and to extend along the entire bottom edge of the doorframe opening.I glued the ply strip in place while you weren’t looking and now I’m sanding it flush and smooth with the outer surface of the fuselage using 100-grit production paper on one of those long blocks.The rear edge of the door frame consists of part of F-4 and the edge of the 1/8-inch balsa side sheet. In order to make all the surfaces line up exactly I’m adding an insert of scrap 1/8-inch balsa sheet which I’ll sand down flush. (Notice that this happens to be the right side door.)Here’s the left door frame viewed from inside the cabin, ready for the next step…building the door.Here I’m following the instruction book exactly, building up both door frames over the plan using 3/16-inch sq. and 1/4×1/2-inch balsa stripHere’s the left door trimmed and sanded for an accurate fit into the frame cutout with about 1/16-inch clearance all around.The next step is to cut the outside face of each door from 1/8-inch balsa sheet. I’m tracing the outer edge onto a 1/8x4x24-inch sheet. I’ll edge-join more sheets to fill in the rest of the door.The entire outer surface of the left door is faced with 1/8-inch balsa sheet and then trimmed to fit the frame opening.Same deal for the right side…each door is a mirror image of the other.The kit provides two pinned nylon hinges for each door. I’m going to use them in a somewhat unusual way. Here I’m holding one hinge approximately in position against the front of the right door frame.I have marked where the upper and lower edges of the hinge lie on the door frame and now I’m using a razor saw to make two cuts about 3/64-inch deep (the thickness of the tab) to permit me to inset the hinge into the door frame.I’ve slotted the recess for the upper hinge position as well and used a flat wood chisel to knock out the thin piece of wood between each pair of slots…each of them just the width of the hinge tab. Now I’m holding the upper hinge in position to check the fit.With the fixed (door frame) half of the hinge securely ZAP’d in place (just as with control surface hinges, use a drop of oil or Vaseline on the hinge to keep the adhesive from fouling it), I’m marking the position of a corresponding slot to be cut out of the forward edge of the actual door. Note that when the cutout is done and the assembly is complete, the hinge tab you see will have been folded 270 degrees clockwise to lie within the doorframe gap.Here’s where I departed from the ordinary. I removed the metal pins from both hinges on each side and made a single, long master pin from a length of .045-inch hobby shop steel wire, ZAP’d both the top and the bottom frame hinge tabs into place with the master pin inserted to align them, then closed the hinges with a scrap of plastic wrap between the tabs and set the door panel into the frame with plenty of SLOW ZAP in the recessed slots I cut out earlier. With the pin aligning the hinges and the door centered in the frame with an even gap all around, the alignment comes out exactly right. This will permit me to remove each door as needed during the building process or later on for maintenance by pulling the master pin out from the top.I got to use that feature right away. With the hinge assemblies complete I’ve taken this door out of the frame to finish the outer edges and inside face. Here I’m using another strip of 1/64-inch plywood bent around the bottom to begin closing in the structure of what will be a 1/2-inch thick scale door. This is directly equivalent to what I did in step two.I’m using ZAP-A-GAP to bond that strip of 1/64-inch plywood along the rear edge and bottom of the right door. You can see the loose end of the ply strip in the lower left part of the image, waiting to be folded around and pressed into place.Here’s the same door with the top, side and bottom 1/64-inch ply edges all in place to match the 1/4×1/2-inch thickness of the balsa front door edge. Notice that I have already cut the shape of the front window out of the 1/8-inch sheet at the top.I cut some more 1/2-inch wide strips of 1/64-inch aircraft plywood, again with the primary grain running across…the short way…to frame the front window (which is already part of the door). Here I’m dry fitting the strip.When I’m sure the 1/2-inch wide plywood strip fits exactly, I use fast ZAP to glue it in place. By working only one inch or so at a time, I can hand-hold the part (without pins, tape, or clamps) and be sure to get an accurate alignment.This is the left door seen from the inside. I have closed up the structure with more 1/8-inch sheet balsa just as I did the outer surface and cut out the window opening.I framed the rear windows earlier. This is the right side as seen from the inside. I’m going to face the inner cabin wall here just as I did the door, but I’m going to follow a slightly different construction sequence.I added 1/8-inch sheet balsa to the inside structure, leaving a 1/2-inch gap just as with the door. What you see here is the face of that inner sheet that ends up “inside” the closed-up structure. I’m using more of that 1/2- inch wide 1/64-inch plywood strip to form the frame, ZAP’ing it into place from the outside.More of the same. I’m using calibrated finger pressure to seat the plywood strip firmly against the edges of the opening until I’m sure the ZAP has grabbed tight.Here’s the entire right rear window with the framing in place. The next step will be to sand off the plywood strip flush with the outside surface of the fuselage.That’s what I’m doing here with one of my long sanding blocks. Right now I’m using 100-grit production paper, coarse enough to cut the plywood aggressively, yet fine enough not to leave a rough, splintered edge that would be difficult to fine-sand.This is the completed right rear window structure sanded flush on the outside, with the window opening cut out of the inner 1/8-inch balsa sheet surface. I have pulled the long single door hinge pin free and removed the door you can see the forward portions of both hinges that are now part of the door frame assembly.Remember my telling you that I was going to replicate the sheet metal outer door skins as they appear on the full scale SR-9? That part happens now. I’ll be adding similar sheet aluminum panels to most of the outer surface of the nose of this airplane, but the rest has to wait to go on until after I have the fabric covering in place. (You’ll get a good look at how this works…later.) Because the metal surfaced door is a separate structural unit, I don’t have to wait to finish it. This is a job for which I would once have used “lithoplate”. That is aluminum offset printing plate material which used to be easy to find before changes in printing industry technology made it uncommon. Now I’m using soft .007-inch aluminum sheet that I found at the building supply/hardware store for sale as “roofer’s flashing”. Once again I got so caught up in making the part from blank sheet that I let the camera crew goof off…so I’ll have to explain the cutting and finishing on another metal part later. No matter…the door skin is now ready to be attached to the rest of the door assembly.I used a thin coat of 30-minute epoxy to bond the skin to the door. These large lead weight blocks ensure good clamping pressure while the epoxy cures. I have gotten into the habit of leaving assemblies like this overnight before handling them, just to be sure. If you look closely you can see that the aluminum skin extends about 1/8-inch beyond the door structure at the bottom. (It does the same on the top and rear, too.) This replicates the overlap of the door skin to provide a gap cover on the full scale airplane.All done, for now. I have the hinge pins back in place and the door swung neatly back into its closed position. I still have the job of making the working door handle/latch assembly, but that’s a story for another time.
This month’s column is based on Building the Stinson SR-9, blog No. 15, on www.rcmodel.com.
 Fly RC Magazine WE LIVE RC