| Just a few years ago, LiPo cells and packs without balancing connectors were available. If you own any of these early birds and want to bring them into long-term service by adding a balancing connector, this article is for you. Although most of today’s packs typically have balancing connectors (admittedly, with different form factors), a number of companies still offer individual cells without such connectors. |
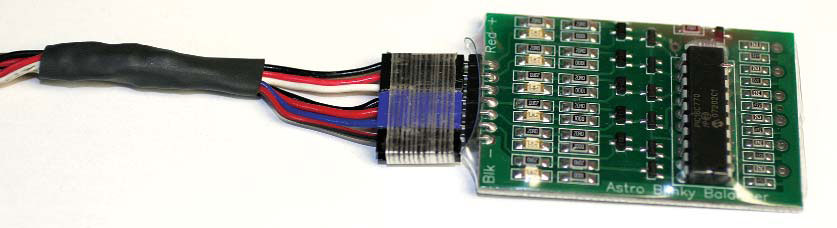 |
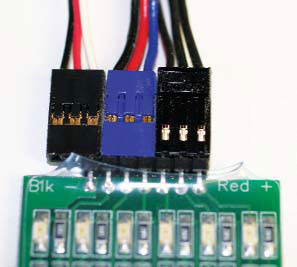
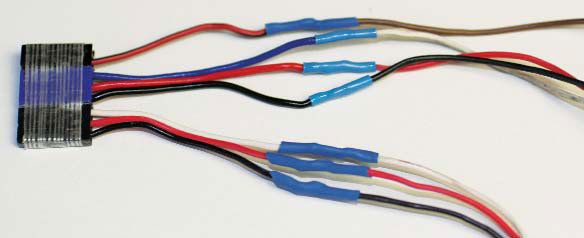
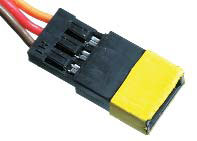
| The completed connector for a 6S pack is shown attached to an AstroFlight Blinky lithium pack balancer. The negative lead is the lowest wire shown. AstroFlight offers two versions of the Blinky, one for lithium-polymer, lithium-manganese and most lithium-ion cells, and one for A123 Racing lithium-ion batteries, which have unique voltage requirements. |
| The AstroFlight Blinky is one of the simplest and most popular lithium-cell balancers, and its pins are spaced 1/10 inch part. That is the same spacing as is found in all standardissue RC servo leads. The automated Blinky does it all for you; you can balance cells passively or while they are being charged. Using the Blinky will result in safer, better performing packs with longer lives. |
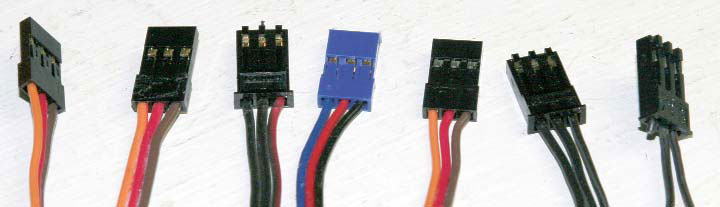 |
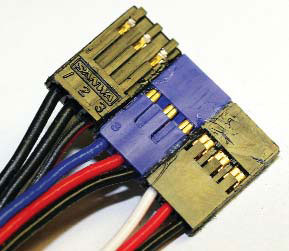
| A randomly selected group of female RC servo connectors that I acquired over years. The Astro Blinky has seven pins. Since the servo connectors have three pins in each housing, we can make a composite female connector out of three servo-connector housings with nine pins total. To get back to just seven pins, trim away the extra pins. |
| If you are like me and have accumulated miscellaneous male and female servo connectors and leads over the years, then you probably have a box in your workshop that’s full of junk connectors from which you can easily fashion a balancing connector that will mate with the Astro Blinky. The key is to solder sufficiently long leads to the connector so that setting up your lithium pack is easy. Here’s how to make a connector that will plug right into the Blinky. |
| 1 |
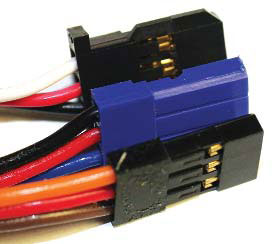
Note the differing shapes of the housing sides. They have to be filed or sanded flat so that they can be Zapped together with CA. There is just enough plastic built into the connectors to allow proper spacing. I used Pacer Plasti Zap. |
 |
|
| 2 |
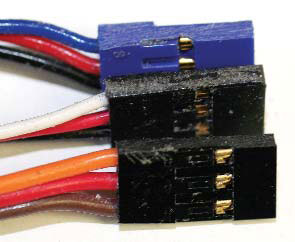
The flattened and squaredup sides of the servo-connector housings after they’ve been smoothed with a sanding block. |
 |
|
| 3 |
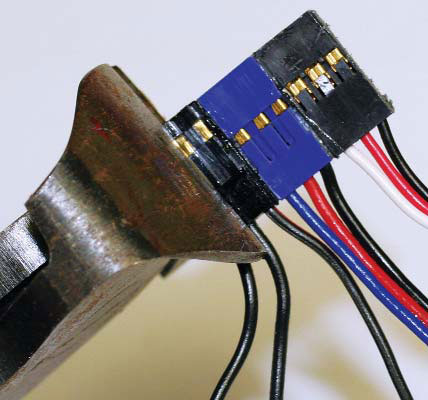
If you wish, you can use the Blinky as a jig to hold the connector housings in place while they are Zapped together with Plasti Zap. Be careful, and use CA sparingly so that none of it wicks into the connector (do not use thin CA). |
 |
|
| 4 |
The housings have been glued. |
 |
|
| 5 |
Because there are only seven pins on the Blinky, use wire nippers to cut the third housing in half. The middle pin will fall out—which is desirable. You want the partial housing for the middle pin left in place to support the plastic surrounding the remaining first pin. |
 |
|
| 6 |
Tape the assembly with strapping tape; the nylon filaments strengthen the composite connector. |
 |
|
| 7 |
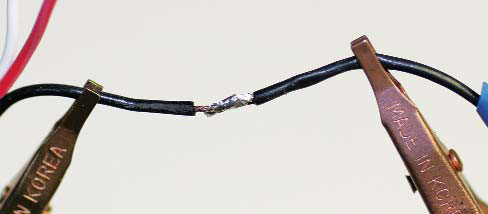
Next, solder extensions onto the leads so that you have 10 inches or so of wire to work with. It’s best to have wire that you trim to fit as you solder the balancing wires to a pack. |
 |
|
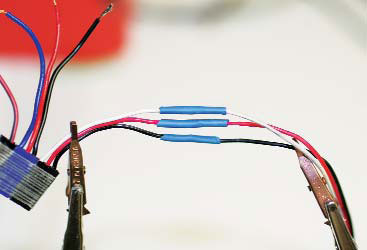
| 8 |
Use Du-Bro heat-shrink tubing to insulate the soldered leads. |
 |
|
| 9 |
The heat-shrink tubing has been shrunk with a heat gun. A heat gun is preferable to an open flame from a lighter. |
 |
|
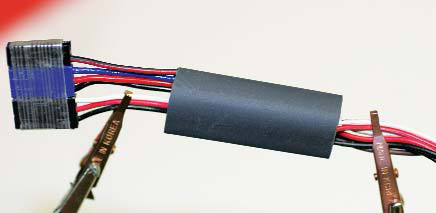
| 10 |
Now put a larger piece of heat-shrink tubing over the bundle of soldered leads. |
 |
|
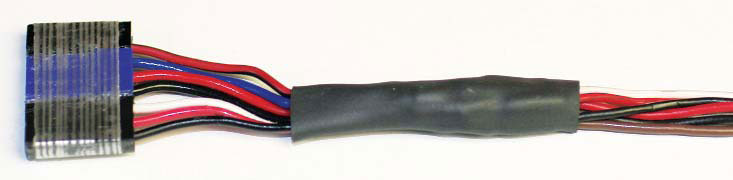
| 11 |
A heat gun will yield this desirable result. For details on how to wire the leads to the cells in your pack, see the November 2007 issue of Fly RC, Wire and Balance an A123 Battery Pack, page 60. Now you can enjoy balanced packs that will offer better, safer performance for a longer time. |
 |
|
| TIP |
If you make a Blinky connector for a 2-cell pack, you can use a single female servo lead connector, as you only need to use three pins on the Blinky balancer. It’s important to mark the connector so that you don’t accidentally plug it into the wrong connector by mistake. I put a yellow heat-shrink band around it to make it easy to distinguish from connectors that are part of other systems on my aircraft. |
 |
|
Links
A123 Racing www.a123racing.com
Astro Flight Inc. www.astroflight.com (310) 821-6242
Du-Bro www.dubro.com (800) 848-9411
Zap is manufactured by Pacer Technology www.zapglue.com |
 Fly RC Magazine WE LIVE RC
