 Fly RC Magazine WE LIVE RC
One of the goals of having a scale model is that you want the model to look real; to reproduce the full-scale aircraft. There is nothing more dramatic looking than seeing a warbird that looks like it has been in a dogfight. The plane is no longer pristine and shiny as it was from the factory. Instead, it’s dirty, beat up and soiled with engine exhaust soot, but it still looks mean and nasty. That is what defines a true fighter aircraft. In this article I will show you some simple techniques to add weathering to a model using a basic airbrush, a semi stiff detail brush and some paper.
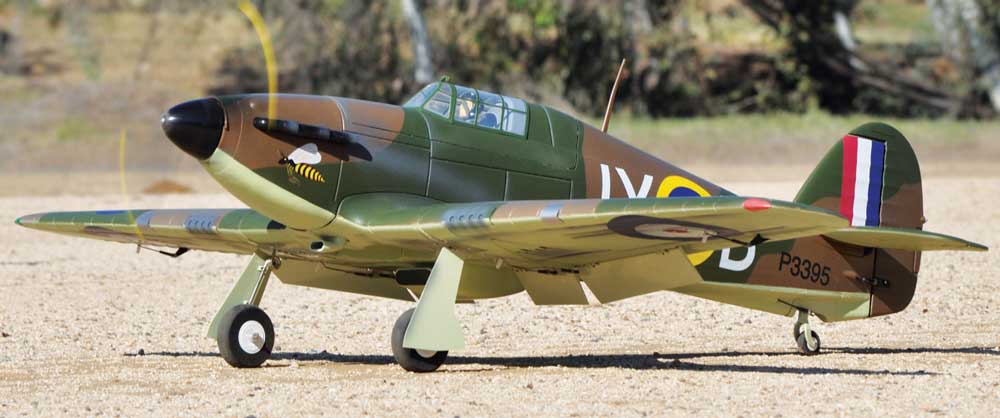
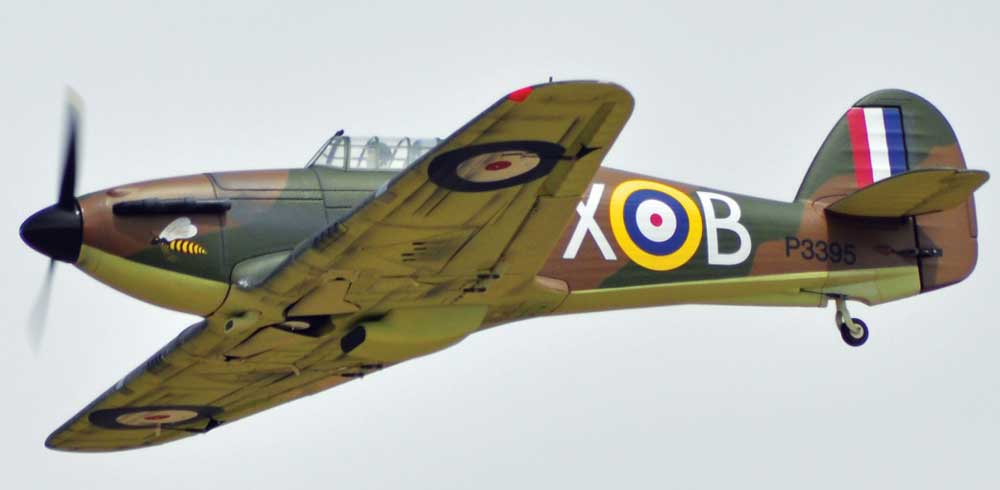
The first step in the process is to find photos of the real aircraft within its natural environment—the war zone! In my example, the RAF’s Hawker Hurricane is a popular aircraft and finding photos of active duty Hurricanes is easy by doing a simple internet search. I am using my E-flite Hawker Hurricane (reviewed in this issue) as the subject for this article. With these photos, you can study the dirt trails on the skin panels, the exhaust flume on the side of the fuselage, the dirt on the wheel hubs, the gun smoke from the .303 gun ports and even the chipped paint on the leading edge of the wing. Once you study that, imagine how to reproduce this detail on your model. Do remember that the dirt and scum trails start from a skin panel and trail towards the rear of the aircraft as the slipstream pushes it.
First, let’s look at the painting tools. I am using a Testors Aztek airbrush, which is a basic airbrush with internal mixing capabilities. I suggest changing the nozzle to a medium or fine spray tip for this process. Believe me; you don’t need a fancy nor expensive airbrush. A Badger 250 airbrush will do the job well and it only costs around $20 dollars. Weathering is 95-percent technique and 5-percent equipment. You can also add a medium-stiffness detail paint brush to the list and several pieces of white printer paper. For this lesson, I will use a dark gray acrylic paint to simulate the dark earth and soot of the English environment during the war on a grass air field.
The important thing to remember is that you will not be spraying paint directly onto the model. If you have done any spray-painting before, you most likely were taught to spray perpendicular to the surface. In weathering, we are going to spray from an angle and it is the overspray of the paint that will be applied to the model, not the direct spray. So, let’s practice the technique with the airbrush, paint and paper.
From the bottle, most paints are thinned for application with a brush, not an airbrush, so the paint tends to be thick. You must thin the
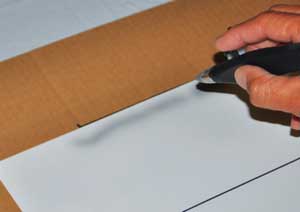
paint down so it will be able to spray. Since we are looking for a more subdued look, we are going to thin the paint a lot; about 5-to-1. That’s five parts thinner to one part paint for starters. Next, you will need to find a surface to paint such as a cardboard box. You need to then draw a line on the box, anywhere, but just draw a line. This will be your practice panel line. Tune the airbrush to achieve a consistent spray pattern as light as possible.
Take a piece of paper and hold that paper so the edge of it is matching the line you drew on the box. Now, aim the airbrush such that the spray pattern hits the paper about a half-inch from the edge and the airbrush is at a 45-degree angle to the paper causing the paint spray pattern to spread away from you and overspray off the edge of the paper. The overspray should be very faint; that’s what you want. If you want the weathering to be heavier, spray again until you think you are getting close to enough, and then stop. Less is best! Weathering is an enhancement, not the feature. It is subtle and you are supposed to just notice it as nuance.
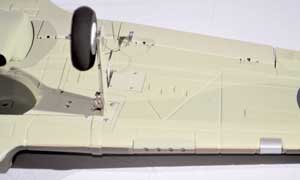
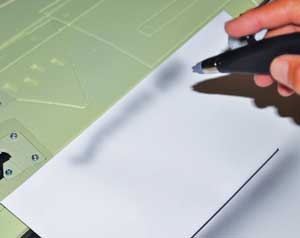
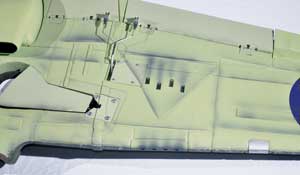
It will take a few dozen passes of practice spraying to get the desired effect and technique, so keep working the airbrush. I only spoke about a single line as you would find along the span of the wing. Start your weathering on these lines first as they are easier to work with. Note where the panel lines begin and they end and hold that paper steady to the line for best effect. Change out the paper as needed to make sure you are spraying the paper directly and not the plane. Once the wingspan panel lines are done, go to the lines along the wing chord. The lines going across the width would typically be very faint weathering compared to the other panel lines. On my Hurricane, I took advantage of using heavy weathering to emphasize the gun ports as well as the shell casing exhaust ports just as you would see on a combat fighter. On the fuselage, those Hurricanes that survived a couple dozen missions definitely had an exhaust trail on the sides going over the contour of the wing.
I also talked about the paint brush and here is where that tool comes in. Using silver paint, dip the brush to load it with paint and then brush off almost all of the paint onto a sheet of paper. Now, if you brush the tip of this brush on the surface of that box you practiced on, you should leave some faint, but uneven spots of silver paint behind; similar to what chipped paint looks like. Use this technique on the wing’s leading edge to simulate the punishment taken by the wing skin in the harsh conditions of combat flying.
More than likely, your first try at this won’t make you ecstatic about the results, but the experience you just gained will make the next project awesome. Practice the techniques until the results work out the way you like it. You will be surprised how quickly you learn this skill and how much it can enhance the looks of your next project.
Words: Mike Lee
Photos: Mike Lee and Mike Skube
