 Fly RC Magazine WE LIVE RC
Get the Best Performance from Your Foam EDF Jet
Today’s RC flyer has a huge variety of molded foam ARF and RTF scale and sport planes to choose from and the EDF (electric ducted fan) is one of the most popular categories. For the most part, these foam jets fly well and are durable and inexpensive. While they usually fly quite well out of the box, a little extra time and effort during the assembly process goes a long way in increasing performance and longevity. One of my favorite WW2 fighters is the ME-262 twin engine jet and I was excited when Dynam released a relatively large foam version. Typical of many of the foam planes on the market, the basic airframe and electronics are excellent and the plane flies well in stock form. Also typical is the lack of detailed instructions and room for improvements in many areas. While I am using the ME-262 in this article, most of the enhancements and improvements are applicable to any foam EDF.
AIRFRAME
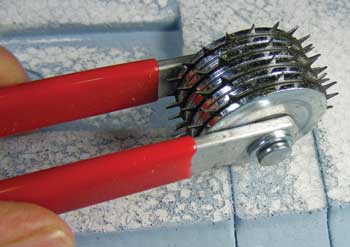
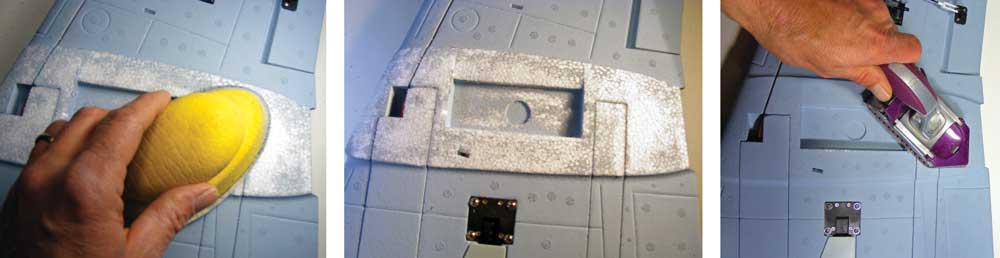
The instructions state to glue the main components together with the supplied glue. However, the areas to be glued are painted and adhesives do not bond well to a painted surface. I removed most of the paint using a sanding block with medium grit abrasive for the flat areas to avoid changing the shape of the foam. Hand held sandpaper can be used for the contoured areas. It is not necessary to remove all of the paint, but some unpainted foam should be visible. To further increase the strength of the bond, I used a Top Flite Woodpecker (item no. TOPR2190) to create perforations to give the adhesive added “bite”. A toothpick can be used as an alternative to the Woodpecker. Before gluing the pieces together, I used a tack cloth and alcohol to clean the surfaces. While on the subject of adhesives, I prefer 30-minute epoxy for structural components.
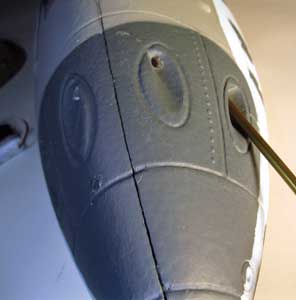
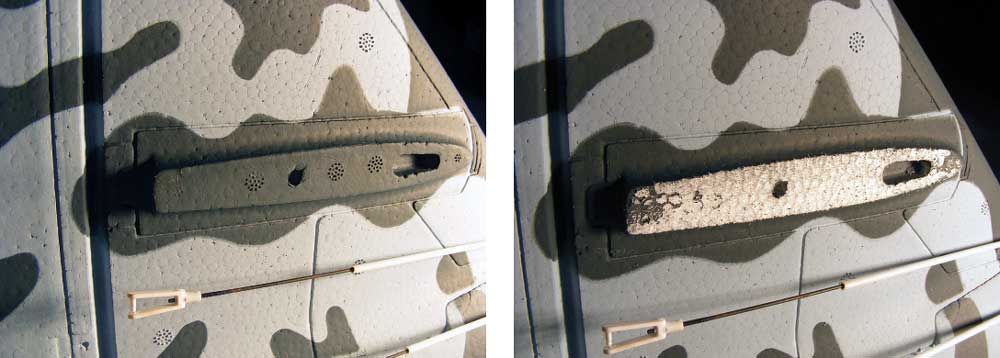
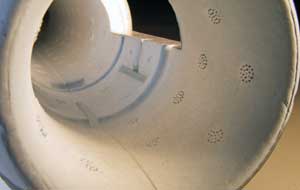
EDFs tend to consume a lot of power and consequently the ESC and LiPo batteries can become very hot and fail over a short time. A cooling airflow will keep the temperatures down and increase the reliability and longevity of the electronics. The ME-262 has no cooling air; therefore I felt it necessary to add some cooling holes without detracting from the aircraft’s appearance. There are four gun ports in the nose and these seemed to be a natural place to add some cooling holes. I heated up a length of brass tubing to melt the foam and get a nice clean hole. I also added a rectangular hole in the nose gear wheel well and an exit hole behind the wing. Flight testing will determine if these modifications are sufficient or more cooling area is needed.
POWER SYSTEM
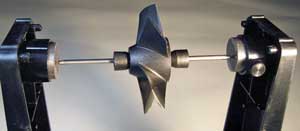
Inexpensive EDFs usually have a composite (plastic) fan unit which is often not balanced at the factory. Even small unbalances in the fan can lead to vibrations due to their high rotational speed. These vibrations cause performance loss which can damage the electronics over time. A magnetic balancer, such as the Top Flite Power Point Precision Balancer (item no. TOPQ5700) that I use results in a nearly perfectly balanced fan. There are numerous ways to correct an unbalanced fan unit, but it is important that the shape of the blades remain unchanged and the integrity of the hub not be compromised by removal of material. I prefer to use JB Weld on the inner surface of the hub to build up the light side. The balance process takes some patience to get it correct, but is worth the time and effort. Occasionally a fan unit will produce vibrations even when it is balanced statically. This is caused by the mounting hole being machined off-center. If this is the case, rotate the fan relative to the mounting collet until the least amount of vibrations is noticed.
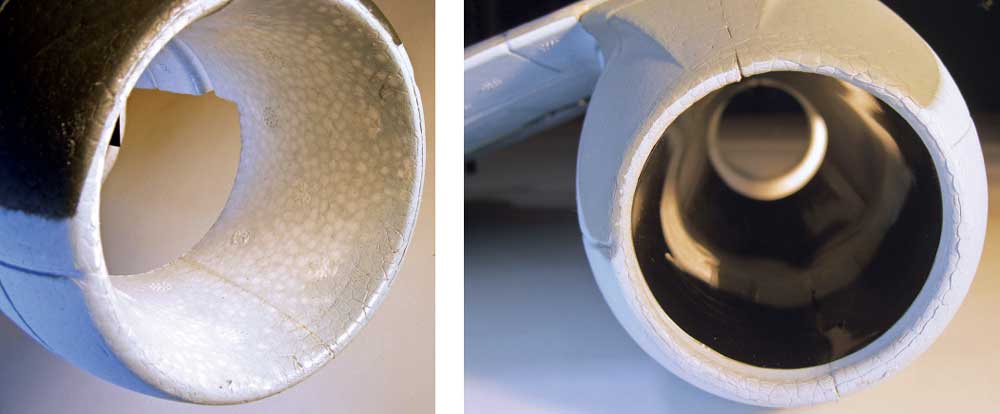
Ducted fans operate by accelerating a relatively small amount of air to a high velocity and any disturbance in the inlet or exit airflow reduces thrust. I noticed the ducts in the ME-262 contained numerous raised molding “dimples”. For the exhaust, I fabricated a smooth tube out of a piece of black plastic I obtained from a report cover and is held in place by double-sided tape. For the inlet, I sanded the dimples smooth and sprayed on several coats of Minwax Polycrylic water-based polyurethane from a spray can. This provides a smooth surface while toughening the foam.
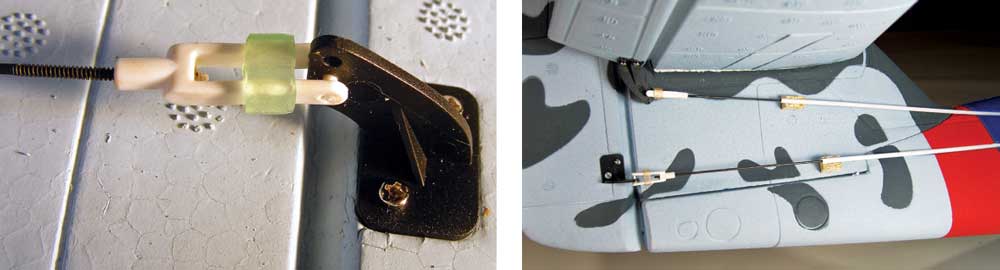
Right: Adding pushrod stand-offs eliminates flexing and improves control response.
CONTROL SYSTEM
A tight, slop-free control system results in increased aircraft control and precision and reduces the chance of flutter. Like many EDFs, the ME-262 elevator and rudder pushrods are unsupported for a length where they exit the fuselage. To eliminate flexing from the unsupported pushrods, I added simple balsa stand-offs. I made these from a length of rectangular balsa stock and drilled a 3/32-inch hole to accept a portion of a toothpick. I then used foam-safe CA to glue the balsa block and toothpick into the fuselage. Silicon adhesive was used to adhere the pushrod tube to the stand-off. Once painted, it will not be very noticeable.
To prevent unexpected loss of control, simple clevis retainers provide cheap insurance. Simply cut a quarter-inch length of silicon fuel tubing and slip it over the detached clevis. After the control throws are determined and attached to the control horn, slide the retainer to prevent the clevis from opening.
While EDFs vary widely, I found that the items discussed here apply to the majority of the planes on the market today. If you intend on pushing the envelope on your jet, then these are the minimum items to check. It will give you peace of mind when pulling out of a high-G dive knowing that the plane is up to the task. Additionally, your plane will be smoother, last longer, sound better and be a few knots faster than your friend’s.
CONTACT
TOP FLITE topflite.com, (800) 637-6050
Words: Klaus Ronge
Photos: Klaus Ronge
