Fly RC Magazine WE LIVE RC
Words by Scott Copeland
Now we are cooking with gas! In our last installment, we discussed how to choose a building project and pointed out how to read the details of the plan. We have done some studying and now we have a good idea of how all of the pieces fit together. It’s time for you, the would-be builder, to become an actual builder. Before we start butchering balsa, it’s a good time to discuss a few more pertinent topics that will help us make our first build a success.
BALSA AND PLY PROPERTIES
Traditional RC model construction over the past 50 years has predominantly utilized balsa wood and plywood. These materials have a tremendous strength-to-weight ratio and when used correctly, produce a strong, lightweight airplane that will provide many years of enjoyment. In order to take advantage of the properties of balsa and ply, we need to understand the basic characteristics of each.
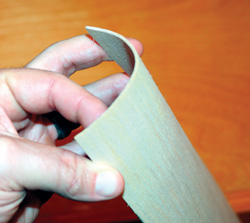
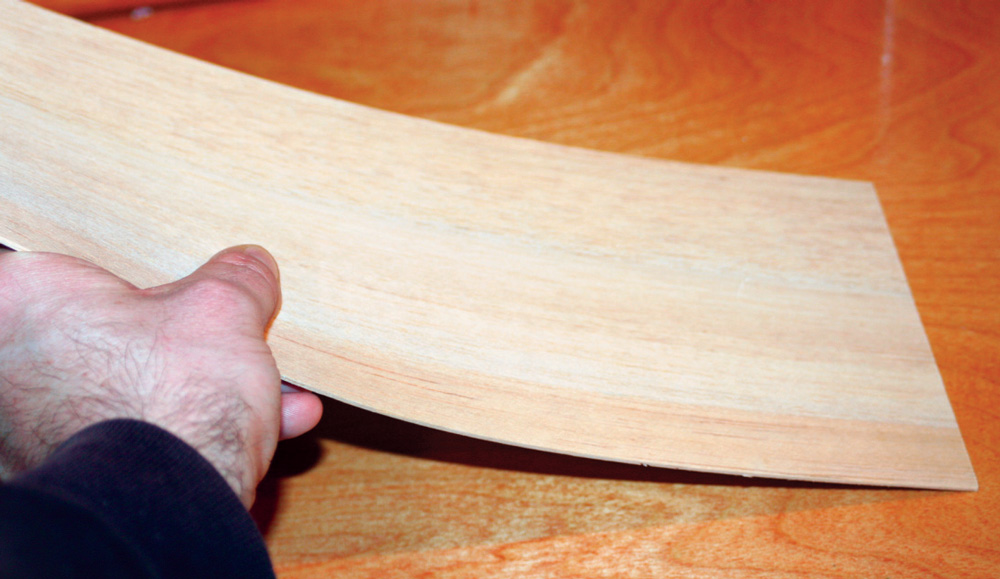
Balsa is actually considered a hardwood despite its light weight. Grown in the tropical forests of Central and South America (Ecuador primarily), balsa wood contains very high moisture content. When it is slowly kiln-dried, the weight of the wood decreases significantly and when sawn into sheets, the product becomes the strong, workable wood that we commonly use in the model airplane hobby. Balsa is usually described either by its density or by its grain pattern. Density is usually referred to as light, medium or heavy (as it is on our VSP plan) and grain is referred to as A-, B-, or C-grain. There are many resources that tackle these topics in depth so I won’t take up space here going into detail. After all, we want to start building! The essential thing to remember is that balsa has a grain pattern that runs down the length of the sheet. This makes the wood stiff lengthwise and flexible across its width (see photos). Not all balsa is the same. Some is flexible while some is stiff. Some is very light while others can be quite a bit heavier. If you are able to physically select the wood for your first build, pull out a few sheets and see if you notice any variability in sheets of the same dimension and thickness. Chances are you will see plenty!
This is where studying the plan comes in handy. If we know what parts are to be cut from each sheet of wood, we can make intelligent decisions about the wood we purchase. Buy heavier, denser, less flexible stock for things like wing spars and fuselage formers. Medium stock works well for balsa sheet tail surfaces and the like. Light, flexible material works well for wing leading edge sheeting and other places where the wood will need to bend around curves. When in doubt, try to pick sheets of medium stiffness and density or ask the shop owner for help. If ordering balsa online, try A-grain for areas requiring flexibility, B-grain for tail surfaces, etc., that require medium stiffness and weight, and use C-grain for areas requiring maximum strength and stiffness.
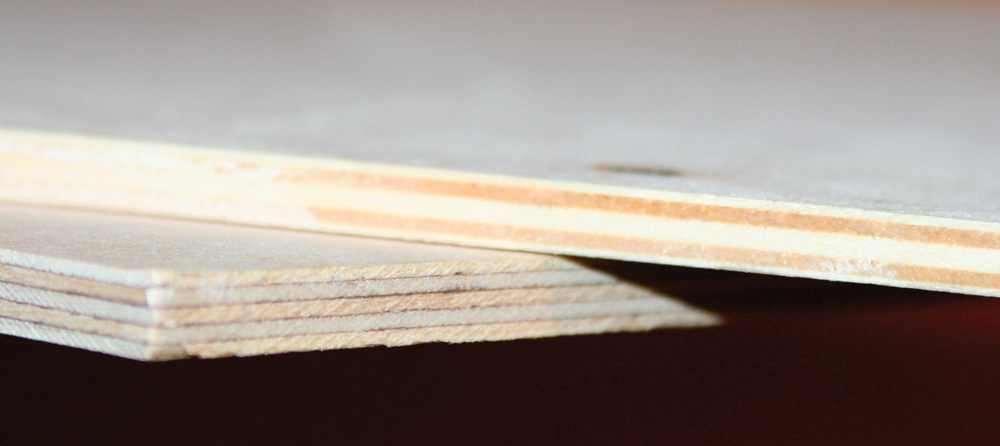
Plywood is different story. Much like the large sheets you can buy at the local lumberyard, plywood for the model industry is made of thin sheets of wood laminated together to form sheets. The ply we use has smaller dimensions than the lumberyard variety, is much lighter and is typically made from birch. Ply is generally quite stiff (with the possible exception of 1/64-inch ply which is very flexible across the grain) and is heavier per dimension than balsa. It is used sparingly in areas of the airplane that need tremendous strength, where balsa is inadequate. These areas include landing gear mounts, firewalls and dihedral braces.
We generally find two grades of model plywood: standard birch and “lite” ply. Birch plywood is generally five laminations while lite ply is three. Lite ply, as the name implies, is lighter than birch, but does sacrifice durability for the weight savings. I recommend standard birch for the areas listed above and only use lite ply if the plan calls for it specifically.
TOOLS
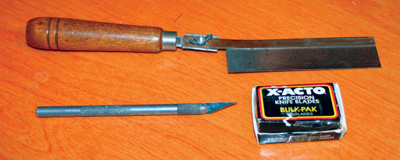
There is a basic complement of tools you need to have to build your first RC model; the rest are simply nice to have. For cutting out parts, an X-acto knife is required and you will need a coping saw or something similar for cutting out plywood parts. If you would like to buy another useful saw that will pay you back handsomely for your monetary investment, buy yourself a razor/Zona saw. These saws make fine cuts with ease and are great for crosscutting balsa without crushing the grain.
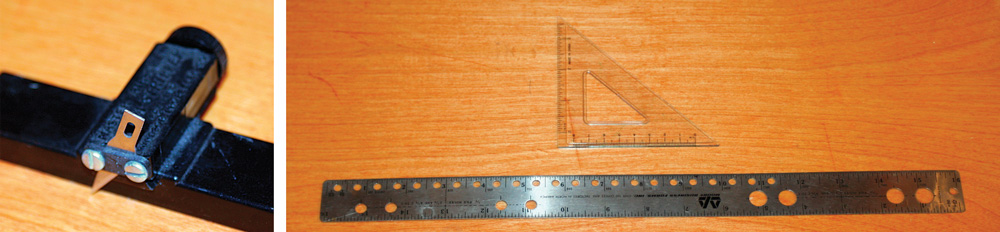
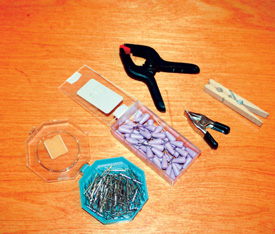
A straight-edge/ruler is an excellent tool to use as a cutting guide. Additionally, pins will be necessary to hold pieces together while they are glued. Small spring clamps or clothespins will be helpful for pieces not suitable for pinning. A building board of some type will be required to pin parts to for assembly (fuselage sides, tail surfaces and wing). I have seen all types of building boards, from the high-tech to the farcical. A decent, un-warped pine board is suitable or alternatively, usable boards can be made from ceiling tiles. There are also boards made from balsa planks available for purchase online. Ultimately, the building board needs to have no warps and must be soft enough that pins can be pushed into it in order to keep parts from moving. No matter what building board you use, remember that your plane will only be as straight as the board on which it’s built!
Finally, you will need a sheet of wax paper to cover your plans and prevent your model from sticking to the building board and plans. There is nothing worse than breaking the beautiful structure you have just created while trying to get it un-stuck from the work surface! A few sheets of sandpaper will round out your tool kit. Before we cover our model, a good sanding will smooth out our framework and make our covering job look that much better.
ADHESIVES
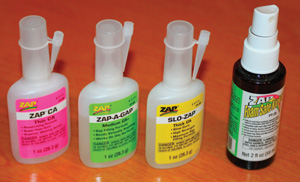
During the past four decades, CA (cyanoacrylate) glues have revolutionized the efficiency of traditional RC model building. Prior to their use, parts were pinned together and left to dry overnight. There was no such thing as instant gratification! CA’s are truly instant, particularly when they are used with accelerant (commonly known as “kicker”), which makes them dry literally in seconds. Although CA is used in 80-percent of all model gluing, the limitation of these glues is that they are not suitable for joining certain materials and can be brittle if the mating surfaces are not very congruent.
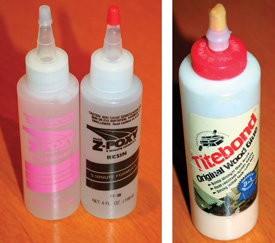
Epoxy is the glue to use where the strength of the joint is imperative. The areas where plywood is used (firewalls, landing gear mounts and dihedral braces) are places where epoxy should be the glue of choice. Epoxy is a two-part glue requiring the mixture of equal parts of resin and hardener to elicit the chemical reaction that cures the glue. Epoxy is quite sticky and difficult to remove from skin; I typically use latex gloves if I will be mixing large quantities of epoxy. Epoxy is also much heavier than many other adhesives, so use only as much as is needed for a strong joint.
The last adhesive you may need for your project is ordinary wood/carpenters glue (sometimes called PVA or polyvinyl acetate). This is the ideal glue for laminating thin balsa strips and will be the adhesive of choice to make our VSP wing tips and tail outlines. It is water-based and allows substantial working time, unlike CA.
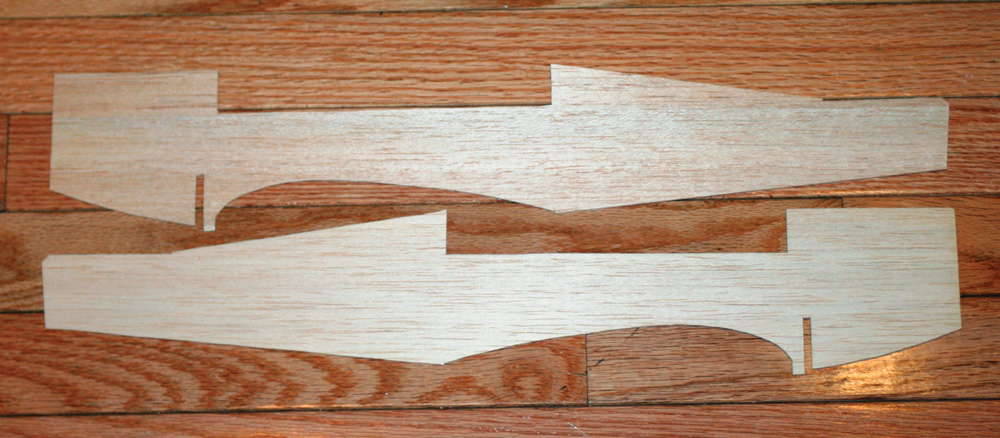
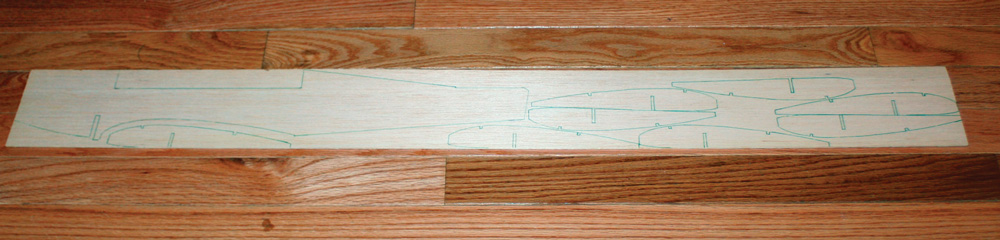
MAKING OUR “KIT”
Finally, we get to cut wood! In order to make the pieces so our final product looks like it is supposed to, we need to make patterns for our parts and trace them onto our balsa and ply sheets. For the VSP, the main balsa components are the fuselage sides, horizontal stabilizer and wing ribs. Your pattern can be cut from the plans themselves or can be traced onto another sheet of paper. I typically use a fine-tip pen to trace my patterns onto the balsa so my lines are clearly visible. Pay attention to grain direction for all parts (usually indicated on the plan) as the strength and function of the part itself is a product of the wood grain.

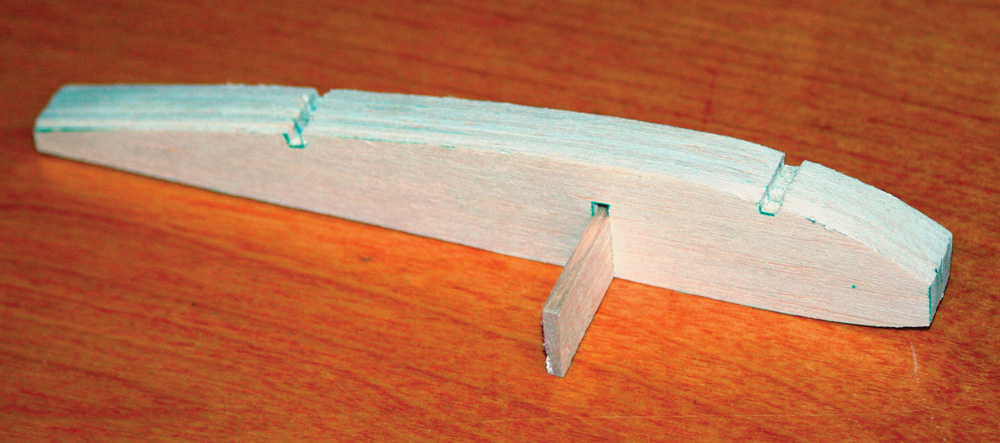
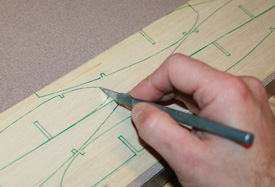
With your parts traced onto the balsa sheet, it’s time to start cutting. For most of the parts mentioned, there are curved lines to be cut which means that the X-acto knife is our tool of choice. Be patient! For thicker sheets, trace over the part outlines gently with the knife then repeat with increased pressure for a better final cut. Cutting balsa perpendicular to the grain is tougher than cutting with the grain. Sometimes it will be necessary to cut over the same outline three or four times in order to make a good cross-grain cut without damaging the part. It is often good practice to make cuts wider than the actual parts outline and sand the part down to the true outline when it has been removed from the balsa sheet. Sometimes you have better control with sandpaper than a hobby knife. Proceed to cut out the firewall, landing gear mounts, wing spar, dihedral braces and fuselage formers. We should now have something that resembles a wood kit that a modeler might buy at the local hobby shop.
It’s now all a matter of time and patience. All projects and all modelers have a pace that works for them so relax and enjoy the process and your pace will come naturally. Building can be frustrating at times, but each problem you work through makes you a smarter modeler and makes the final product more satisfying. Try not to get bogged down by fear or uncertainty. To paraphrase Dave Platt, “No amount of hand-wringing is going to get the darn thing built for you!” Usually, good advice is only a few keystrokes away on one of the online RC forums. Problems are often easily resolved with a short call to a fellow club member or hobby shop owner. The best part of this hobby is sharing knowledge and experiences so don’t be afraid to ask for help from someone with more experience. Stay tuned as next month we transform our two-dimensional wood parts into something more tangible.