 Fly RC Magazine WE LIVE RC
Conquer Workshop Clutter This Weekend!
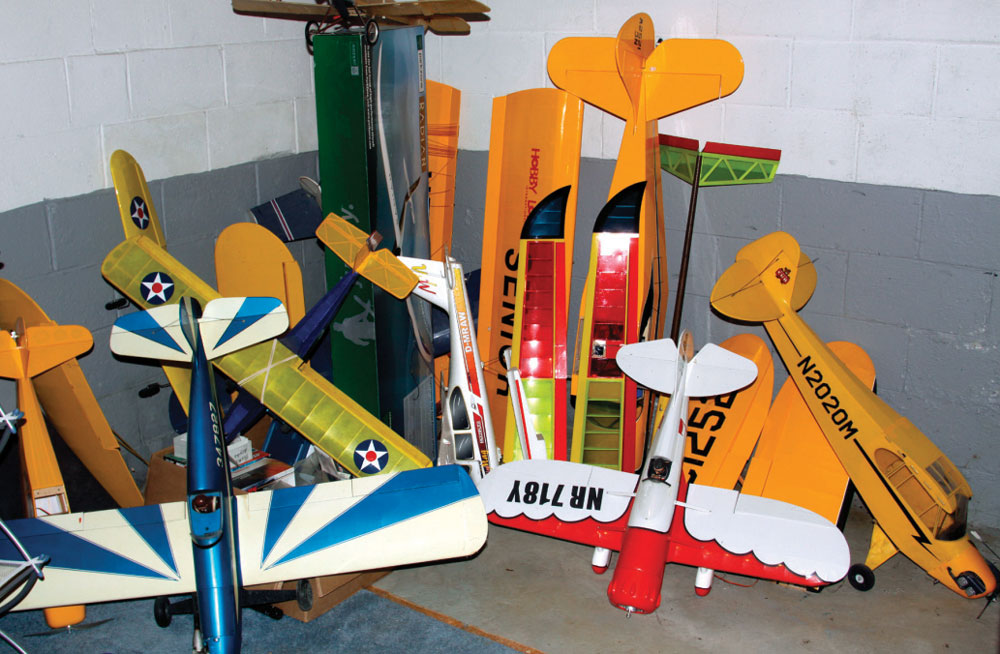
If you have been in RC for a while you can probably relate to the inevitable crowded workshop corner where partially completed airframes sit mixed with those finished and flight ready, and maybe even a few more awaiting a little maintenance or repair. Back in the pre-ARF era it could take years to accumulate those extra models that crowd the workshop. Now though, with “build” time usually measured in hours—and sometimes even minutes—most active RC pilots have a few extra models that need safe storage between missions.
Chalk it up to our insatiable “have-it-now” appetite or simply the flood of irresistible models we see at the local hobby shop, a storage solution for your models is a must. The following photographs show you how I recently resolved the precarious stack in my workshop. My shop space is in our unfinished basement and the simple storage rack I built is secured to the exposed floor joists above. The overhead is a little low, measuring just over seven feet from the floor to the bottom of the joists.
GETTING STARTED
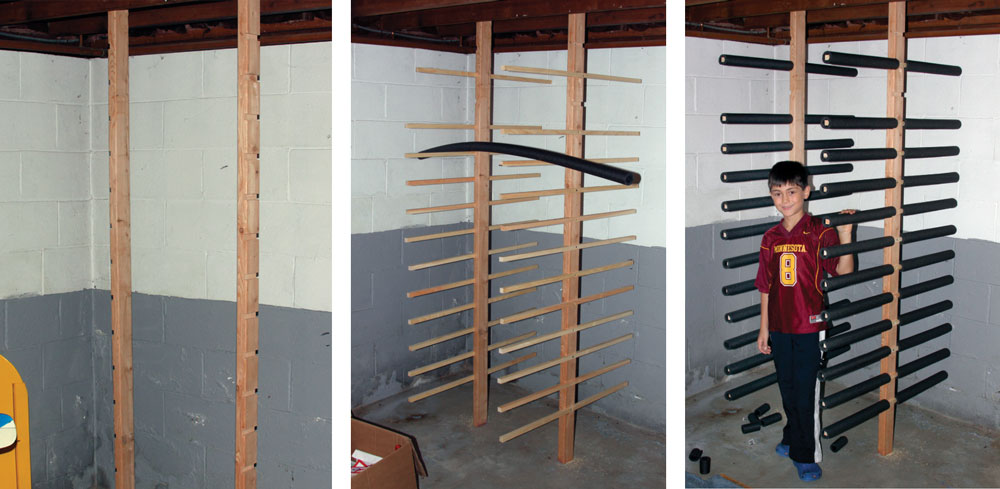
The basic design resembles two double-sided combs with padded tines spaced a few inches apart to support wing panels and smaller fuselages. I hand selected straight and clear lumber at the local home center, coming home with an 8-foot 2×6 for the uprights and 3 pieces of 6-foot 1×4 stock for the fingers. A full 8-foot overhead or more will allow you to work with taller uprights. I crosscut the 1×4 stock in half and then ripped each piece into 4 strips measuring approximately 3/4 square and 36 inches long.
Start the uprights by determining the basic spacing you want between the fingers. I am using five inches on center so I am not tempted to stack wings or overload the fingers. After marking them out with a pencil and speed square I made a few passes with a Skilsaw to rough out shallow dados sized to fit the cross pieces. Using the speed square to guide the saw was faster than I could have set up a dado blade and cut them on my table saw. I ripped the 2×6 in half with my table saw to get two identical uprights once I had the dados all cut.
INSTALLATION
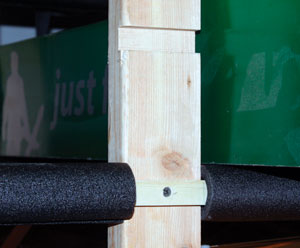
With all the wood cut, I clamped the uprights to a floor joist and spaced them 24 inches apart. That dimension worked well for me, but it can be whatever suits your models. The slab in our basement is rather uneven, so I rested one upright on a tapered shim to level the dado heights between them. After also checking they were plumb, I screwed them in place using a few 21/2-inch drywall screws running through the joists. I then wedged the shims in place using a hammer and then broke off the excess shim stock to keep from kicking them free later.
Some of the fingers were snug enough in the dados that I could have just pressed them into place. Instead I held them all with a speed clamp while drilling a single countersunk pilot hole for a 15/8 drywall screw. I didn’t glue them in place, knowing that at some point I might want to remove one or two to give a wider space. Note that the fingers extend both in front of and behind the uprights. I had room in this corner to have the rack double sided and a full three feet deep, so spaced it out off the foundation wall as you can see. If you don’t have that much room you can cut the fingers to half length or even less and position the uprights against the wall.
The last step was to pad the fingers, and the best solution for this task is split foam pipe insulation. My rack has a total of 24 36-inch fingers, so a dozen 6-foot pieces of insulation did the job there, and for just a little over a dollar per piece. I saved a handful of the short foam off cuts that result from subtracting the upright widths and use them to pad spinners when standing a fuselage on its nose as shown. If you want to store heavier fuselages as well, make some of the lower cross pieces from 1×3 stock and space them farther apart.
PICK IT ALL UP
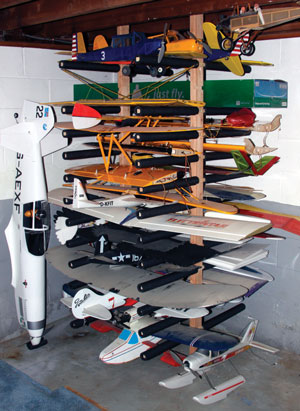
Fully loaded, this rack consumes about 3 x 5 feet of floor space, yet is currently holding 5 fully assembled models, 1 boxed model, 30 wing panels, 7 fuselages, a stack of foam sheet and still has some open space. Three fuselages are also standing on their noses behind the rack with a fourth on floats resting on the floor underneath. Three additional fuselages stand outside this space just to the right of what you can see in the photos. For only a few dollars and a couple hours work, I consider this project to be a complete success. Not only does that corner of the shop look a lot better now, getting everything up off the floor protects the models from most potential hangar rash.
