 Fly RC Magazine WE LIVE RC
By Scott Copeland
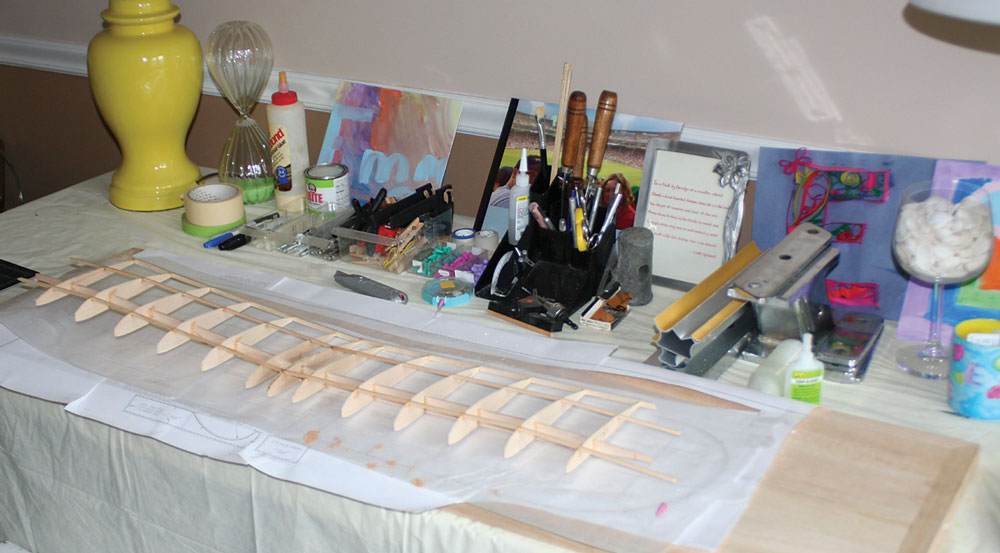
Time for the two-dimensional world to add a third dimension! In the first two parts of this column (Fly RC April and May 2013) we’ve studied our plans, gathered our tools and carefully cut out our kit. Now, with our glue within arm’s reach, we are ready to build. This article is meant to describe some of the techniques used to build models in general and is not meant to be a construction article for the VSP. Therefore, the descriptions will revolve around the skills used to put the airplane together and not the airplane itself.
WHERE TO START
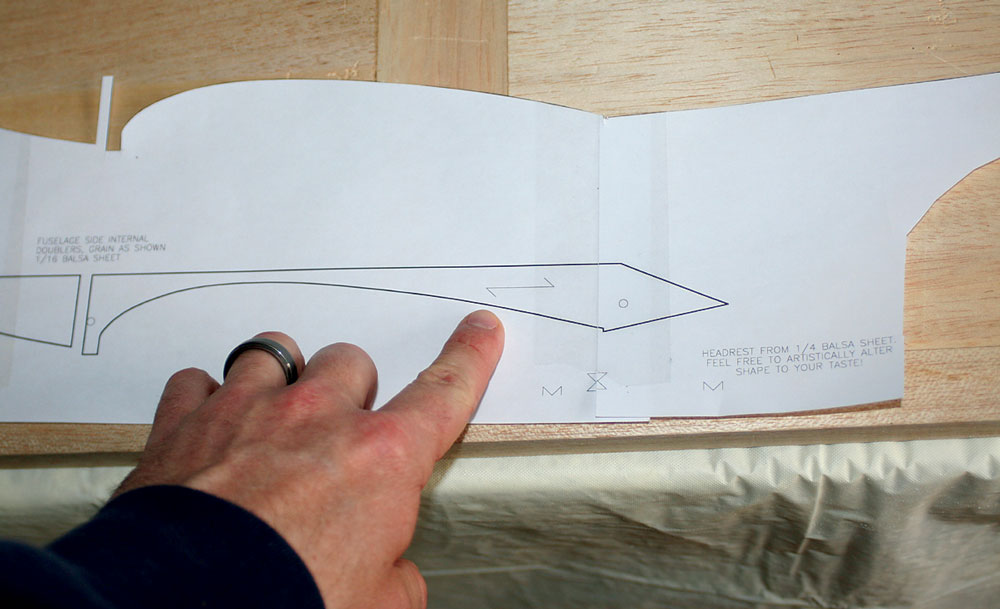
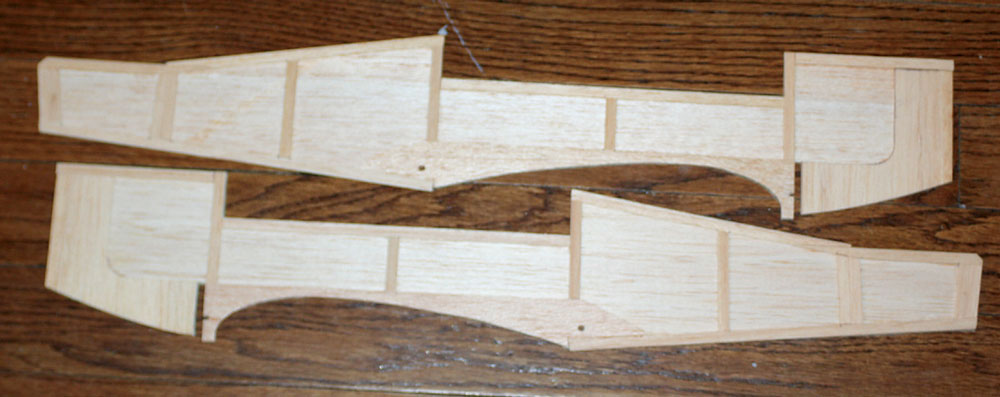
It’s all up to you! Many builders prefer to begin with the wing, although you don’t really have to. Just pick somewhere you’d like to start and have at it! Remember to re-familiarize yourself with the plans and make sure you have a realistic timeframe in mind. You will not be done in one afternoon so pace yourself. Pay attention to the grain direction of the wood indicated on the plans because it is important for structural strength. For our VSP, there are a couple of things that may trip up first-time builders, so file these tidbits in your memory banks. The firewall onto which the motor is mounted is built into the fuselage with right thrust added. This is done to counteract the torque of the motor/prop and if it is forgotten, the model will not fly as designed. Also, when adding doublers to the fuselage sides, make sure you build a left and a right. You can’t dance with two left feet and you surely can’t build a fuselage with two left sides!
KEEPING IT ALL STRAIGHT
Before the days of instant glues, parts had to be held together in proper alignment while the glue dried, usually overnight. That meant that the wing ribs, spars, leading and trailing edges had to be pinned together on the building board. The good part was that you had plenty of time to realign parts if something wasn’t correct. The bad, however, was that you had to wait forever for the glue to dry. With modern CA glues, like those from BSI (Bob Smith Industries), we have eliminated the waiting game, but we still have to get things lined up right.
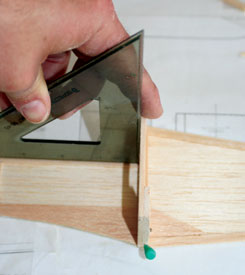
It is good practice to check all 90-degree angles with a square prior to gluing. This means double-checking that ribs are perpendicular to the building board, fuselage formers are perpendicular to the fuselage sides and the horizontal stab is perpendicular to the rear fuselage. Also check the alignment of the spar notches in the wing ribs and if something doesn’t look straight, fix it now. Once you have established good alignment of your parts, then it is time to glue it up. There is an old woodworker’s saying, “Measure twice; cut once”. In the realm of model airplanes, the saying should be, “Check twice, glue once”.

STRIPPING BALSA
This is not a necessary skill, but one that is simple to learn and will save money in the long run. For frugal (read cheap) builders like myself, I can’t bear to spend extra money on a project when it is unnecessary. For example, one online balsa source quotes a price of $1.31 for a 3×1/8 inch balsa sheet. If making 1/8×1/8-inch balsa strips, you should be able to theoretically get 24 sticks from that one sheet which gives us a cost of $.05 cents per stick. The same source quotes a price of 16 cents per 1/8×1/8 inch stick so ordering 24 sticks will cost $3.84. I know which price I’d rather pay! I tend to use wood from Balsa USA, as I find the quality is excellent and the pricing is very competitive.

A stripping tool, like the one available from Master Airscrew, is adjustable and can be used to cut balsa sheet to any dimension strip you’d like. For the VSP, we will need a variety of stick sizes: 1/16×1/2 inch strips for the wing tips, 1/16×1/8 inch for the rudder and elevator outlines, 1/8 inch square sticks for the wing spars and 1/16×1/4 inch for the fuselage doublers. Stripping your own stick wood takes a little extra time but is very practical for projects like this.
To strip wood, set the blade for the width of the strip you plan to cut, and simply run the stripper along the edge of the balsa sheet. That’s it! No rocket science here. Your stick wood will all be of the same density since it was cut from the same sheet, unlike the stick wood from some suppliers that can run from super-hard and dense to downright flimsy.

LAMINATING
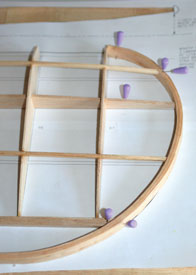
Laminating is used on our VSP to make the elevator and rudder outlines as well as the wing tips. The purpose of this construction method is to produce curved wooden outlines that are light without sacrificing structural strength. Because the wood grain in the laminated balsa strips is not cut, but rather bent around a form, the finished outline is far stronger and lighter as compared to other methods.
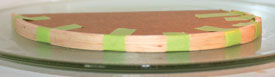
The process is very easy. Forms are made from cardboard with masking tape applied around the edge to keep the balsa from sticking to the form. The strip wood is soaked in water in the tub for about 10 minutes and then patted with a towel to remove excess water. I use Titebond wood glue for laminating since it is water-based and will successfully glue the wet balsa together.
Bend the first strip around the form and tape the ends in place with masking tape. Apply glue with a brush on the outer surface of the first strip and lay the second on top. Repeat one more time so you now have three balsa strips glued together. Apply multiple strips of tape to hold the balsa to the form and you’re golden! You can either set the part aside, letting it dry naturally or, if you prefer, you can accelerate the cure in the microwave. Building guru, Pat Tritle, recommends heating the laminated form in the microwave for 10-15 second intervals until the glue sets. My experience is that it only takes one or two intervals for the glue to cure. Let it cool between blasts in the microwave.
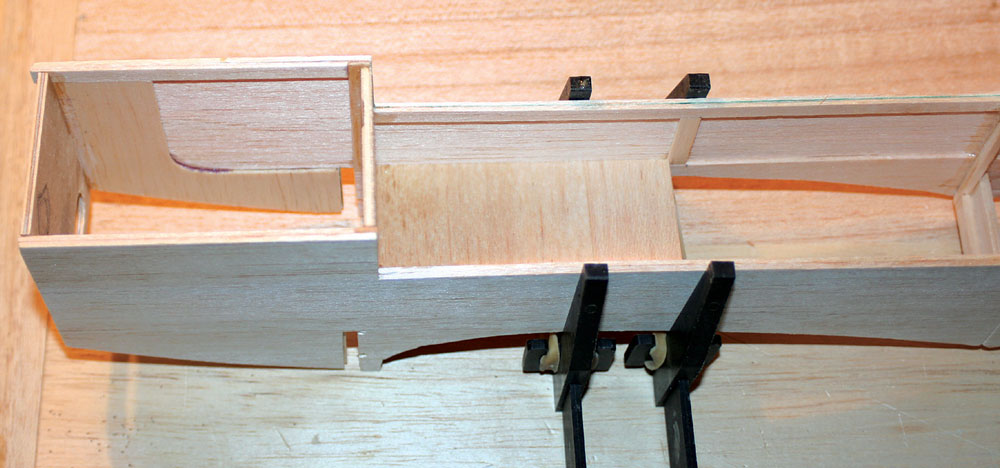
SHEETING
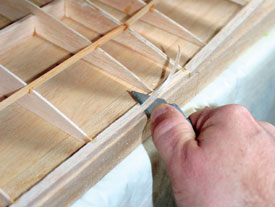
There is not a tremendous amount of sheeting needed on the VSP, only the top and bottom of the wing root. This particular model shows the spars flush with the sheeting (as opposed to under the sheeting), which makes fitting the sheet wood a little more involved. I believe this is to maintain the structural strength of the spars in the root of the wing where strength is critical. Measure the width of the sheeting needed, and cut it from 1/16 inch balsa. Be sure to note the grain direction on the plans. Lay the sheet on top of the area where it will be glued and mark the borders with a pencil. Cut the sheeting slightly oversize and perform final shaping with sandpaper. You are basically in-laying the balsa sheet between the spars. Remember, check twice, glue once!
SHAPING WOOD
The last skill worthy of mention for this project is shaping wood. The wing leading and trailing edges need to be shaped to form the proper airfoil and the wing tips and tail surfaces need to be rounded over. Sandpaper is your friend! It is always easier to remove material than to add it back, so go slowly. It’s tempting to blast the part with rough grit sandpaper but it is very easy to ruin your part.
For the leading and trailing edges, first remove a fair amount of wood with a razor plane or a utility knife. Using the utility knife takes a steady hand, but it cuts balsa like a hot knife through butter! Supporting the part on the edge of a table makes the shaping process easier. Once the part is roughly shaped, use your sanding block to finish the process, re-checking your work frequently. Hold the block at the same angle as the outline of the wing ribs to make sure the leading and trailing edges are the right shape.

Round off the sharp edges, like where the fuselage top and sides meet and where the top hatch slides into the fuselage. Use 150-grit sandpaper for most of this work. Always make sure parts are flush (like where the wing ribs meet the leading and trailing edges) because the covering will accentuate these joints if they are poor. Besides checking visually, feel with your fingertips to confirm a smooth transition between parts. Your eyes and your hands can’t both lie to you at the same time!
FINAL THOUGHTS
At this point, we have covered our work area with a fine layer of sand dust, our workbench looks like a bomb went off and we have successfully tracked balsa chips throughout the house. But, look what we’ve created! Go ahead and admire your work. Yes, it has been challenging and frustrating at times and yes, it took longer than the foam ARF. Congratulate yourself because you have become an aero modeler in the most classic sense. It’s said, if you give a man a fish, he eats for a day but if you teach a man to fish, he eats for a lifetime. Hopefully, if you teach a man to build, he builds for a lifetime!
Our next installment will entail covering and finishing our VSP and finally getting to fly!
CONTACTS
BALSA USA balsausa.com, (800) 225-7287
BSI, BOB SMITH INDUSTRIES bsi-inc.com, (805) 466-1717
MASTER AIRSCREW masterairscrew.com, (916) 731-5868
