 Fly RC Magazine WE LIVE RC
Words and photos by Gary A. Ritchie
This time we will complete the fiberglass cowling of our Ultra Sport 60 and mount the motor and speed controller. To finish the cowling here is what we will need (Figure 1):
A sheet of 2 oz. fiberglass cloth, a bottle of Deluxe Eze Kote, a spray can of Scotch Super 77 spray, the foam mold we made last time, a small (3.4 to 1 inch) paint brush, a pair of sharp scissors, the two bolts that we used last time to fasten the mold to the firewall, the round 1/8 plywood spinner ring, a sheet of Saran or similar wrap and a couple sheets of 220 to 400 grit sanding paper. Not shown in the photo are a tube of Bondo Glazing and Spot Putty, available in automotive stores, a spray can of automotive primer and a spray can of gloss paint of a color you select to match your covering scheme (more on that later).
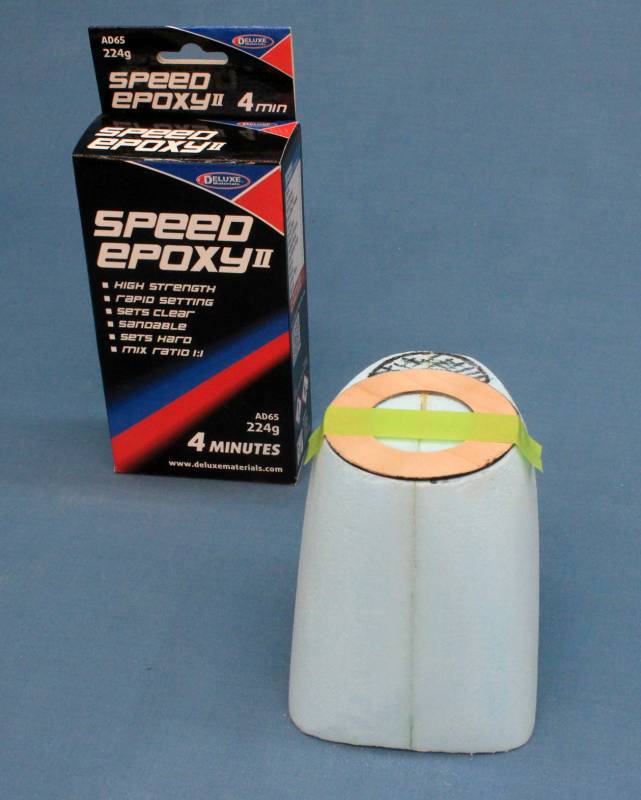
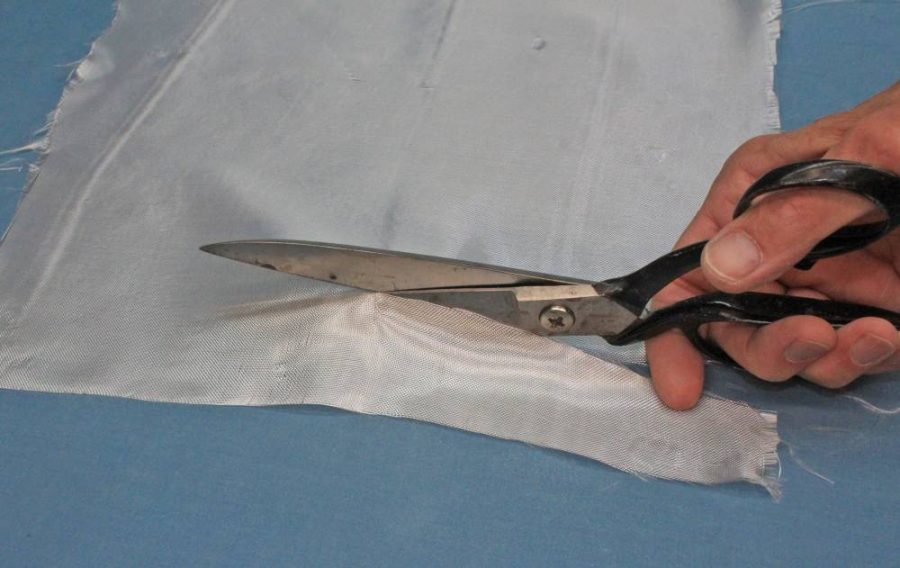
First let’s glue the round plywood spinner ring to the front of the mold using the circle we drew in Part 1 (Figure 2). I used Deluxe Speed Epoxy II 4-minute epoxy for this. Set that aside to dry and while it is drying cut about thirty 2” x 6” strips of fiberglass cloth (Figure 3). To pick up the stray fiberglass hairs from the worktable I like to wrap a loop of masking tape around my fingers and roll it across the fibers.
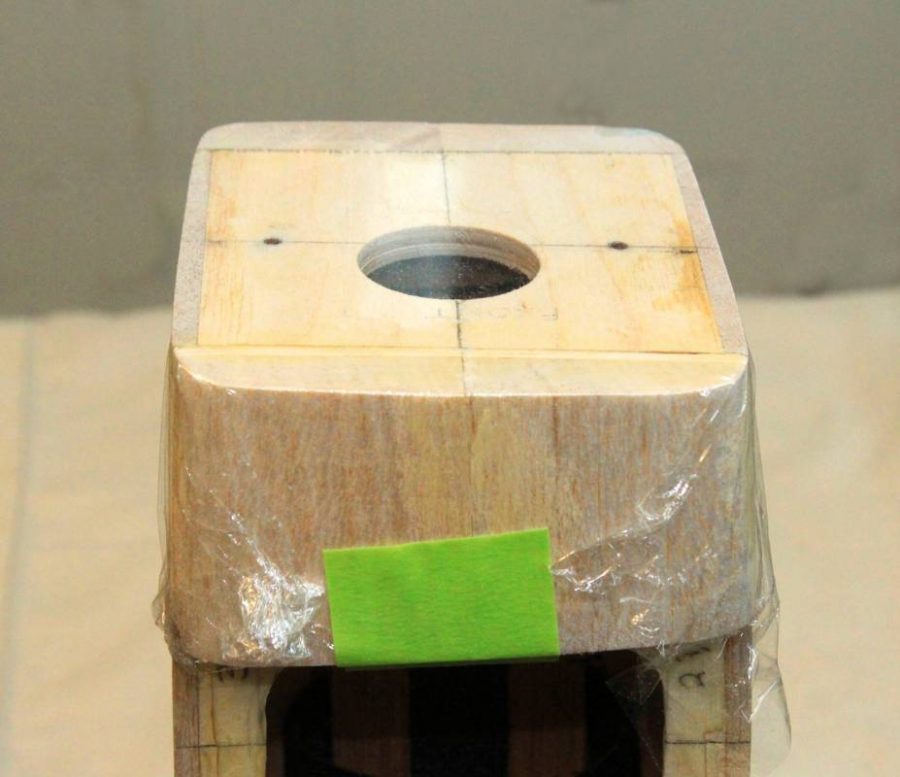
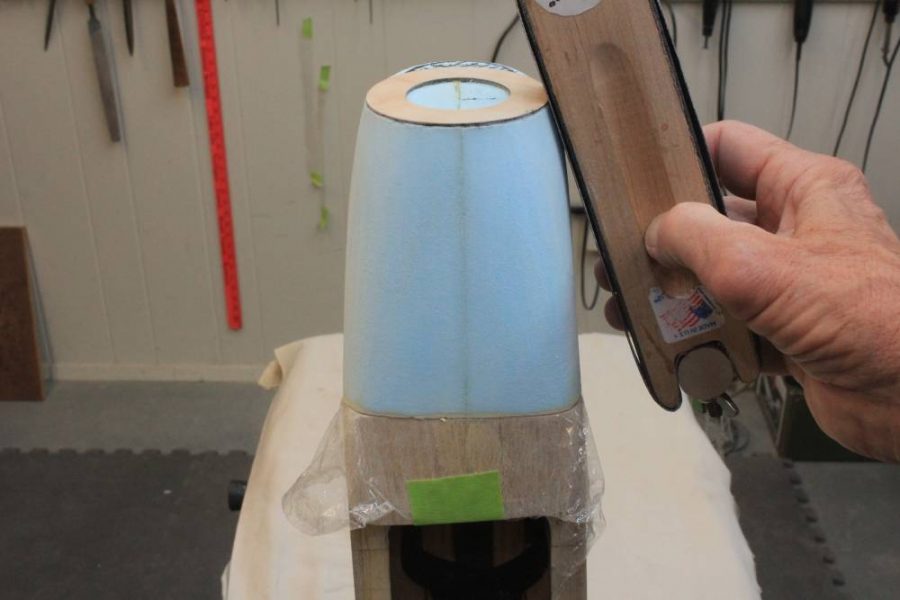
Next, take the fuselage and mount it in a Workmate so that the top is horizontal and then tape the sheet of plastic film wrap to the top of the firewall and a couple of inches down the fuselage (Figure 4). Now, bolt the foam mold back onto the front of the firewall making sure that it fits snugly and square to the front edge of the fuselage. Fine sand the block at this time focusing on the area surrounding the 1/8”plywood spinner ring (Figure 5). This is your last chance to perfect the mold, so perform whatever sanding that may be needed.
Now comes the messy part, so here a couple of tips to help out. Wear latex or nitrile gloves throughout the next steps. The Scotch Super 77 is very sticky and likes to get all over everything. You can clean it up easily, though, with rubbing (isopropyl) alcohol. So keep some handy along with a cleaning rag or two.
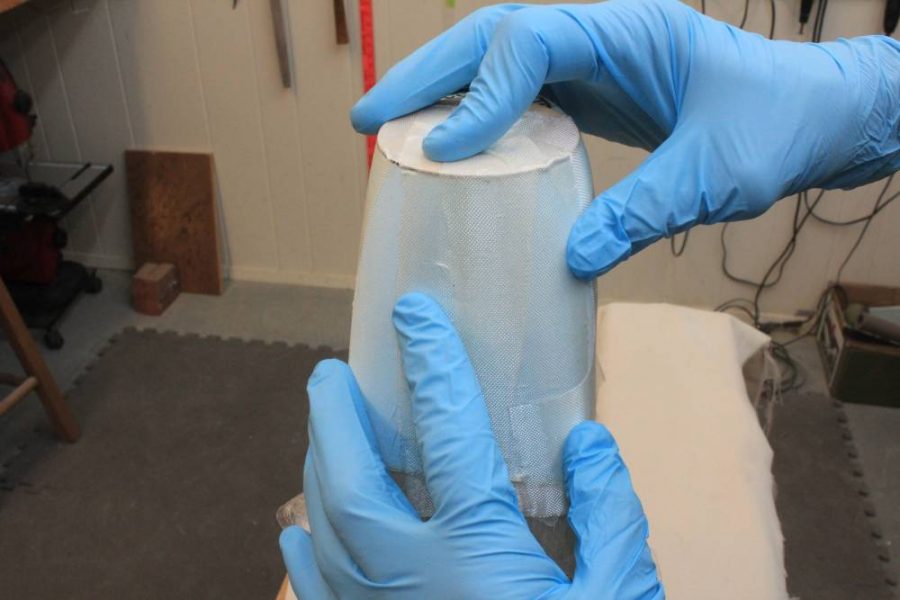
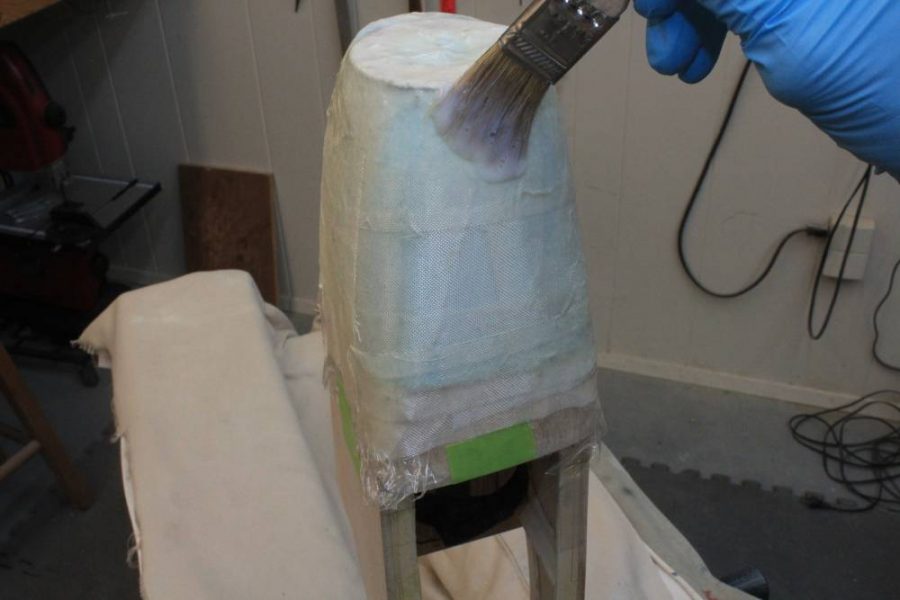
Take a strip of the 2” x 6” fiberglass cloth, lay it down in the middle of a sheet of newspaper, and spray it with the Super 77. It is best to do this in small puffs; long blasts will blow the cloth off the work table. Once it has been moistened, pick it up using a pair of forceps, and place it on the blue foam mold – sticky side down. Then carefully firm it out on the mold smoothing it and pressing out any air bubbles that may form (Figure 6). When it is securely stuck to the mold, place another strip on the newspaper and repeat the process. Orient the strips in different directions so that they overlap several times. Continue this process until the entire cowling mold has two layers of cloth on it. This may take 20 or more strips. Then set it aside for a few hours until the Super 77 has dried. Then pour a small amount of Deluxe Eze-Kote onto a small plastic or glass jar. With the paint brush dab the Eze-Kote onto the cowling making certain that it soaks all the way through the glass cloth (Figure 7).
Having done this, take another ten or so fiberglass cloth strips and lay them, one at a time, over the first two layers of cloth, then dab Eze-Kote onto them as before, making sure it soaks completely into the cloth. You will now have two layers of fiberglass cloth laid on top of each other. Allow this to dry for several hours.
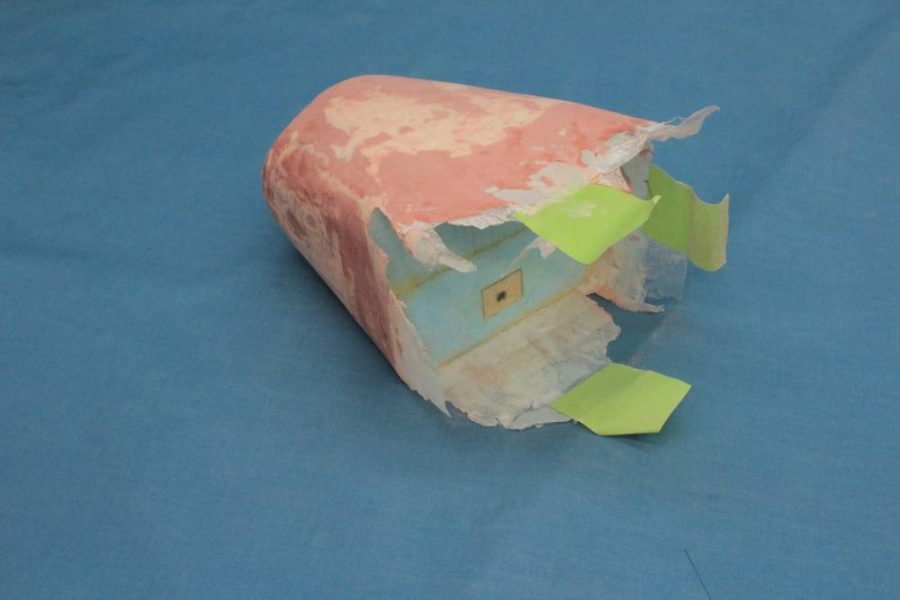
When the fiberglass and Eze-Kote are fully dried (I waited overnight for this), using a pallet knife cover the entire structure with a light coat of Bondo and let it dry. Try to smooth it out as much as possible. After this is done you can remove the cowling from the fuselage by unbolting it and simply pulling it off (Figure 8). Sand the cowling smooth with 220 grit sandpaper then spray it with the automotive primer. I used gray Brite Touch General Purpose Primer purchased at an auto supply store. When this has dried it will reveal the areas of the cowling that need more Bondo. Apply it, let it dry, and then sand it again (Figure 9). During this part of the process I shoved a heavy screw driver into the foam to hold the cowling while I painted and Bondo’d it.
When you are satisfied with the cowling surface you can apply the final paint. I used Krylon Super Maxx bright white – use whatever color you need to fit in with your covering scheme. Apply the paint in very light layers so it doesn’t run and then let it dry thoroughly. If you place the cowling in front of a small fan you can reduce the drying time appreciably.
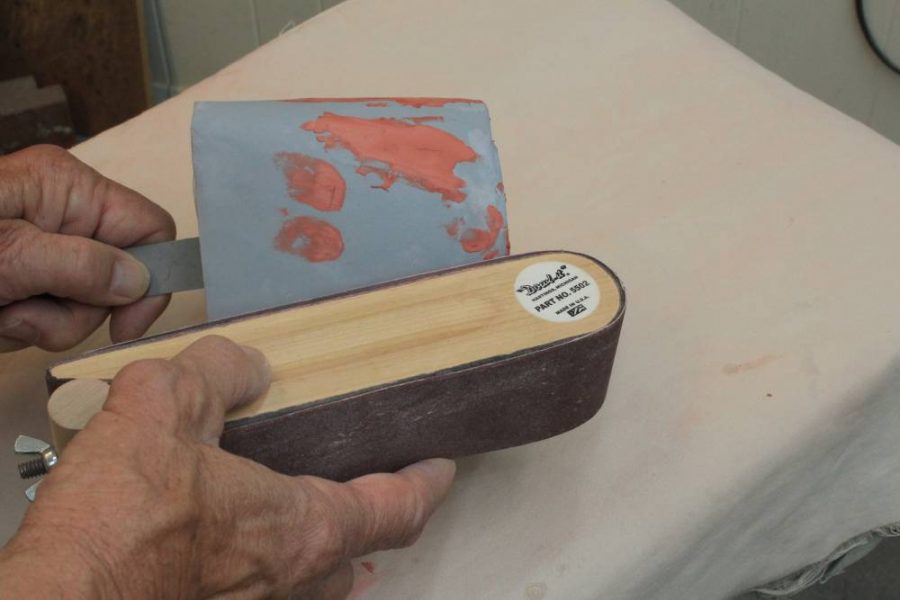
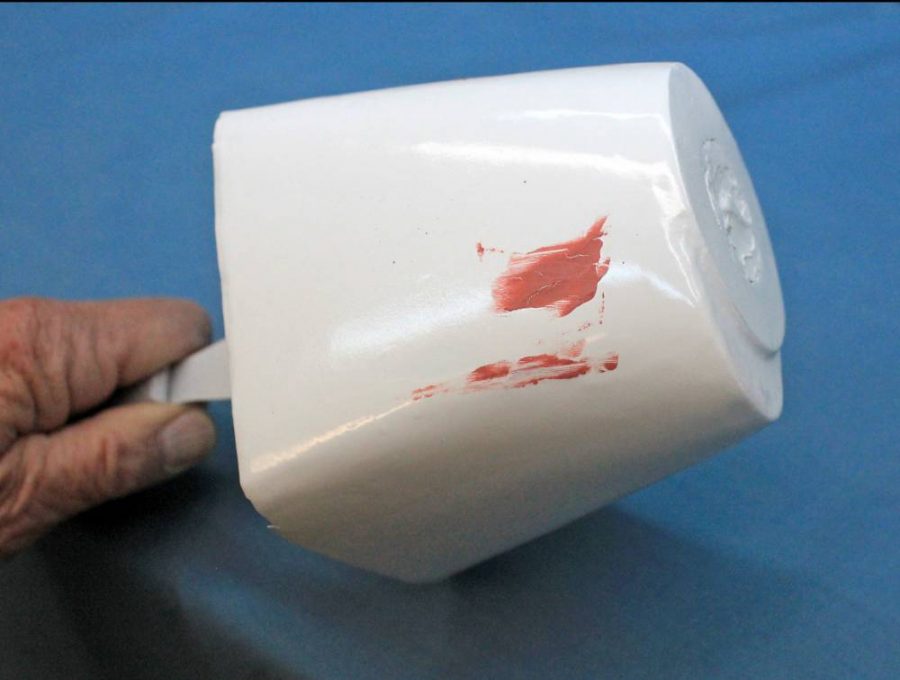
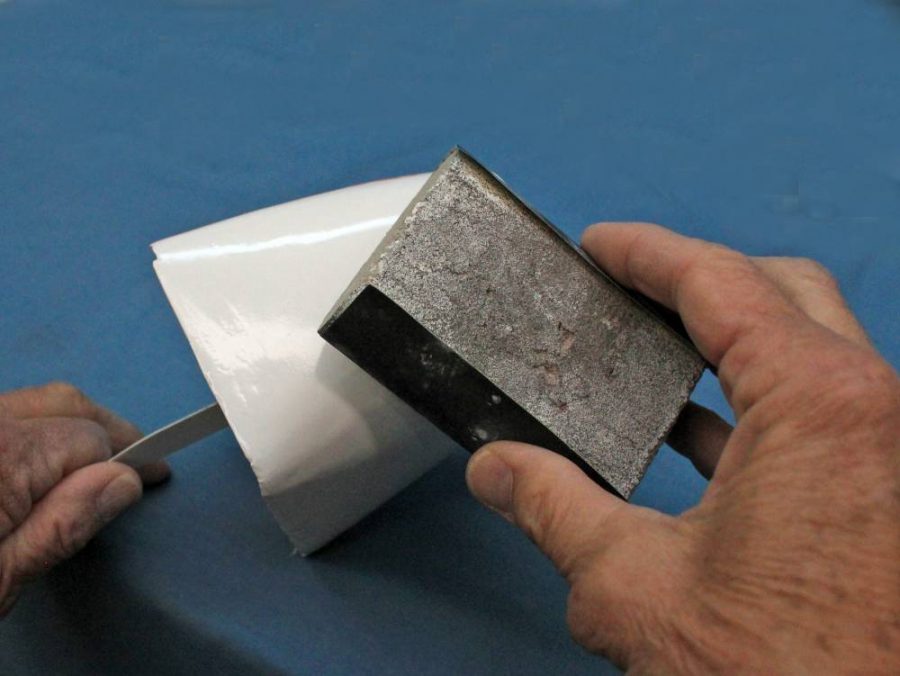
During this process you will undoubtedly find small imperfections in the surface of the cowling. You can continue to add Bondo to fill in these imperfections as you add layers of paint (Figure 10). Hint: the Bondo will melt the paint, so just dab it on and don’t try to shape it. It sands very easily when dry. During this process of painting and filling, sand the surface of the cowling with 400 grit wet sand paper. I wrapped mine around a small foam pad (Figure 11). I spent several days on this process trying to get the cowling as smooth and perfect as I could. Even so, I never got it as perfect as I wanted it but finally decided that I had had enough sanding and painting and called it done (Figure 12).
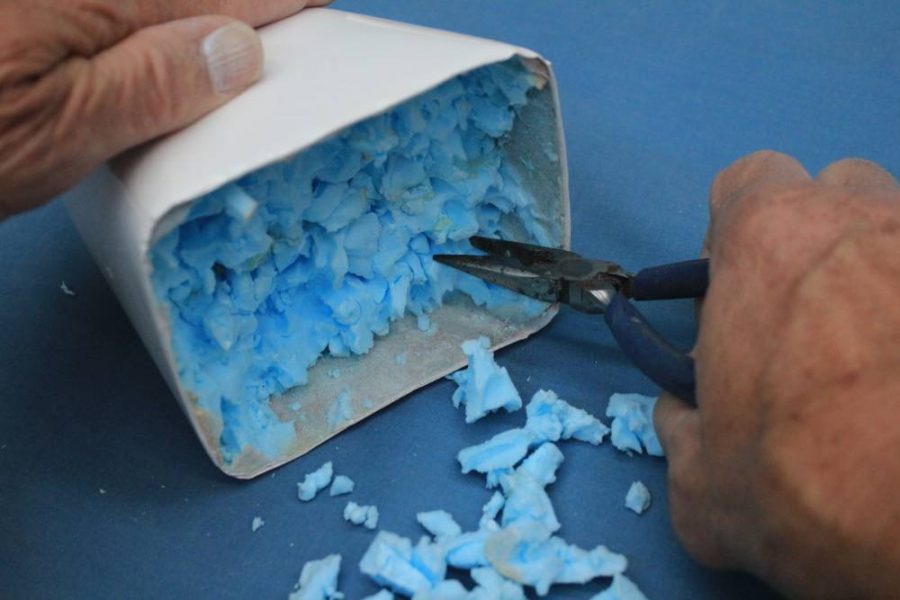
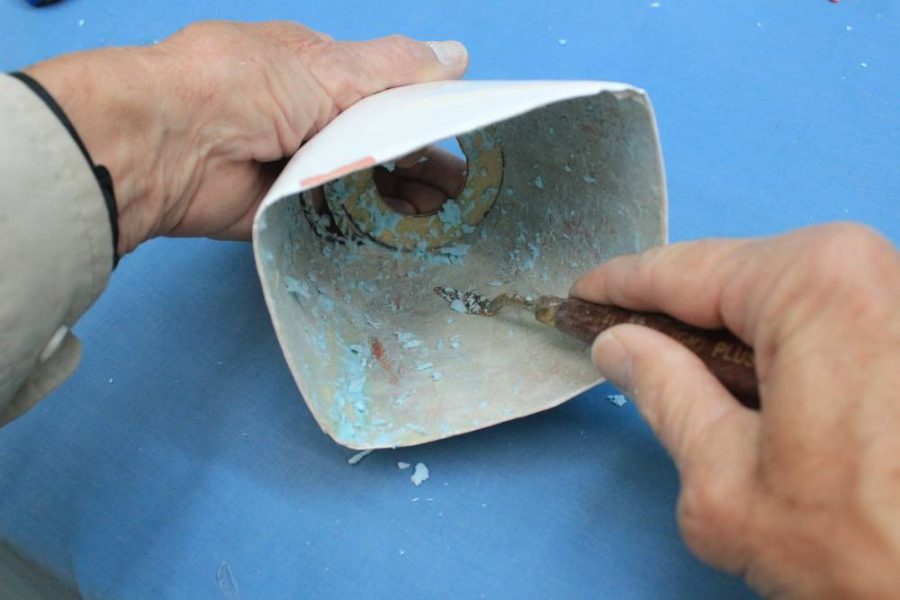
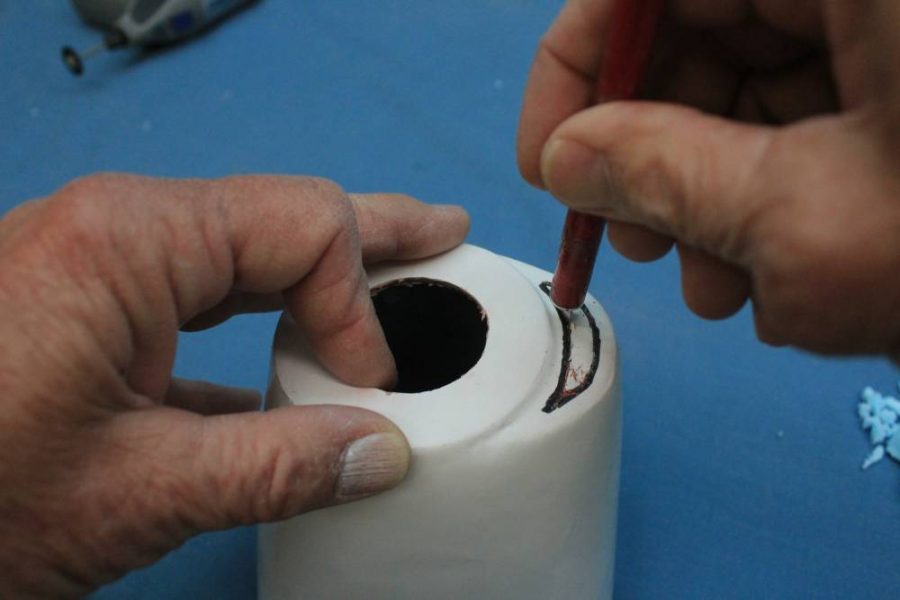
When the paint is thoroughly dry, pull the foam out of the block with a pair of needle nose pliers (Figure 13). This reminded me of a bird packing pieces of bread out of a hard loaf. Take it apart in small pieces and be careful not to puncture the surface of the cowling. I used a small pallet knife to scrape the remaining pieces out (Figure 14). Finally, very carefully cut out the round opening in the plywood spinner ring and the air scoop (if you added one) with a sharp #11 hobby knife (Figure 15).
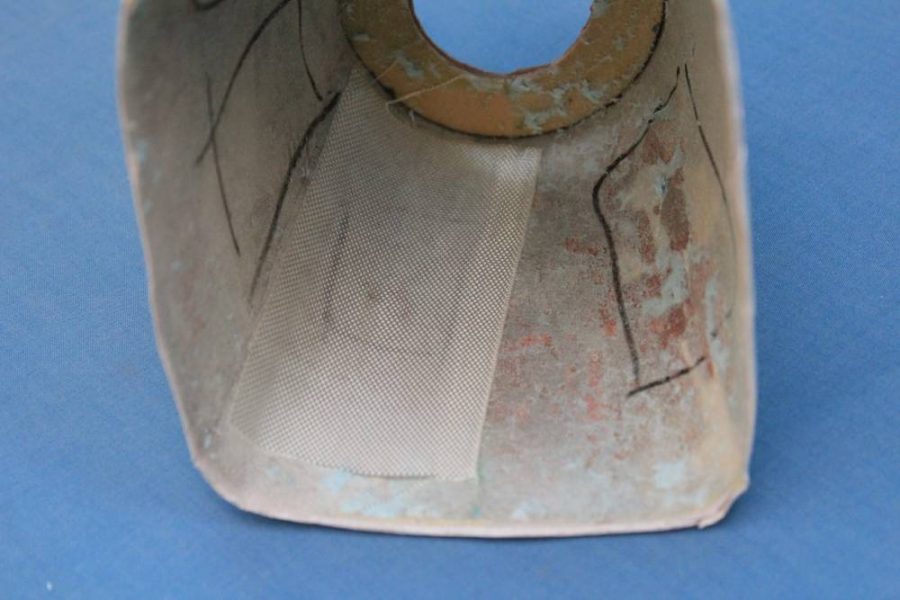
Examine the cowling carefully looking for weak or thin areas. If you find any they can be easily reinforced by sticking a piece of 2 oz. fiberglass cloth inside on the weak area with Super 77, then smearing fast-drying epoxy on top of it (Figure 16). This process can also be used to repair a damaged cowling.
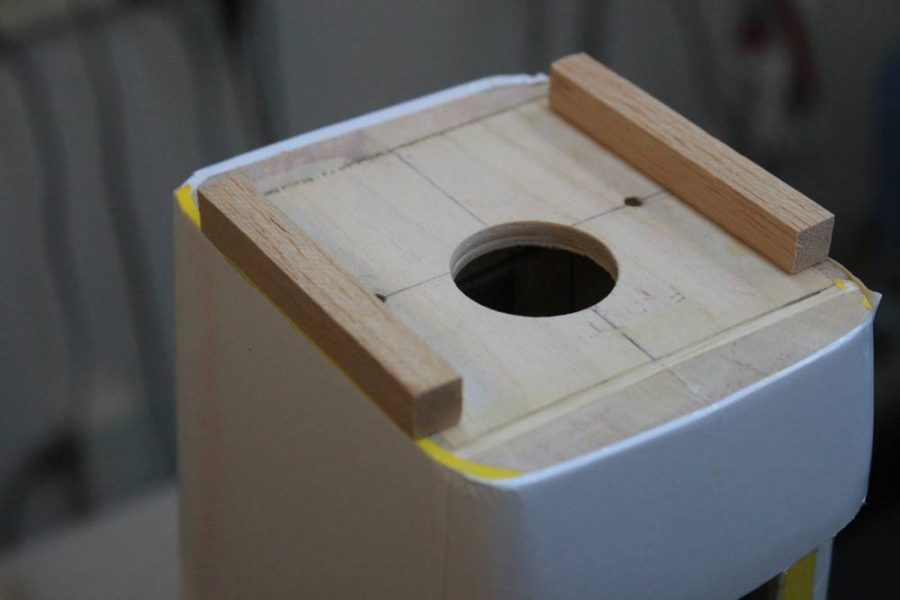
Now that the cowling is finished it is time to mount it and the motor to the front of the fuselage. Begin by gluing a 3/8” square x 3 ¼” long piece of hard balsa or hardwood along each side of the front of the firewall. Make sure the sides of the wood strip are perfectly aligned with the edge of the fuselage (Figure 17). Test fit the cowling to the front of the fuselage. I set my fuselage up in my Workmate to hold it vertically for the next several steps (Figure 18). Make any trimming and final adjustments at this time.
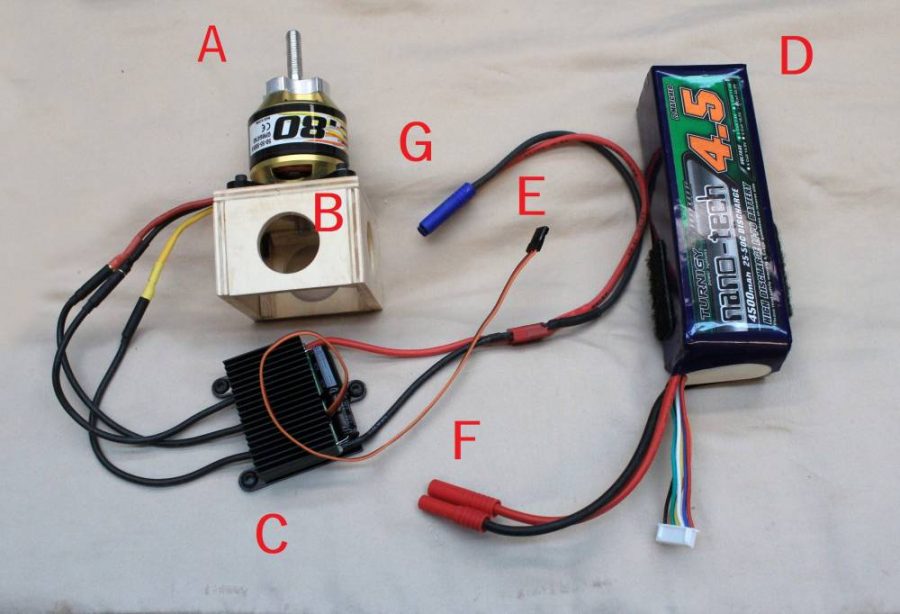
Assemble the parts of your power system (Figure 19). Here A = the brushless motor; B = the plywood motor mount we made earlier; C = the speed controller; D = the power battery; E = the wire from the controller that goes to the throttle plug on the receiver; F = the power connectors that came pre-installed on the battery, and G = the adaptors I used to connect the battery to the speed controller. These are ProgressiveRC HXT 4mm connectors, which fit the connectors that came with the battery. If your battery has different connectors you need to make an adaptor that joins them to the connectors that came pre-mounted on the speed controller.
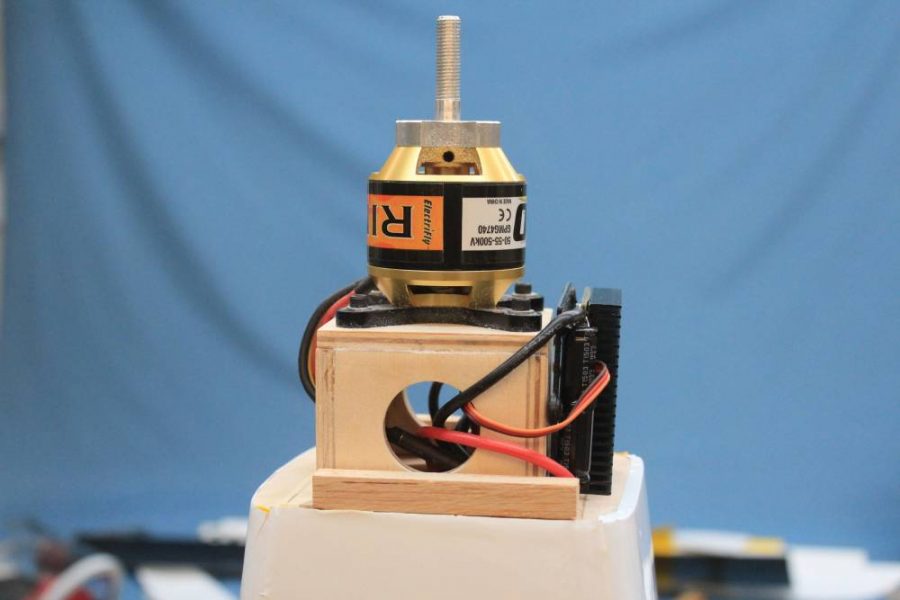
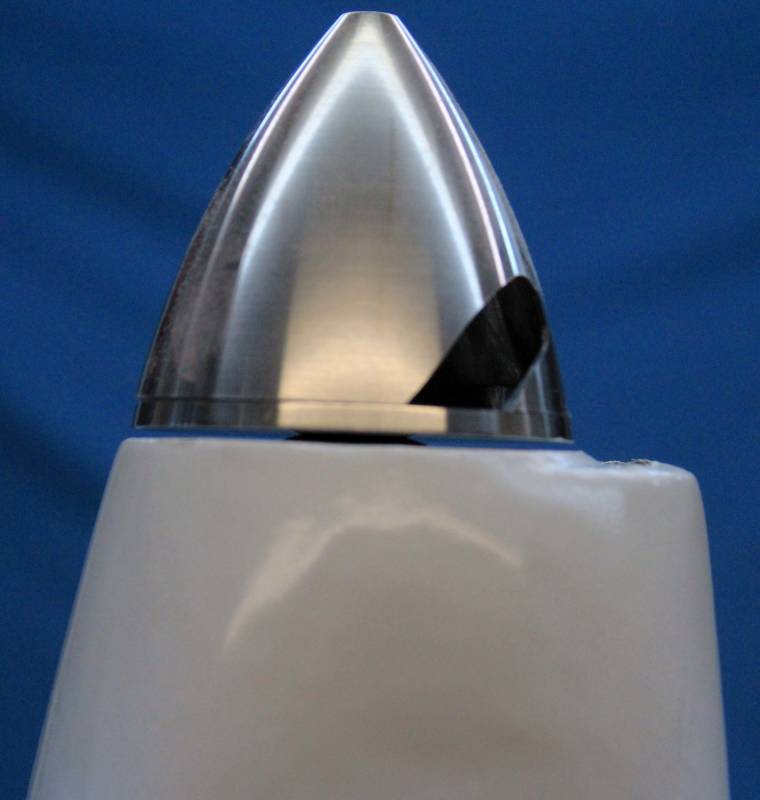
Remove the cowling, set the motor on the front of the fuselage and run the wires through the bottom of the mount and down into the usage as shown in Figure 20. DO NOT glue it in place yet. If possible, mount the speed controller below the motor where it will receive incoming cooling air from the air scoop in the cowling. Now mount the cowling back in place and move the motor mount so that it fits perfectly in the center of the wood spinner ring and the back of the spinner plate is about 1/16 to 1/8” above the cowling (Figure 21). Remove the spinner and cowling and then epoxy the mount in place on the firewall with 20-minute epoxy. Re-mount the cowling and spinner to ensure that they are still aligned and make any final adjustments that may be necessary before the epoxy dries.
That’s it. You just made a fiberglass cowling that will cleanly and elegantly enclose your electric motor and you have mounted it and the motor and speed controller to the front of the airplane. (A shout-out to my flying friend Rick Linstad of Puget Sound Silent Flyers here in Olympia who, many years ago, taught me this useful technique).
We’re getting very close to having our bird completed. Next time we’ll do some finishing up and covering of our plane. You might be thinking about what color scheme you want to go with and purchase some iron on covering. I like Ultracote. I‘ve never used yellow before so I’m going to try yellow and white with black trim.
Until then, remember to “take your time and enjoy doing a good job”.
LINKS
