 Fly RC Magazine WE LIVE RC
Theory
It is now summer 2011 and still there are two questions that crop up in my emails. Can you equate an electric motor to a glow equivalent? How do you go about converting a glow model to electric? The answer to the first question is technically no, but manufacturers do and they are doing the motor a disservice by doing so. The answer to the second question is the main thrust of this article.
Unlike a glow engine, a motor does not have a narrow operating range. When you buy an ordinary .40 cu. in. glow engine, you generally put a 10×6 pop on the shaft and it turns around 12,000 rpm. If you are lucky, it develops about one horsepower. The first thing we should be learning when flying e-powered models is that if we are swinging a glow size prop at typical glow rpm on our models we are doing something wrong.
The biggest advantage to electric flight is to choose a motor/prop combination that swings a larger prop that better matches not only the way you want to fly, but the ability of the model to fly in the manner intended. Calling a motor a 46 and using it on a 40 glow size model may work well for a sport model that, because of the design, cannot swing a much larger prop. However, it would not be the best answer for a lumbering 40 glow trainer with lots of room for prop growth. That 46 motor can be run on three LiPo cells effectively with a large prop and fly a lightweight (but large) model and it can be run on 5-6 LiPo cells on a fast moving sport model with a much smaller prop. This electric motor is capable of running effectively at 1/3hp as well as it is at one horsepower! This is why we should not give the motor a glow equivalent designation. It makes things easier for the marketing manager, but not for the modeler.
I have put together a 10-step method for converting a glow aircraft to e-power. I would like to begin by making two statements. If the model in question is considered overweight as a glow model, do not even start the process. It will not fly any better as an electric model. In addition, most ARF and RTF glow models cannot be lightened enough to make a difference, so dont start putting holes in everything (especially balsa!) thinking that the performance will improve. All you may be successful in doing is making the model weaker.
I will be using a Hobbico Avistar for the purpose of this article. Although the glow to electric conversion presented here is rather specific, the steps involved are applicable to any type model of any size from .049- .90 cu. in. displacement. The 40-size Avistar is one of the most popular trainers still sold today and I dont see that changing any time soon. In each of the 10 steps presented, I will describe the process and then how it relates to this particular model. Next month, I will describe the physical process of converting the model from glow to electric.
Ten steps for electric conversions:
ESTIMATE THE WEIGHT OF THE MODEL
How can I do this if I dont know what I am putting in it? A simple way to estimate the weight of the model is to consider that after you take out the glow motor, mount, fuel tank, throttle servo and pushrod, you will find very often that when you add in all the electric components (if using LiPo bat-teries) that the weight of the model will only be a few ounces more than the glow model with an empty tank! Add the fuel weight and the glow model can actually be heavier!
The estimated weight of the Avistar is 5 pounds, giving us our first data point.
CHOOSE A PROPELLER
How do I choose a prop when I have not chosen a motor yet? As I mentioned earlier, we desire to swing as large a prop as possible to reap the benefits of electric flight. The only exception to this rule is if you plan on racing your model (that would be the subject of a different article). Before you remove the engine, measure distance from engine shaft to ground with model level and subtract experience.
Experience is a number that is directly related to your skill level. A skilled pilot can subtract one inch or so. A less skilled pilot might subtract 1.5-2 inches. If you fly off a very rough field, even a skilled pilot may choose a higher number to avoid prop breakage. The measured distance on the Avistar is 7.5 inches or a 15-inch diameter prop. As this model is supposed to be a trainer, I will subtract 1.5 inches on the radius, giving me a 12-inch prop. The Avistar flew with a 10-inch prop when glow-powered.
Now we need to choose the pitch of the prop. Though this number can be changed later after some flight testing, typically we calculate the pitch of the prop to be about 50 percent its diameter which should be good for sport aerobatics with a good climb rate. We can go with 60-75 percent of the diameter if we want more speed and less climb. For the Avistar, I chose 50 percent which gives me a 6- inch pitch. I now have my second data point; 12×6 prop (Use APC Eseries props whenever possible).
ASK YOURSELF THESE THREE QUESTIONS
The next step is all up to you. I cannot help you with the answers. How was this model intended to be flown? How do I want to fly it? What is my skill level? Answering these questions (honestly) will help us choose an appropriate power system for the model.
DETERMINE POWER LOADING
Determining how much power we need to fly our model depends on the answers given in Step three. We express power loading in W/lb. The higher this number, the more energetic the model will fly, however, at two costs; weight and expense.
Use 75 W/lb. for mild sport models and trainers. Use 100 W/lb. for nonaggressive aerobatics. For aggressive aerobatics, use 125 W/lb. and you can use 150+ W/lb. for 3D and wild flight modes. As I consider the Avistar an advanced trainer and would like it to do a little more than putt-around, I will choose 100 W/lb., giving me my third data point.
SELECT MAX CURRENT
To help define the electrical parameters of the model, I will use a fire hose analogy. The electrical current is a measurement of the flow rate of electrons through the wires. Consider this the same as the gallons per minute in a fire hose. Voltage can be compared to the pressure of the water in the fire hose.
The greater the push (voltage x amps) the more power will be received by the prop. Unfortunately, more current increases heat. Because of this, we always like to use more voltage (pressure), a larger wire (hose) and lower current to get the work done. It has been my experience to use the following wire relationships for my models:
10-20 amps for glow models from .049-.15cu. in. with 18-14 gauge wire
20-30 amps for .15-.30 cu. in. with 14 gauge wire.
30-45 amps for .30-.90 cu. in., and 12-13 gauge wire.
50+ amps, I suggest staying away from these high-current setups.
Since motor, ESC and battery manufacturers generally supply the appropriate gauge wire on their units, we do not have to concern ourselves with wire gauge unless we have to make changes. We are planning a 35-amp current draw for the Avistar.
DETERMINE WATTS
To determine the watts required to fly our model, we multiply the power loading from step four by the weight of the model. 100 watts/lb. x 5 lbs. = 500 watts
DETERMINE CELL COUNT AND ESC SIZE
The cell count, or voltage, when using LiPo cells, is determined by simply dividing the watts required by the amperage chosen. 500 watts / 35 amps = 14.3V
Since LiPo cells are normally 3.7 volts, we need to round off to the nearest cell count. 14.3/3.7 = 3.86 cells. So we round up to 4. Our Avistar is going to require a four cell LiPo battery and a speed controller that can handle at least 35 amps.
Choose an ESC with enough capability in the battery eliminator circuit (BEC) to handle the number and size of servos installed in the model. I would choose a Castle Creations ICE 50 or ICE Lite 50 for the Avistar.
 DETERMINE MAX DIMENSIONS IN BATTERY BAY
It has been my experience that most models will require the LiPo battery pack to be installed in the fuel tank compartment to obtain proper CG. Measure the height and width of that compartment and choose as large a battery as you can fit. The Avistar is easily able to accommodate a 4S 3000 to 3800mAh battery pack. At this point, I know I need a 12×6 prop, 50 amp ICE ESC, and a 4S 3200 mAh battery pack.
DETERMINE THE BATTERYS C RATING
I have found manufacturers of battery packs very optimistic about the ability of their batteries to deliver the power required. This is commonly referred to as C rating. The C rating is the ability of the battery to give up its stored power without damage. If a battery pack is listed as 20C and the capacity is stated as 3200mAh, then the maximum amount of current one should draw out of that battery pack is 20 x 3.2AH or 64 amps. DO NOT use this as an acceptable number, especially from inexpensive, unbranded batteries! My recommendation is to use 50 percent to 60 percent their number to be safe. A 20C advertised battery will be used by me at no more than 10-12C. This means a 20C 3200mAh battery will be fine at 35 amps for my Avistar.
PICK THE MOTOR
Finally, we need to choose a motor. From the data determined above, we need to find a motor that will swing a 12×6 prop on a four-cell LiPo battery at around 35 amps. You can research different motors on the Internet or use an electric aircraft performance emulation programs such as Electri-Calc or Moto-Calc.
On the Internet, you might find a generic motor company with model xxyy-400, that specs it will swing a 13×6 prop with 14.8V (4 cell) at 5500 rpm drawing 40 amps. The fact is that if you use a 12×6 prop on this motor that the current will drop substantially. It is not necessary to be concerned with rpm ratings; you just need to find a motor that will spin a 12 x 6 prop on 4S at 35 amps. If an exact match cannot be found, get as close as you can.
Emulation programs such as E-Calc and Moto-Calc can get you a more specific answer, but they assume that the manufacturer lists all the motor constants on their website. Kv (RPM/volt constant), Io (no load current) and Ra (armature resistance) are required inputs for these emulation programs.
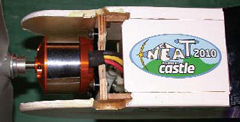
There are a number of brushless outrunner motors that I could have picked for the Avistar, but I chose the BP Hobbies BL- 4120-7. Other motors that may have been suitable for the Avistar would be: Scorpion HK-4025-550Kv or Model Motors AXI 4120-18.
I hope this article helps you in any E-conversion projects you plan to do. Next time I will cover the physical steps to convert an Avistar to E-power.
Links
APC Propellers, distributed by Landing Products
www.apcprop.com, (530) 661-0399
AXI Motors, distributed exclusively by Hobby Lobby International, Inc.
www.hobby-lobby.com, (866) 512-1444
BP Hobbies
www.bphobbies.com, (732) 287-3933
Castle Creations
www.castlecreations.com, (913) 390-6939
E-flite, distributed exclusively by Horizon Hobby Distributors
www.e-fliterc.com, (800) 338-4639
Electricalc
www.slkelectronics.com/ecalc/index.htm
Hobbico
www.hobbico.com, (800) 682-8948
MotoCalc
www.motocalc.com, (519) 638-5470
Scorpion Motors, distributed exclusively by Innov8tive Designs
www.innov8tivedesigns.com, (760) 468-8838
